How to Setup Epson XP 310 printer?
Setup Epson XP 310 Printer:
The Epson Home XP 310 has many amazing features and the design is such that it saves a lot of space. It is compatible with Wi-Fi direct, which enables the user to print documents from any place in the house.
It has a memory card slot, which means you can use it for PC-free photo printing. The fine color printing feature makes this device a prominent choice in the market.

Steps to Setup Epson XP 310
Below are the steps that you need to perform in order to set up your Epson XP 310 printer.
Step 1: Firstly, take your Epson XP 310 out of the packaging.
Step 2: After that, connect the power wire to the side of the device and connect the other side of the power wire to the electrical outlet.
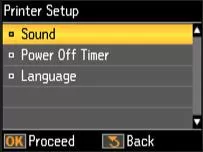
Step 3: Turn on your printer machine and open the control panel.
Step 4: Now, use the arrow buttons to choose the language and then select Ok.
Step 5: Pick up the wrapped ink cartridges and shake them well.
Step 6: After that, lift the scanner unit and remove the packaging covering the ink cartridges.
Step 7: Install the ink cartridges in their respective compartments.

Step 8: Now, wait till the ink system of your printer device gets charged.
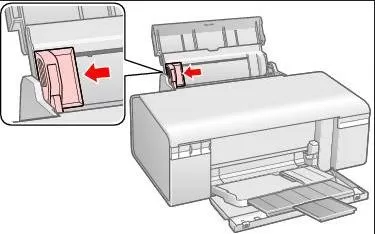
Step 9: After that, take out the input tray and adjust the guides.
Step 10: Place the stack of paper on the cassette and then push it back in its original position.
Step 11: Now, install the printer driver on your computer system and then you can begin printing.
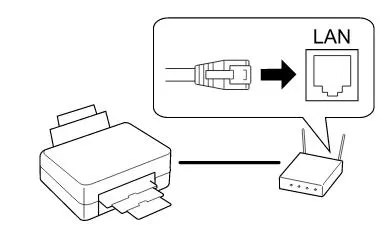
Steps for Epson XP 310 Wireless Setup
Carry out the steps given below to perform Epson XP 310 wireless setup.
Step 1: First of all, press the home button on your printer device.
Step 2: After that, tap on the wireless icon, then select Wi-Fi. After that, select the option of Change Settings or Start Setup.
Step 3: Open the Wi-Fi setup wizard by clicking on Ok.
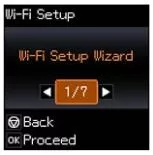
Step 4: Choose the name of your wireless network.
Step 5: You will have to enter the name of your network manually if the name is not appearing in the list of wireless networks.
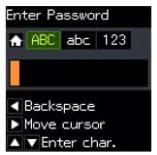
Step 6: After that, enter the password using the on-screen keyboard.
Step 7: Click on start setup and then confirm the details of the network.
Step 8: Once you are done performing all the steps given above, then continue with printing a test page.
Steps to Connect Your Epson XP 310 to the Computer
Below are the steps that you need to perform in order to connect your Epson printer device to the PC.
Step 1: Tap on the home button of your printer device.
Step 2: Select Wi-Fi setup using the navigation buttons.
Step 3: After that, select the option Wi-Fi direct setup and press the Ok button.
Step 4: Select connection setup and then select Ok.
Step 5: Now, use the down arrow button for changing the password.
Step 6: After that, enter the password by using the on-screen keyboard.
Step 7: Then, check if the name of the Epson XP 310 wireless setup network is appearing on the screen or not.
Step 8: If it is appearing, then select it. Now, enter the password on your printer.
Step 9: Select exit and then search for the connection symbol on the screen.
- SAM
 Brand: Epson Printer
- Last Update: 2 weeks ago
 Related Articles


Top Searches in Epson Printer
How to Fix Epson Printer Error 0XF3?
May 23, 2026
How to Fix Epson Printer Error Code 000041?
May 23, 2026
How do I Connect My Epson l3060 to WiFi?
May 23, 2026
Epson Printer Printing Double Letters
May 23, 2026
Fix Epson Workforce Pro WF-3720 Scanner Problem - Thin Vertical Stripes on Complete Scan
May 23, 2026
How to Find WPS Pin on Epson Printer?
May 23, 2026
How to Fix Epson Printer Error Code 0x98?
May 23, 2026
How to Reset the Epson Stylus C88?
May 23, 2026
Featured Articles
How to Get Canon Printer Online on MAC?
Jun 4, 2026
How to Fix Printer Printing Horizontal Black Lines?
May 23, 2026
How to Scan from HP Printer to Computer Windows 10?
Jun 13, 2026
Ricoh Printer Stuck on Processing
May 23, 2026
Brother Printer Only Printing in Black and White
Jun 21, 2026
How to Clean Kodak Printhead?
May 23, 2026
How to Install Lexmark Printer to Computer Without CD?
Jun 12, 2026
Why My Samsung Printer is Not Printing Clearly?
May 23, 2026
Top Questions
Why Won't My Canon Printer Print after Changing an Ink Cartridge?
May 23, 2026
How do I Fix a Canon Printer 1403 Error?
May 23, 2026
How do I Connect My Canon MG3050 Printer to WiFi?
May 23, 2026
How to Change Printer from Offline to Online Canon?
May 23, 2026
How to Turn My Ricoh Printer Online from Offline?
May 23, 2026
Brother MFC Printer Won't Print Black Despite Full Ink Cartridges
May 23, 2026
How to Fix Epson Printer Filter Failed or Stopped on Mac Error?
May 23, 2026
How do You Get a Lexmark Printer Back Online?
May 23, 2026