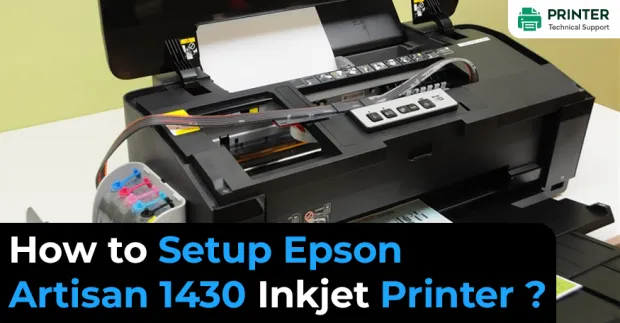
How to Setup Epson Artisan 1430 Inkjet Printer?
Setup Epson Artisan 1430 Inkjet Printer
Got your new Epson Artisan 1430 inkjet printer and want to print your documents but not able to setup Epson Artisan 1430 inkjet printer. No need to worry just follow the below guidelines.
Follow the methods to setup Epson Artisan 1430 inkjet printer.
Setup Epson Artisan 1430 Inkjet Printer
Step 1: Raise the Epson Artisan 1430 Inkjet Printer cover and take away the protective material from inside.
Step 2: Connect the power cord to the rear of the printer and power it up.
Step 3: Press the power button to show the machine on.
Step 4: Take out the cartridge cover and unbox the ink cartridges.
Step 5: Take out the yellow tape from every cartridge and install them within similar holders.
Step 6: Keep press the cartridges until they click into their positions.
Step 7: Extract down the printer cover and press the Ink button to start ink priming.
Step 8: Leave the printer empty for around 3 minutes for this process to need to place at the time Epson Artisan 1430 Setup.
Step 9: Extend the paper support and therefore the extensions.
Step 10: Keep the output tray pulled towards you.
Step 11: Shift the manuals and put the paper into the feeder at the time Epson Artisan 1430 Setup.
Step 12: Ensure that to not connect the printer to your computer.
Step 13: Insert the installation CD and run the file.
Step 14: Follow the prompts. Establish the printer - computer connection when requested.
Step 15: The printer is prepared to be used.
Epson Artisan 1430 Connect with Wi-Fi
- During Epson Artisan 1430 Setup, if you've connected the printer to your computer via a USB cable, unplug it now.
- Press the house button > Setup > Network Settings > Wi-Fi Setup for Epson Artisan 1430 hook up with Wi-Fi.
- Choose push Setup ( WPS). Proceed with the on-screen instructions.
- Keep the WPS button on the router down.
- After about 2 minutes, press the Wi-Fi button on the printer for 3 seconds for the Epson Artisan 1430 hook up with Wi-Fi.
- The Wi-Fi light on the printer flashes showing a successful network connection.
- Also, the Network icon on the proper of the LCD screen turns blue.
Change Epson Artisan 1430 Ink
- Prepare your replacement cartridges before cartridge replacement.
- Open the Epson Artisan 1430 Inkjet Printer lid while it's turned on to vary Epson Artisan 1430 ink.
- Touch the Ink button to slip the print head to the ink replacement position.
- A light flashes above the cartridge if it's expended or the ink is low.
- Next, open the cartridge cover and press the tabs on the cartridge to vary Epson Artisan 1430 ink.
- Take the cartridge out and discard it carefully.
- Strip open the new cartridge. Pull out the yellow tape in it.
- Put the new cartridge into the holder until it clicks into position.
- Again follow the above procedure for all the expended cartridges.
- To start loading the ink, press the Ink button again.
- Deduce that ink charging is over when the machine’s Power light stops flashing but remains on.
- Marvin
 Brand: Epson Printer
- Last Update: 1 week ago
 Related Articles


Top Searches in Epson Printer
How to Fix Epson Printer Error 0XF3?
May 23, 2026
How to Fix Epson Printer Error Code 000041?
May 23, 2026
How do I Connect My Epson l3060 to WiFi?
May 23, 2026
Epson Printer Printing Double Letters
May 23, 2026
Fix Epson Workforce Pro WF-3720 Scanner Problem - Thin Vertical Stripes on Complete Scan
May 23, 2026
How to Find WPS Pin on Epson Printer?
May 23, 2026
How to Fix Epson Printer Error Code 0x98?
May 23, 2026
How to Reset the Epson Stylus C88?
May 23, 2026
Featured Articles
How to Get Canon Printer Online on MAC?
Jun 4, 2026
How to Fix Printer Printing Horizontal Black Lines?
May 23, 2026
How to Scan from HP Printer to Computer Windows 10?
Jun 13, 2026
Ricoh Printer Stuck on Processing
May 23, 2026
Brother Printer Only Printing in Black and White
Jun 21, 2026
How to Clean Kodak Printhead?
May 23, 2026
How to Install Lexmark Printer to Computer Without CD?
Jun 12, 2026
Why My Samsung Printer is Not Printing Clearly?
May 23, 2026
Top Questions
Why Won't My Canon Printer Print after Changing an Ink Cartridge?
May 23, 2026
How do I Fix a Canon Printer 1403 Error?
May 23, 2026
How do I Connect My Canon MG3050 Printer to WiFi?
May 23, 2026
How to Change Printer from Offline to Online Canon?
May 23, 2026
How to Turn My Ricoh Printer Online from Offline?
May 23, 2026
Brother MFC Printer Won't Print Black Despite Full Ink Cartridges
May 23, 2026
How to Fix Epson Printer Filter Failed or Stopped on Mac Error?
May 23, 2026
How do You Get a Lexmark Printer Back Online?
May 23, 2026