How do I Connect My Canon MG3050 Printer to WiFi?
Hello, Please let me know that how do i connect my canon mg3050 printer to wifi. I bought this canon mg3050 printer. But now i am trying to connect canon printer to wifi then it's not connecting. Give me any idea.
 1 Ans
1 Ans- 5 years ago
Connect Canon MG3050 Printer to WiFi
Here, you will learn how to connect your Canon MG 3050 printer to Wi-Fi. First, click the WPS button on the router, turn on your router, and wait for the light to flash. Now, to connect the Canon printer to Wi-Fi, you need to click the colour button and keep pressing the wireless button until the light on the router turns on; the power and Wi-Fi lights will start blinking when you link the access point. Once the connection between the wifi and the Printer is established, both the power light and wifi will turn into solid light, and the network light will also turn on.
Canon Printer WPS Connection Method:
Prior to starting the process, there are some conditions that you need to follow to use the WPS push button method.
- The router needs to have a physical push button. Please take a look at the device user guide to get more information.
- Your network should use WPA2 security protocol or Wi-Fi-protected access. Most access points cannot connect through the use of the WPS method if you use a wired equivalent privacy method of security or if you are not using any security. To get information on what type of security method should one use, take a look at the wireless connection settings on your computer.
How to Connect Canon MG3050 Printer to Wifi?
Step 1: Please ensure that the wireless router is within the range of your printer and press the WPS button.
Step 2: Turn on the router by pressing the wireless button and wait for the light to flash.
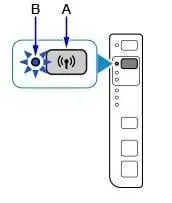
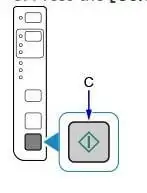
Step 3: After that to connect my Canon mg3050 printer to wifi, you need to press the button of color.
Step 4: Press the wireless button until the light turns on.
Step 5: Press the colour button and ensure that the wireless lamp starts flashing. Then, after two minutes, press the wireless button on the router. The blue light of the Wi-Fi will blink when you search, and the Wi-Fi light and the power light will flash when you link the access point.
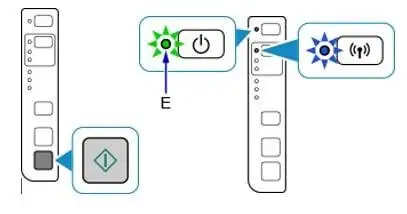
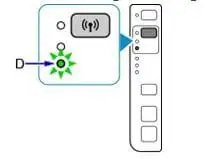
Step 6: When a connection is established between the wireless network and the printer. After that, both the Wi-Fi and the power light will remain turned on but will quit flashing. After that, the network light is also going to turn on.
Confirmation of the Network Settings:
To verify that your printer has been connected to the network, you can take a printout of the printer settings.
- Please ensure that your printer is switched on.
- Load a letter-sized or A-4 size sheet.
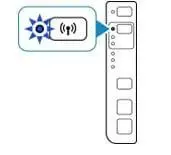
- Press and hold the Wi-Fi button, wait for the Wi-Fi light to flash once, and then leave the button.
- Press the colour button and then the Wi-Fi button at least two times in a row.
- After that, to connect my Canon mg3050 printer to wifi, you need to press the black and coloured buttons.
Then, the network information page is going to print. When you go forward to take a printout, you must check that the connection is active. Also, check that it shows the right SSID name. This was all about the WPS setup procedure.
Standard Connection Method:
If the WPS feature is not supported by your access point, then here are some of the instructions that you need to follow for setting up your printer.
If you are a Windows user, then you need the installation disc that came along with your printer for running the setup. In case you do not possess an installation disc or you are using a Mac computer, then you must download the software that is made for Mac only. When you will download the file, then it will look exactly like this: win-mg3000-XXX-n_mcd.exe.
Connection for Windows Users: Canon mg3050 Setup
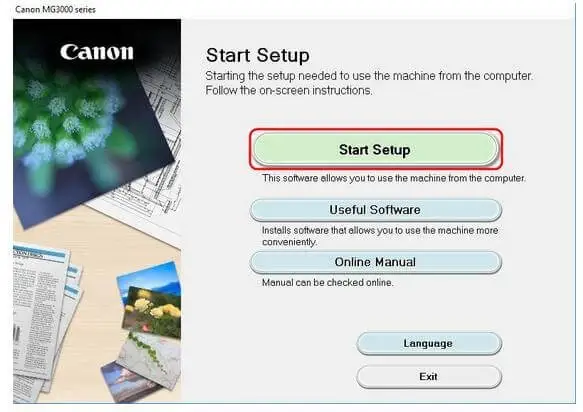
Step 1: Open the download.exe file by double-clicking on it and opening up the start setup screen.
Step 2: The software will check for the software and driver updates. This entire procedure is going to take some time to complete.
Step 3: Choose your region and country and then click on next.
Step 4: After that connect my Canon mg3050 printer to wifi, in the next step read and accept the terms given in the license agreement.
Step 5: If you wish to participate in the survey program, then select agree, or else you can just choose do not agree.
Step 6: Please make sure that deactivate the block is ticked and then go to next.
Step 7: Checking the printer status screen will be displayed in front of you for a few seconds.
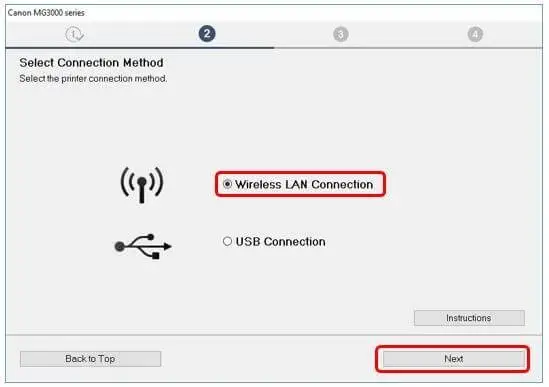
Step 8: Choose wireless LAN connection and then select next.
Step 9: Please make sure that the printer is turned on and then click on next.
Step 10: The software will start looking for the printers that are present on your network.
Step 11: If your printer is already linked to the network. Choose it from the list and then select next. After that, the software will be installed.
Step 12: In case you are setting up your printer for the very first time, then it will not show up on the list. Please make sure that the setup network connection as per the guide has been chosen and then select next.
Step 13: The setup guide is going to open up and will guide you through the steps in how to connect to the printer using the process of easy wireless connection.
Step 14: After the required settings have been made on the printer, the software is going to disconnect your wireless network from the computer system. Connect your printer directly to configure the settings of your printer.
Step 15: Your computer will link with the wireless network one more time when the reconnection is completed.
Step 16: Once the network connection is formed, then click on next to continue with the software installation process to connect my Canon mg3050 printer to wifi.
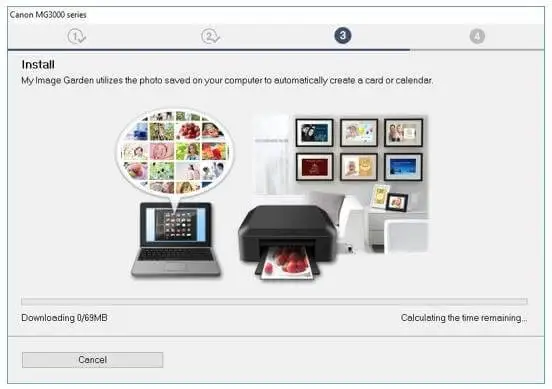
Step 17: The driver software is going to get registered and installed on your computer. This process is going to take a few minutes to complete.
Step 18: In case you are setting up your printer for the very first time, then you need to perform the print head alignment. Select execute for starting the process and carefully adhere to the instructions on the screen. Select next if the printhead has already been aligned.
Step 19: Select execute for performing a test print. Once the printing process is completed successfully.
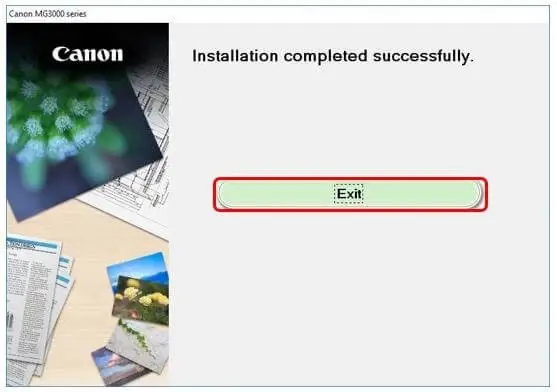
Step 20: Finally, the setup process will be completed.To view the list of software that are optional click on next.
Step 21: Select any additional software that you would like to install and then select next.
Step 22: When you are done with installing the additional software, a message will pop up and help you with how you can set up your tab or software. To gain more information about how to setup the device. Now, click on next and then continue.
Step 23: If you wish to register your printer, then just click on next. If not, then you can skip.
More Important Pages for Canon Printers
How to Setup Canon Pixma MX922 Printer?
How to Fix Canon Printer Printing Blank Pages?
How to Fix Canon G2010 P07 Light Blinking Error?
How to Connect Canon MG3650 Printer to WiFi?
How to Fix Canon Printer Error Code B203?
How to Fix the Canon Printer Error P02?
- 2 years ago
 Related Articles


Top Searches in Canon Printer
Why Won't My Canon Printer Print after Changing an Ink Cartridge?
May 23, 2026
How to Get Canon Printer Online on MAC?
Jun 4, 2026
How do I Fix a Canon Printer 1403 Error?
May 23, 2026
How do I Connect My Canon MG3050 Printer to WiFi?
May 23, 2026
How to Change Printer from Offline to Online Canon?
May 23, 2026
How to Connect Canon TS3122 Printer to WiFi?
May 23, 2026
How to Fix Canon Printer Carriage Jam Problem?
May 23, 2026
How to Fix Canon Printer Error Code 1660?
May 23, 2026
How to Resolve OKI Printer Error Code 990?
May 23, 2026
How do I Reset Canon MG2522 Printer?
May 23, 2026
Featured Articles
How to Get Canon Printer Online on MAC?
Jun 4, 2026
How to Fix Printer Printing Horizontal Black Lines?
May 23, 2026
How to Scan from HP Printer to Computer Windows 10?
Jun 13, 2026
Ricoh Printer Stuck on Processing
May 23, 2026
Brother Printer Only Printing in Black and White
Jun 21, 2026
How to Clean Kodak Printhead?
May 23, 2026
How to Install Lexmark Printer to Computer Without CD?
Jun 12, 2026
Why My Samsung Printer is Not Printing Clearly?
May 23, 2026
Top Questions
Why Won't My Canon Printer Print after Changing an Ink Cartridge?
Oct 7, 2020
How do I Fix a Canon Printer 1403 Error?
Dec 30, 2020
How do I Connect My Canon MG3050 Printer to WiFi?
Mar 30, 2021
How to Change Printer from Offline to Online Canon?
Nov 27, 2020
How to Turn My Ricoh Printer Online from Offline?
Feb 20, 2021
Brother MFC Printer Won't Print Black Despite Full Ink Cartridges
Nov 7, 2020
How to Fix Epson Printer Filter Failed or Stopped on Mac Error?
Dec 7, 2021
How do You Get a Lexmark Printer Back Online?
Sep 29, 2020