How to Fix Windows 10/11 doesn’t Find Wireless Printer?
Fix Windows 10/11 doesn’t Find Wireless Printer:
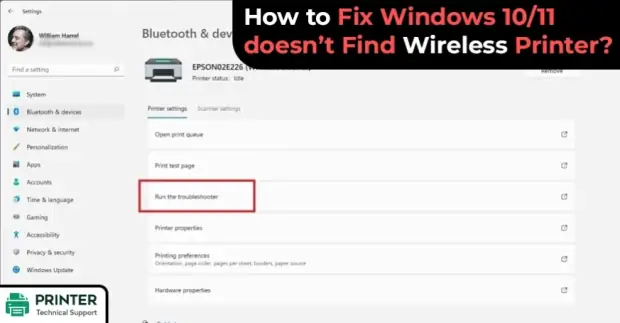
Sometimes the wireless connection works fine and your printer is also connected to the network but even then users face connection issues on their device. One of the common problems that users face is can't find a wireless printer on PC. Here, in this post, we are going to describe various ways that can help you get rid of this problem.
How to Resolve Windows can't Find Wireless Printer Issue?
1) Enable the Option of "Find Devices and Content"
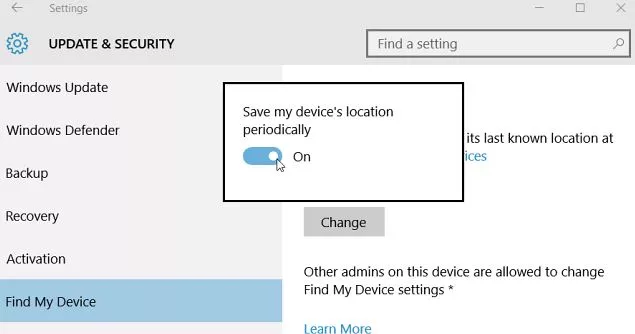
Below are the steps that you need to follow in order to enable the option of "Find devices and content".
Step 1: Take your cursor to the lower-right side of the window.
Step 2: Now, tap on the Settings feature from the menu.
Step 3: After that, go to the submenu of settings and select the option of "Change PC Settings".
Step 4: Select the Network button given in the change PC settings menu.
Step 5: Now, select the button of "Connections".
Step 6: After that, choose your network connection by tapping on it.
Step 7: Enable the "Find devices and content" feature.
Step 8: Close the window you opened and then restart your Operating System.
Step 9: Once the device starts, check whether you can find the wireless printer.
2) Check the Homegroup
Below are the steps that you need to follow in order to check your Homegroup.
Step 1: Take your cursor to the bottom right side of the screen.
Step 2: Tap on the search feature.
Step 3: Type "This PC" in the search area and then press the enter key.
Step 4: Now, select the "This PC" result that appeared after the search.
Step 5: After that, go to the Homegroup and see if you can find your Wireless Printer.
Step 6: In case you can't find it under the Homegroup topic, then you must search the "Workgroup or domain".
3) Add Your Printer to the Network
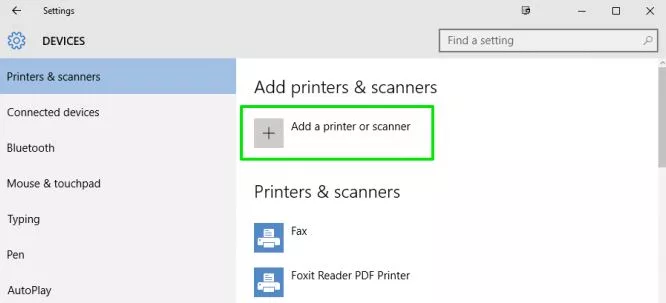
Carry out the steps mentioned below to add your printer to the network properly.
Step 1: To properly add your wireless printer to the network, power on your Wireless printer.
Step 2: Add the printer to the network by following the instructions given in the instructions manual.
Step 3: After that, you need to log in to your Windows 10 device and then connect it to the network.
Step 4: Take your mouse cursor to the upper-right side of the screen.
Step 5: Go to the Search feature given in the menu.
Step 6: Now, type "Network" in the search box.
Step 7: Once your search is done, then click on the "Network" icon.
Step 8: Now, check if you can see your wireless printer in the Network menu.
4) Disable Network Adapter
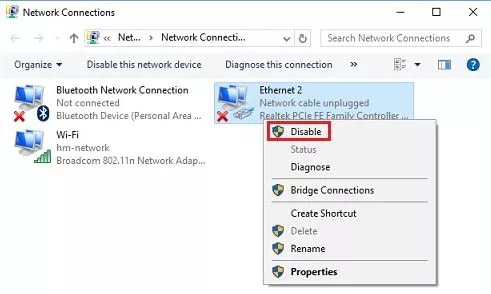
Another way to resolve the PC can't find the network adapter issue is to disable the network adapter.
Step 1: Go to the search area of your screen.
Step 2: Now, type "Network and Sharing" in the search box.
Step 3: After that, press the Enter key on your keyboard.
Step 4: Once your search is over, click on the icon of "Network and Sharing Center".
Step 5: Select the feature of "Change Adapter Settings".
Step 6: After that, right-click on your network adapter.
Step 7: Then, select the disable feature from the menu that appears before you.
5) Repair Network Issues
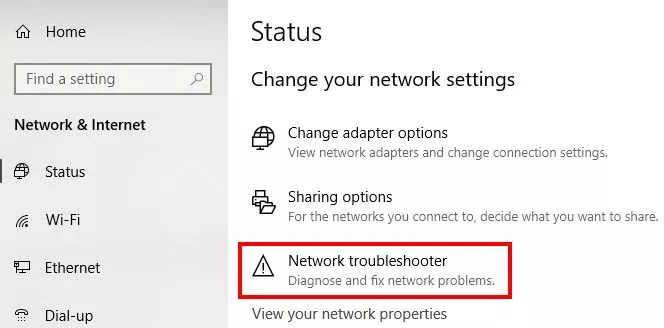
To repair network issues, carry out the steps mentioned below.
Step 1: Take your mouse cursor to the upper-right side of the screen.
Step 2: After that, tap on the Search feature.
Step 3: Now, enter identify and repair in the search box.
Step 4: Once you are done finishing the search, select the icon of "Identify and repair network problems".
Step 5: Carry out the instructions appearing on the screen to complete the troubleshooting process.
Also Read:
- How To Add Printer And Print Documents From Kindle Fire?
- Printer not Printing Actual Size: Why & How to Fix it
- How to Fix Printer has Run Out Paper Error?
FAQ for Fix Windows 10/11 doesn’t Find Wireless Printer
- Mick
 Brand: Other
- Last Update: 1 month ago
 Top Related Question
Related Articles


Top Searches in Other
How to Fix Printer Spooler Problems on Windows 10?
May 23, 2026
9 Best Printer to Buy for Home Office Use in 2026
May 23, 2026
How to Fix Boot Device Not Found 3f0 Error?
May 23, 2026
How to Fix Print Job Stuck in Queue?
May 23, 2026
How to Make Printer Online in Windows 10?
May 23, 2026
Why is a Printer Printing Blank Pages on Windows 10?
May 23, 2026
How to Troubleshoot Wireless Printer Not Printing?
May 23, 2026
Featured Articles
How to Get Canon Printer Online on MAC?
Jun 4, 2026
How to Fix Printer Printing Horizontal Black Lines?
May 23, 2026
How to Scan from HP Printer to Computer Windows 10?
Jun 13, 2026
Ricoh Printer Stuck on Processing
May 23, 2026
Brother Printer Only Printing in Black and White
Jun 21, 2026
How to Clean Kodak Printhead?
May 23, 2026
How to Install Lexmark Printer to Computer Without CD?
Jun 12, 2026
Why My Samsung Printer is Not Printing Clearly?
May 23, 2026
Top Questions
Why Won't My Canon Printer Print after Changing an Ink Cartridge?
May 23, 2026
How do I Fix a Canon Printer 1403 Error?
May 23, 2026
How do I Connect My Canon MG3050 Printer to WiFi?
May 23, 2026
How to Change Printer from Offline to Online Canon?
May 23, 2026
How to Turn My Ricoh Printer Online from Offline?
May 23, 2026
Brother MFC Printer Won't Print Black Despite Full Ink Cartridges
May 23, 2026
How to Fix Epson Printer Filter Failed or Stopped on Mac Error?
May 23, 2026
How do You Get a Lexmark Printer Back Online?
May 23, 2026