How to Force Epson to Print with Low Ink?
Force Epson To Print With Low Ink:
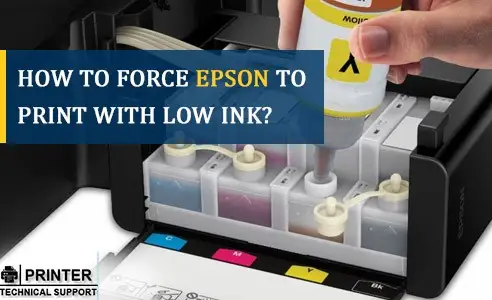
The low ink in the Epson printer might overrule a few prints in order to Force Epson To Print With Low Ink. Below are the steps to help you perform your print jobs with only one cartridge, but also make sure to get a new one after that as your printer quality might get affected due to that.
- From the control panel, click on the “printers & devices” option.
- Under “printers & devices”, look for your Epson printer model in the available list of printers.
- Right click on Epson your printer and then go to the drop down menu.
- Now go to the “properties” in the drop down menu and select the “color” in the ink set.
- Next, click on “apply changes” and then on “update the settings”.
- Terminate the print queue on your computer system and find “Epson printer utility”.
- Go to “Epson printer utility” and then click on “permit temporary black printing”.
- Click on the print option and then select “grayscale”.
- Next, click on OK and an indicator will depict a monochrome setting on your screen.
- Lastly, run a test printing to check whether the low printing is indicated on the printer.
Your Guide on How to Enable Printing with Low Ink in Epson Printer
- Using the power button, turn your Epson printer ON and load papers into the paper tray.
- After that, connect your Epson printer to the computer system.
- Now, open the ink cartridge access door and pull out the ink cartridge that has low ink.
- Re-insert the one you pulled out in the slot after shaking it a little and here's how to start Force Epson To Print With Low Ink.
- From the start menu, click on the “printers & devices” option.
- Under “printers & devices”, look for your Epson printer model in the available list of printers. Right click on Epson your printer and then go to the drop down menu.
- Now go to the “properties” in the drop down menu and select the “color” in the ink set.
- Next, click on “apply changes” to save the changes you have made.
In windows,
- Firstly, Cancel all the printing jobs or eliminate the print queue.
- From the start menu, click on the “printers & devices” option.
- Under “printers & devices”, look for your Epson printer model in the available list of printers.
- Next, Click on the quality option and then choose the plain paper under the type option.
- Click on the print option and then select “grayscale” and then click OK > Apply, in order to save the changes you have made and an indicator will depict a monochrome setting on your screen.
- Lastly, run a test printing to check whether the low printing is indicated on the printer.
In Mac,
- Firstly, Cancel all the printing jobs or eliminate the print queue.
- Click on the “printers & scanners” option and look for your Epson printer model in the available list of printers.
- Now go to the “Epson printer utility” and click on “driver” settings and then click on “permit temporary black printing” > back to the print settings.
- Choose the plain paper under the type option. Click on the print option and then select “grayscale”.
- Lastly, click on OK and then run a test printing to check whether the low printing is indicated on the printer.
- In case the above steps did not fix the issue, then remove the ink cartridge and then cover the ink cartridge access door portion with the white tapes or any opaque label and then install the ink cartridge again. Try running a test printing to check whether the low printing is indicated on the printer. We hope the above article helped you to Force Epson To Print With Low Ink.
- SAM
 Brand: Epson Printer
- Last Update: 1 month ago
 Related Articles


Top Searches in Epson Printer
How to Fix Epson Printer Error 0XF3?
May 23, 2026
How to Fix Epson Printer Error Code 000041?
May 23, 2026
How do I Connect My Epson l3060 to WiFi?
May 23, 2026
Epson Printer Printing Double Letters
May 23, 2026
Fix Epson Workforce Pro WF-3720 Scanner Problem - Thin Vertical Stripes on Complete Scan
May 23, 2026
How to Find WPS Pin on Epson Printer?
May 23, 2026
How to Fix Epson Printer Error Code 0x98?
May 23, 2026
How to Reset the Epson Stylus C88?
May 23, 2026
Featured Articles
How to Get Canon Printer Online on MAC?
Jun 4, 2026
How to Fix Printer Printing Horizontal Black Lines?
May 23, 2026
How to Scan from HP Printer to Computer Windows 10?
Jun 13, 2026
Ricoh Printer Stuck on Processing
May 23, 2026
Brother Printer Only Printing in Black and White
Jun 21, 2026
How to Clean Kodak Printhead?
May 23, 2026
How to Install Lexmark Printer to Computer Without CD?
Jun 12, 2026
Why My Samsung Printer is Not Printing Clearly?
May 23, 2026
Top Questions
Why Won't My Canon Printer Print after Changing an Ink Cartridge?
May 23, 2026
How do I Fix a Canon Printer 1403 Error?
May 23, 2026
How do I Connect My Canon MG3050 Printer to WiFi?
May 23, 2026
How to Change Printer from Offline to Online Canon?
May 23, 2026
How to Turn My Ricoh Printer Online from Offline?
May 23, 2026
Brother MFC Printer Won't Print Black Despite Full Ink Cartridges
May 23, 2026
How to Fix Epson Printer Filter Failed or Stopped on Mac Error?
May 23, 2026
How do You Get a Lexmark Printer Back Online?
May 23, 2026
How to Fix Epson Printer Error 0XF3?
May 23, 2026
How to Fix Epson Printer Error Code 000041?
May 23, 2026
How do I Connect My Epson l3060 to WiFi?
May 23, 2026
Epson Printer Printing Double Letters
May 23, 2026
Fix Epson Workforce Pro WF-3720 Scanner Problem - Thin Vertical Stripes on Complete Scan
May 23, 2026
How to Find WPS Pin on Epson Printer?
May 23, 2026
How to Fix Epson Printer Error Code 0x98?
May 23, 2026
How to Reset the Epson Stylus C88?
May 23, 2026
How to Get Canon Printer Online on MAC?
June 4, 2026
How to Fix Printer Printing Horizontal Black Lines?
May 23, 2026
How to Scan from HP Printer to Computer Windows 10?
June 13, 2026
Ricoh Printer Stuck on Processing
May 23, 2026
Brother Printer Only Printing in Black and White
June 21, 2026
How to Clean Kodak Printhead?
May 23, 2026
How to Install Lexmark Printer to Computer Without CD?
June 12, 2026
Why My Samsung Printer is Not Printing Clearly?
May 23, 2026
How do I Fix a Canon Printer 1403 Error?
May 23, 2026
How do I Connect My Canon MG3050 Printer to WiFi?
May 23, 2026
How to Change Printer from Offline to Online Canon?
May 23, 2026
How to Turn My Ricoh Printer Online from Offline?
May 23, 2026
How do You Get a Lexmark Printer Back Online?
May 23, 2026
Categories
48 Article
79 Article
13 Article
67 Article
182 Article
11 Article
30 Article
41 Article
11 Article
27 Article