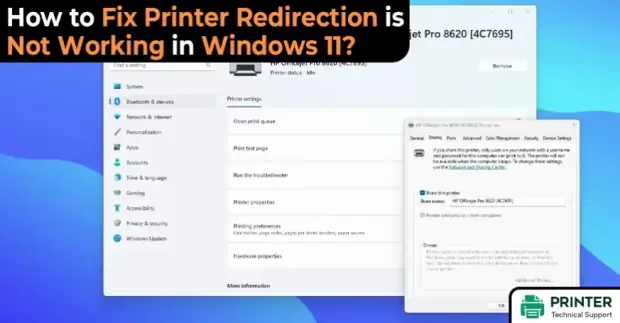
How to Fix Printer Redirection is Not Working in Windows 11?
Fix Printer Redirection is Not Working in Windows 11:
Microsoft is one of the most popular tech giants available in the market today. The software and hardware solutions are very reliable and there are multiple areas where this company is not performing well.
Recently, the printing experience on Windows 10 and Windows 11 hasn't been reliable and stable lately. There is a bug associated with USB printing, which may lead to printer malfunction problems after you reinstall or restart it. Here in this article, you are going to learn how to fix printer redirection not working problems.
Why is the Printer not Letting me do Redirection?
If you wish to troubleshoot this problem, then you must learn how RDP printer redirection works in Windows 11 to identify the reasons why your printer is not appearing. Initially, the server will receive a number of printers, which are installed on the remote client. After that, the server is going to create the print queue within your remote.
When you go to select the print option, you are asked about the accompanying drivers. Once everything is done, then the printer is redirected. Sometimes, remote desktop printing is more trouble than it's worth.
However, you get lots of benefits through remote desktop protocol environments. Though it has a lean infrastructure and offers a lot of flexibility, the RDP environments can create serious problems for this printing.
How can I Make My Printer Redirect?
Below are some solutions that you can apply to make your printer redirect.
1) Enable Local Printers
Step 1: Go to the screen of the Remote desktop connection.
Step 2: Go to the section of Local devices and resources and then activate the option of "Printers".
2) Modify the Values of Registry Entries
Step 1: Go to the Registry Editor and then launch the app.
Step 2: After that, navigate to HKEY_LOCAL_MACHINE\SYSTEM\CurrentControlSet\Control\Terminal Server\Wds\rdpwd\fEnablePrintRDR
Step 3: Open the file by double-clicking on it and then changing the value to 1. After that, click on OK.
3) Uninstall the Printer Drivers and Then Reinstall Them
Below are the simple steps that you need to follow in order to uninstall and then reinstall the printer drivers.
Step 1: Start looking for the Device Manager and then launch the app.
Step 2: Expand the category of print queues and then choose a device. Aftter that, select the option of "Uninstall device".
Step 3: Go to the print queue option and then right-click on it. After that select Scan for hardware changes.
After that, your system is going to detect the printer device and install all the drivers that are necessary. In case you have the drivers that are on the stick or CD. After that, you will be able to install the drivers manually.
If you are still encountering issues even after applying the solutions mentioned above, then your computer may experience deeper Windows issues. After that, you must download a PC repair tool to resolve this issue. Once your installation is complete, click on the button of Start Scan and then press the button of Repair All.
Also Read:
- How to Fix Printer has No IP Address on Windows 10?
- How to Fix Windows 10/11 doesn’t Find Wireless Printer?
- How To Add Printer And Print Documents From Kindle Fire?
FAQ for Fix Printer Redirection is Not Working in Windows 11
- Mick
 Brand: Other
- Last Update: 1 month ago
 Top Related Question
Related Articles


Top Searches in Other
How to Fix Printer Spooler Problems on Windows 10?
May 23, 2026
9 Best Printer to Buy for Home Office Use in 2026
May 23, 2026
How to Fix Boot Device Not Found 3f0 Error?
May 23, 2026
How to Fix Print Job Stuck in Queue?
May 23, 2026
How to Make Printer Online in Windows 10?
May 23, 2026
Why is a Printer Printing Blank Pages on Windows 10?
May 23, 2026
How to Troubleshoot Wireless Printer Not Printing?
May 23, 2026
Featured Articles
How to Get Canon Printer Online on MAC?
Jun 4, 2026
How to Fix Printer Printing Horizontal Black Lines?
May 23, 2026
How to Scan from HP Printer to Computer Windows 10?
Jun 13, 2026
Ricoh Printer Stuck on Processing
May 23, 2026
Brother Printer Only Printing in Black and White
Jun 21, 2026
How to Clean Kodak Printhead?
May 23, 2026
How to Install Lexmark Printer to Computer Without CD?
Jun 12, 2026
Why My Samsung Printer is Not Printing Clearly?
May 23, 2026
Top Questions
Why Won't My Canon Printer Print after Changing an Ink Cartridge?
May 23, 2026
How do I Fix a Canon Printer 1403 Error?
May 23, 2026
How do I Connect My Canon MG3050 Printer to WiFi?
May 23, 2026
How to Change Printer from Offline to Online Canon?
May 23, 2026
How to Turn My Ricoh Printer Online from Offline?
May 23, 2026
Brother MFC Printer Won't Print Black Despite Full Ink Cartridges
May 23, 2026
How to Fix Epson Printer Filter Failed or Stopped on Mac Error?
May 23, 2026
How do You Get a Lexmark Printer Back Online?
May 23, 2026