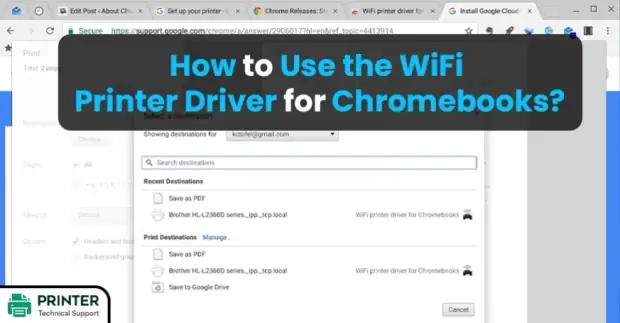
How to Use the WiFi Printer Driver for Chromebooks?
Use WiFi Printer Driver for Chromebooks:
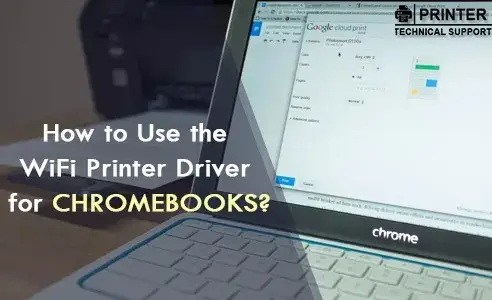
Do you find difficulty in connecting Chromebook to a wifi printer? Well, that's not at all a difficult job as long as you know to use the WiFi printer driver for Chromebooks. Optionally, you can use a Chrome extension or a Google service, or directly let your Chromebook to recognize the printer. Keep on reading this article to understand how to use the WiFi printer driver for Chromebooks.
Even if you have easy online access to all your documents access across multiple devices and platforms out there, there are times when you still require a hard-copy of certain documents or information. However, if you own a Chromebook, printing from a Chromebook is quite easy. You just need to connect your printer to the device correctly. You are then all set to use the WiFi printer driver for Chromebooks.
Fortunately, Chromebook supports most of the printer brands available in the market. But, based on the method you choose, some printers require extra skills and capabilities.
View also this blog: Printer driver is Unavailable
Connection Steps to Use the WiFi Printer Driver for Chromebooks
In order to use the WiFi printer driver for Chromebooks, you need to connect your printer to wifi. Below listed are some steps to set up a connection.
Step 1: Firstly, switch on your printer.
Step 2: Next, connect your printer to an internet network. Connection settings might be different based on the printer model.
Step 3: Turn on your Chromebook and connect to the same network (if this is not done already as a default setting).
Step 4: Now, one by one we will look at various ways in which you can set up the connection between your Chromebook and your printer.
Different Methods to Use the WiFi Printer Driver for Chromebooks
1. With the help of WiFi printer driver extension
You can get the WiFi printer driver extension for Chromebooks in the Chrome Web Store. This specific extension when installed automatically identifies your printer which is already connected to a WiFi connection.
With this extension, you don't need to install any other special programs. The only drawback of this extension is that it doesn’t support any printer. And so, it is required to contact the developer directly asking them to add a certain printer model.
2. Using the Google Cloud Print system
Another way to use the WiFi printer driver for Chromebooks is via the Google Cloud Print service. For this, you need to follow the given steps:
Step 1: Launch the installed Chrome browser on your system.
Step 2: Type and enter chrome://devices in the address bar of the browser.
Step 3: Now, under New devices, locate your printer and click on Manage.
Step 4: As the Confirm registration box appears, click on the Register option.
Step 5: Further, follow the on-screen instructions to finish registering.
Google Cloud Print is one of the finest services available mostly for cloud-ready printers, that connects your printer directly to the web. Likewise, the previous method discussed, when you are logged in to the same network as the printer, you should be able to see it and print any document as desired.
Unlike the Chrome printer extension, Google Cloud Print offers a wide variety of compatible printers. But your printer should have the Google Cloud Print feature for you to be able to use this service. However, if your printer is not cloud-ready and you want to use this method, you will have to contact your manufacturer for help.
3. Directly connecting wireless printer to Chromebook
Another great method to use printer drivers for Chromebook is a direct connection. For this, you have to follow the given set of steps:
Step 1: Firstly, launch the Settings menu from the Quick Quick Settings Panel shown at the right lower side of your screen.
Step 2: Enter print into the search box.
Step 3: Here, select Printers and then Add Printer.
Step 4: Select the printer’s name in the list that appears and click on Add.
Note: If your printer is an older version and does not show in the list, do the following additional steps:
Step 5: Choose the Add Manually button.
Step 6: Set the desired name for your printer.
Step 7: Enter its IP address into the Address box (This information is somewhere in the printer’s display menu, or in its network or wireless configuration settings).
Step 8: Click on Add option.
Step 9: Next, type in your printer’s manufacturer along with the model and then click Add again.
That’s all. Press Ctrl-P from any browser tab or document to get the hard print you want. So, with these above-discussed methods, you can conveniently use the WiFi printer driver for Chromebooks.
Also Read:
- How to Fix Error 740 While Adding Printer on Windows 10/11?
- How To Connect An Oki Printer To A Wireless Network?
- How to Set up a PDF Printer on a MAC?
FAQ for WiFi Printer Driver for Chromebooks
- Mick
 Brand: Other
- Last Update: 4 weeks ago
 Related Articles


Top Searches in Other
How to Fix Printer Spooler Problems on Windows 10?
May 23, 2026
9 Best Printer to Buy for Home Office Use in 2026
May 23, 2026
How to Fix Boot Device Not Found 3f0 Error?
May 23, 2026
How to Fix Print Job Stuck in Queue?
May 23, 2026
How to Make Printer Online in Windows 10?
May 23, 2026
Why is a Printer Printing Blank Pages on Windows 10?
May 23, 2026
How to Troubleshoot Wireless Printer Not Printing?
May 23, 2026
Featured Articles
How to Get Canon Printer Online on MAC?
Jun 4, 2026
How to Fix Printer Printing Horizontal Black Lines?
May 23, 2026
How to Scan from HP Printer to Computer Windows 10?
Jun 13, 2026
Ricoh Printer Stuck on Processing
May 23, 2026
Brother Printer Only Printing in Black and White
May 23, 2026
How to Clean Kodak Printhead?
May 23, 2026
How to Install Lexmark Printer to Computer Without CD?
Jun 12, 2026
Why My Samsung Printer is Not Printing Clearly?
May 23, 2026
Top Questions
Why Won't My Canon Printer Print after Changing an Ink Cartridge?
May 23, 2026
How do I Fix a Canon Printer 1403 Error?
May 23, 2026
How do I Connect My Canon MG3050 Printer to WiFi?
May 23, 2026
How to Change Printer from Offline to Online Canon?
May 23, 2026
How to Turn My Ricoh Printer Online from Offline?
May 23, 2026
Brother MFC Printer Won't Print Black Despite Full Ink Cartridges
May 23, 2026
How to Fix Epson Printer Filter Failed or Stopped on Mac Error?
May 23, 2026
How do You Get a Lexmark Printer Back Online?
May 23, 2026