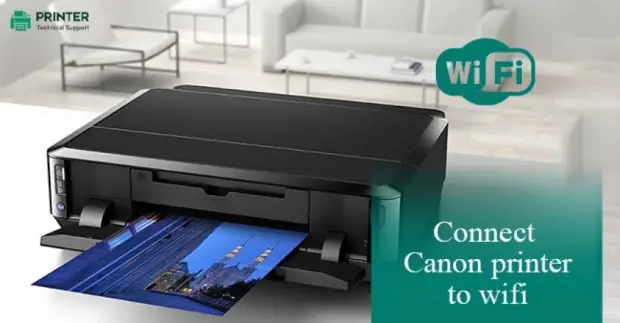
How To Connect Canon Printer To Wifi - Complete Steps
Canon is a Japanese company established by four founders: Takeshi Mitarai, Saburo Uchida, Takeo Maeda, and Goro Yoshida. They laid their foundation in 1937 with a strong vision of paving the way to the future. Canon produces a variety of printers that have been doing well in the market. PCmagsPCmags and TechRadars TechRadars are two of the best printers.
Canon categorizes their printers based on their features and capabilities so that a customer can choose the one according to their demands. Canon printers share compatibility with both wired and wireless connections.
How to connect a Canon printer to wifi?
Is your Canon printer having difficulty connecting to WiFi? This article will provide you with information on how to connect a Canon printer to wifi.
1- Turn on your Canon printer.
2- Click and hold the "wifi" button until It flashes "ON". Now press the "color" button. The "wifi" button will flash quickly, which is an indication that the wifi setup mode is activated in the printer.
3- Switch on your wifi router, click and hold the "wifi" button on the printer until it flashes "ON". Now press the "black" button and then press the "wifi" button.
4- The printer will search for wifi connection and action, and once it's done finding the available network, it will stop flashing the "on" and "wifi" buttons. Once the printer is connected to the wifi, it will stop flashing the "wifi" button, and the "ON" button will be lit up.
5- Put the CD-ROM that came with your printer into your computer, or you can also install the latest software from the Canon website.
6- Now, during the installation process, you have to select the "wireless LAN connection" option and proceed with instructions.
7- Now, your Canon printer is successfully connected to the wifi. You can double-check the connection by printing out a test page.
What are the benefits of connecting a Canon printer to wifi?
The wireless feature of the printer adds a lot of benefits for the users like -
1- Convenience is one of the major benefits the wireless printer comes with. You can be anywhere on any device within the range of connectivity and print out without taking your computer physically close to the printer and then following the printing process.
2- It is less hectic, as it eliminates the extra usage of wires.
3- With the help of wireless printers, you can accelerate your work and increase productivity with better focus. Wireless printers can be a great addition to the corporate world.
Why My Canon Printer Cannot Connect To Wi-Fi?
A lot of times while forming a connection between a Canon printer and wifi we face issues. The reasons behind these issues could be many. If you have proper knowledge about Canon printers then you will be able to fix these. Some of the reasons for these minor inconveniences could be
- The power cycle
- The status of your printer
- Need to Reset the printer
- Outdated firmware
- Network congestion
- Weak signal strength
Make sure you keep all the above-mentioned things in mind while establishing the connection. So, in the future, if you face any obstruction you can easily resolve it.
In case you are not able to connect your Canon printer to wifi even after doing everything possible then contact with Canon customer service system. They will surely guide you.
CONCLUSION
Always remember that when you are connecting devices to your Wi-Fi the connectivity depends highly upon the system you are operating and the version of software you are using. Read the instructions provided with the printer for accurate information and a smooth installation process.
Also Read:
- How to setup Canon MX490 printer?
- How to Setup Canon G7000 Printer?
- How to Fix Canon MX920 Printer Not Responding Problem?
FAQs of Connect a Canon Printer to Wifi
- Sam
 Brand: Canon Printer
- Last Update: 1 month ago
 Related Articles


Top Searches in Canon Printer
How to Get Canon Printer Online on MAC?
Jun 4, 2026
How do I Fix a Canon Printer 1403 Error?
May 23, 2026
How do I Connect My Canon MG3050 Printer to WiFi?
May 23, 2026
How to Change Printer from Offline to Online Canon?
May 23, 2026
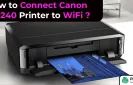
How to Connect Canon TS3122 Printer to WiFi?
May 23, 2026
How to Fix Canon Printer Carriage Jam Problem?
May 23, 2026
How to Fix Canon Printer Error Code 1660?
May 23, 2026
How to Resolve OKI Printer Error Code 990?
May 23, 2026
How do I Reset Canon MG2522 Printer?
May 23, 2026
Featured Articles
How to Get Canon Printer Online on MAC?
Jun 4, 2026
How to Fix Printer Printing Horizontal Black Lines?
May 23, 2026
How to Scan from HP Printer to Computer Windows 10?
Jun 13, 2026
Ricoh Printer Stuck on Processing
May 23, 2026
Brother Printer Only Printing in Black and White
Jun 21, 2026
How to Clean Kodak Printhead?
May 23, 2026
How to Install Lexmark Printer to Computer Without CD?
Jun 12, 2026
Why My Samsung Printer is Not Printing Clearly?
May 23, 2026
Top Questions
Why Won't My Canon Printer Print after Changing an Ink Cartridge?
May 23, 2026
How do I Fix a Canon Printer 1403 Error?
May 23, 2026
How do I Connect My Canon MG3050 Printer to WiFi?
May 23, 2026
How to Change Printer from Offline to Online Canon?
May 23, 2026
How to Turn My Ricoh Printer Online from Offline?
May 23, 2026
Brother MFC Printer Won't Print Black Despite Full Ink Cartridges
May 23, 2026
How to Fix Epson Printer Filter Failed or Stopped on Mac Error?
May 23, 2026
How do You Get a Lexmark Printer Back Online?
May 23, 2026