
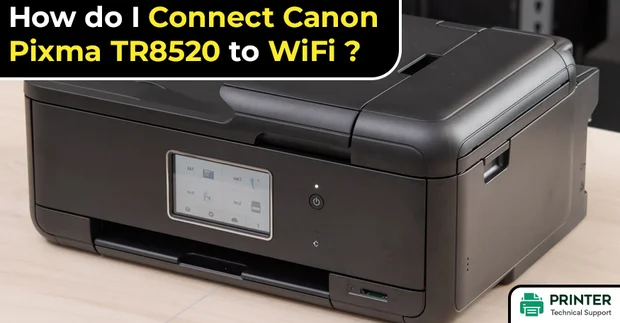
How do I Connect Canon Pixma TR8520 to WiFi?
Connect Canon Pixma tr8520 to WIFI:
To connect Canon Pixma TR8520 to WiFi can be easily carried using the following instructions.
You can connect Canon TR8520 to WiFi in two parts:
- Start the setup process on your printer.
- Download and run the setup file on your computer.
1. Start the Setup process on your Canon TR8520 printer
- Turn the printer ON. In case, the printer is performing cleaning, print head alignment, or another process, wait for it to finish.
- Click the Network Status button (A) on the printer.
- Click LAN settings on the Basic network information screen
- Click Wireless LAN.
- Click Wireless Lan setup.
- Click Easy Wireless Connect, then Click Yes.
- Once the printer preparation is finished, you will see this screen.
- Get back to the setup application screen and continue with the setup.
2. Download and run the setup file on your computer
- First, you will need to get the setup file (set up can also be performed by using the Setup CD-ROM).
- Read the information and note how to run the setup file. If set up doesn't start automatically, click the Download button.
- Select Start Setup on the first screen.
- Select the region where you live, then Next.
- Select Yes on the license agreement.
- Select Agree or Do Not Agree to the survey, then Next.
- Select Yes on the Connection Method screen.
- Setup continues. If the Selected wireless router appears on screen, select the wireless router to connect to the printer, type the Network Key (password) and select Next.
- The screen below may not appear. If it doesn't, go to the next step.
- The network connection is complete. Select next.
- The drivers will install. Select Start to print a test page or Next to continue.
- Select Next from the Setup Complete page.
- Select any optional application software desired. Select Next.
- Select Next.
- Select Exit and your setup is complete.
You can also use WPS connection method to connect Pixma TR8520 to wifi it can apply for all Canon printers.
Canon TR8520 WPS Connection Method
This WPS connection method is common for systems operating with Windows and Mac.
- Power on the printer for Canon Pixma wireless setup and place the WPS button within your reach.
- Hold down the WiFi button on the Canon printer until the ON lamp lights on.
- Tap the WPS button on the Canon Pixma printer within two minutes of the lighting of the lamp.
- Once searching for a network, the blue Wi-Fi lamp will be lit. On connection to a wireless network, both the Power and Wi-Fi lamps will stop blinking and remain illuminated.
- To verify the wireless connection, try printing out the network settings of your printer. Feed two sheets of A4 sized paper into the printer.
- Hold down the Wi-Fi button and release it once the Power lamp ashes.
- The Network Information page will be printed on selecting the Wi-Fi button.
If you still have an issue that isn't resolved after following the steps above, or if you require additional help, please create or log in to your Canon Account to see your additional options.
- SAM
 Brand: Canon Printer
- Last Update: 11 hours ago
 Related Articles

Top Searches in Canon Printer
How to Get Canon Printer Online on MAC?
Oct 3, 2026
How do I Fix a Canon Printer 1403 Error?
Oct 2, 2026
How to Connect Canon TS3122 Printer to WiFi?
Oct 2, 2026
How to Fix Canon Printer Error Code 1660?
Oct 3, 2026
How to Resolve OKI Printer Error Code 990?
Oct 3, 2026
How do I Reset Canon MG2522 Printer?
Oct 3, 2026
How to Fix Canon Printers Error Code 5011?
Oct 2, 2026
Featured Articles
How to Get Canon Printer Online on MAC?
Oct 3, 2026
How to Fix Printer Printing Horizontal Black Lines?
Oct 2, 2026
How to Scan from HP Printer to Computer Windows 10?
Oct 2, 2026
Ricoh Printer Stuck on Processing
Oct 3, 2026
Brother Printer Only Printing in Black and White
Oct 3, 2026
How to Clean Kodak Printhead?
Oct 2, 2026
How to Install Lexmark Printer to Computer Without CD?
Oct 2, 2026
Why My Samsung Printer is Not Printing Clearly?
Oct 2, 2026
Top Questions
Why Won't My Canon Printer Print after Changing an Ink Cartridge?
Oct 3, 2026
How do I Fix a Canon Printer 1403 Error?
Oct 2, 2026
How do I Connect My Canon MG3050 Printer to WiFi?
Oct 2, 2026
How to Change Printer from Offline to Online Canon?
Oct 2, 2026
How to Turn My Ricoh Printer Online from Offline?
Oct 2, 2026
Brother MFC Printer Won't Print Black Despite Full Ink Cartridges
Oct 2, 2026
How to Fix Epson Printer Filter Failed or Stopped on Mac Error?
Oct 2, 2026
How do You Get a Lexmark Printer Back Online?
Oct 2, 2026
Categories
Article Article Article Article Article Article Article Article Article Article