How do I Connect My Canon Pixma G3200 Printer to WiFi?
Hello, Please let me know that how do I connect my Canon Pixma g3200 printer to wifi. I am trying to connect it with my home wifi but having some issue. Help me.
 1 Ans
1 Ans- 5 years ago
Connect Canon Pixma G3200 Printer to WiFi:
So, now you will think how will I connect Canon G3200 printer to wifi? Well, below discussed are various step by step guides that will help you with different setup methods depending upon your device type.
Connect Canon G3200 Printer to WiFi on Windows -
If you have previously setup your canon g3200 printer on a wireless network, then you have to reconfigure it. Like the network name and password has to be changed according to new wireless network. for this, push the WPS button and connect your printer to the new network.
A point to note here is that not all routers support the WPS Push Button feature. We will use "Easy Wireless Connect" method to connect to the wireless network.
Here are the steps to canon g3200 wifi setup: The setup basically comprises of 2 phases:
1. Initiate Easy Wireless Connect on Your Canon g3200 Printer
Before you start printer setup on your Windows computer, start the Easy wireless connect on the printer. Then, further complete the printer setup on your computer or device.
- Continuously press and hold the wifi button (A) on the printer until the ON lamp (B) glows.
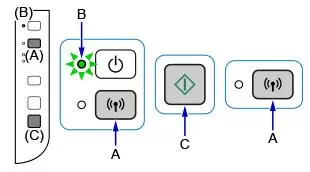
- Press the Color button (C) followed by the wifi button (A).
- Ensure that the wifi lamp (D) flashes the light quickly ON.
- Jump back to the application screen and start with the setup steps.
2. Download and Install the Drivers and Software on Computer.
Step 1: Get the printer setup file from the official website. Before downloading the file, carefully read the information if the setup doesn't starts automatically. You can also perform the setup using the CD-ROM also.
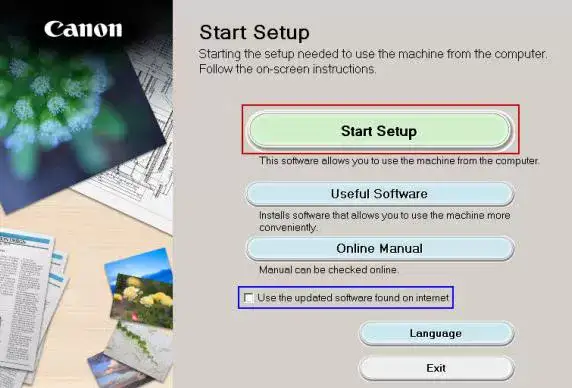
Step 2: Click on the setup file and launch it.
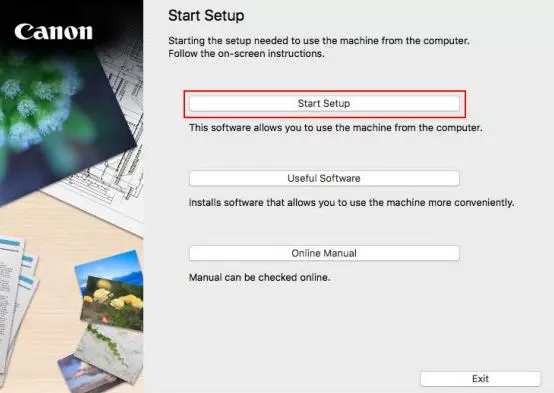
Step 3: Select the Start setup option.
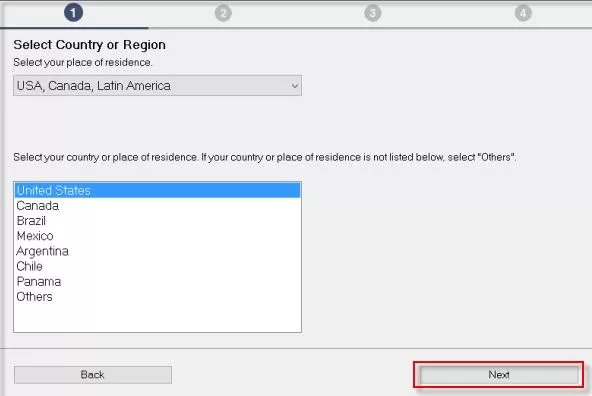
Step 4: Choose you region and click Next option.
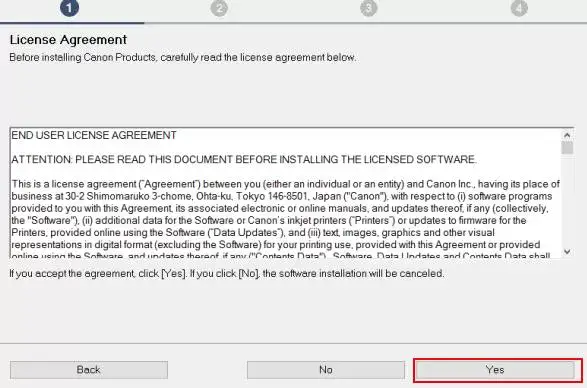
Step 5: Read the licence agreement and click Next.
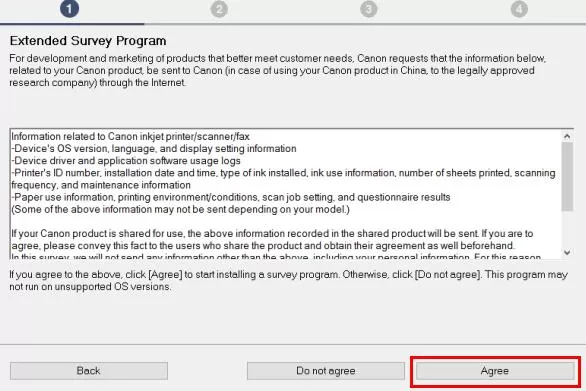
Step 6: Either Agree or Disagree to the survey.
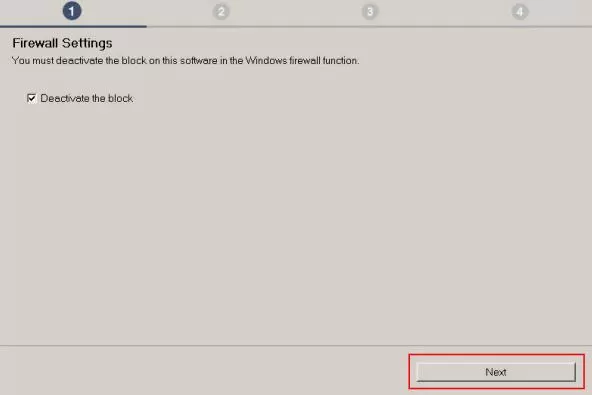
Step 7: Next, enable or disable the Firewall settings and click Next button.
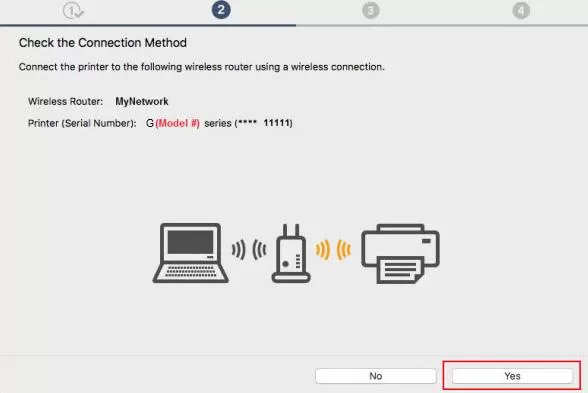
Step 8: Select Yes option after confirming your wireless router name and printer model number.
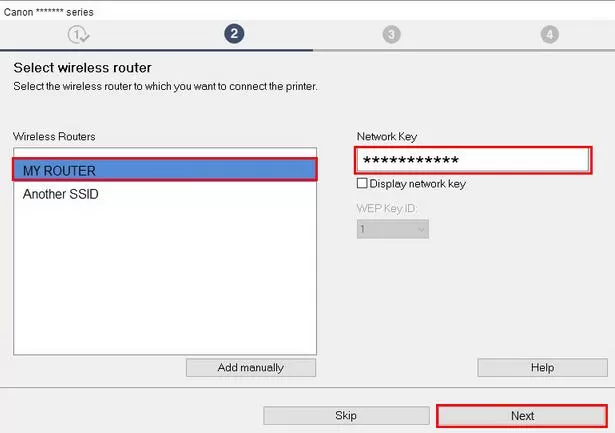
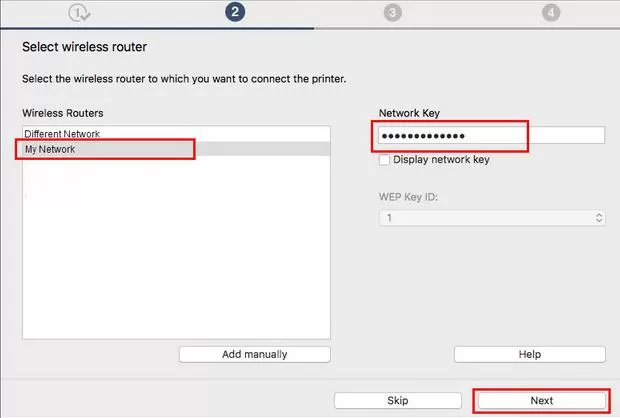
Step 9: A list of wireless routers is displayed. Select your wireless router and enter the corresponding network password. Then, click on Next option. If you are unable to find your network, add it manually.
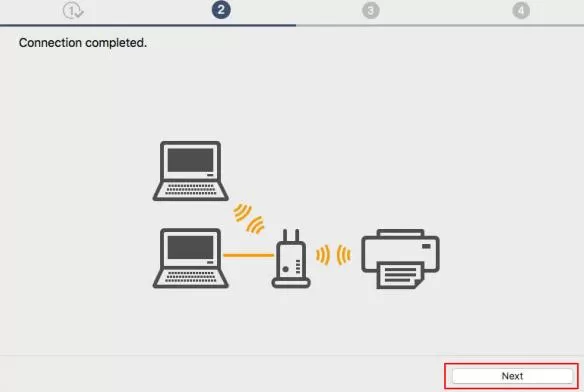
Step 10: The setting up screen appears and soon turns into Network connection completed screen. Click on Next to complete setup.
Step 11: Select optional applications if required and click Next.
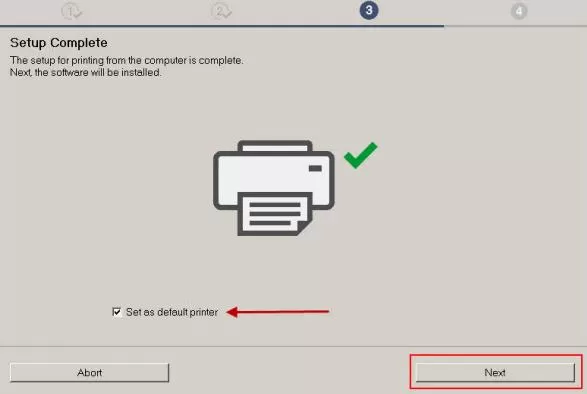
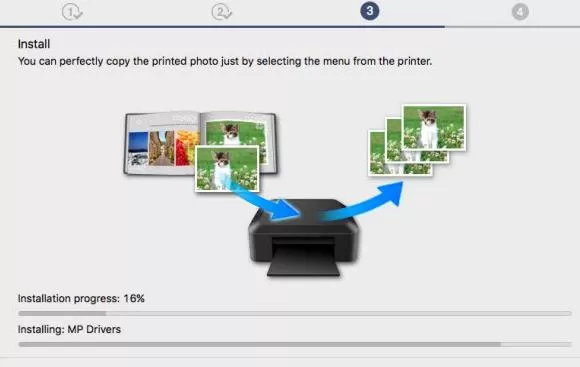
Step 12: Finally, the setup installation is completed.

Connect Canon Pixma G3200 Printer to WiFi on Mac -

Likewise, if you want to use and access the PIXMA G series printer for printing and scanning wireless on a Mac computer, your printer should be connected to wireless network and software drivers along with applications should be installed on your computer.
Here are the steps for "Easy Wireless Connect" method for connecting to the wireless network. Again the setup will contain two phases as:
1. Start Easy Wireless Connect on Your Printer
For initiating the Easy Wireless Connect mode on your PIXMA G3200 printer, follow these steps:
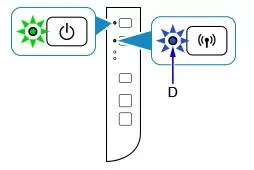
- Continuously press and hold the wifi button (A) on the printer until the ON lamp (B) flashes.
- Next, press the color button (C), then again the wifi button (A).
- Ensure that the wifi lamp (D) flashes and the ON light glows.
- Come back to application screen and proceed with setup.
2. Download, Install Required Drivers and Software on Mac
Step 1: Get the setup file from official site.
Step 2: Based on the Mac OS installed on your system, click the Download button corresponding to that file.
Step 3: Start setup and click Next option on the first screen.
Step 4: Choose your region and click Next option.
Step 5: Read and agree to the License Agreement.
Step 6: Agree or Disagree to the Survey data.
Step 7: Click on Yes after checking your connection method and printer model number.
Step 8: Pick your wireless network out from the list of networks and enter the corresponding network key.
Step 9: Finally, the network connection is completed and click on the Next button.
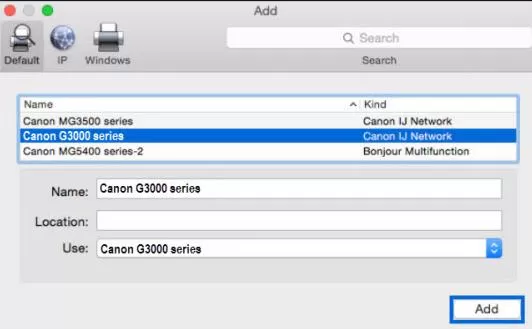
Step 10: Next, Add Printer from the Add Printer screen.
Step 11: Select your Canon G3000 series from the dropdown list and click on Next.
Step 12: Here the setup completes.
Nowadays, every user wants to print and scan wireless from their wifi-enabled computer, tablet, phone, etc. The wireless printer setup makes use of your local network connection. Wireless printing has a minimum working requirement of network with wireless 802.11b/g/n capability.
Also, you will require any wifi enabled device (like a computer, tablet, phone, etc), a wireless router and a wireless printer to perform wireless printing. Make sure that you connect all these devices to the same wireless network connection.
In order to use the PIXMA G series printer for scanning and printing purposes on a Windows computer, you should first connect the printer to available wireless network. The software drivers and other required applications should be installed on the computer.
- 2 years ago
 Related Articles


Top Searches in Canon Printer
Why Won't My Canon Printer Print after Changing an Ink Cartridge?
May 23, 2026
How to Get Canon Printer Online on MAC?
Jun 4, 2026
How do I Fix a Canon Printer 1403 Error?
May 23, 2026
How do I Connect My Canon MG3050 Printer to WiFi?
May 23, 2026
How to Change Printer from Offline to Online Canon?
May 23, 2026
How to Connect Canon TS3122 Printer to WiFi?
May 23, 2026
How to Fix Canon Printer Carriage Jam Problem?
May 23, 2026
How to Fix Canon Printer Error Code 1660?
May 23, 2026
How to Resolve OKI Printer Error Code 990?
May 23, 2026
How do I Reset Canon MG2522 Printer?
May 23, 2026
Featured Articles
How to Get Canon Printer Online on MAC?
Jun 4, 2026
How to Fix Printer Printing Horizontal Black Lines?
May 23, 2026
How to Scan from HP Printer to Computer Windows 10?
Jun 13, 2026
Ricoh Printer Stuck on Processing
May 23, 2026
Brother Printer Only Printing in Black and White
Jun 21, 2026
How to Clean Kodak Printhead?
May 23, 2026
How to Install Lexmark Printer to Computer Without CD?
Jun 12, 2026
Why My Samsung Printer is Not Printing Clearly?
May 23, 2026
Top Questions
Why Won't My Canon Printer Print after Changing an Ink Cartridge?
Oct 7, 2020
How do I Fix a Canon Printer 1403 Error?
Dec 30, 2020
How do I Connect My Canon MG3050 Printer to WiFi?
Mar 30, 2021
How to Change Printer from Offline to Online Canon?
Nov 27, 2020
How to Turn My Ricoh Printer Online from Offline?
Feb 20, 2021
Brother MFC Printer Won't Print Black Despite Full Ink Cartridges
Nov 7, 2020
How to Fix Epson Printer Filter Failed or Stopped on Mac Error?
Dec 7, 2021
How do You Get a Lexmark Printer Back Online?
Sep 29, 2020