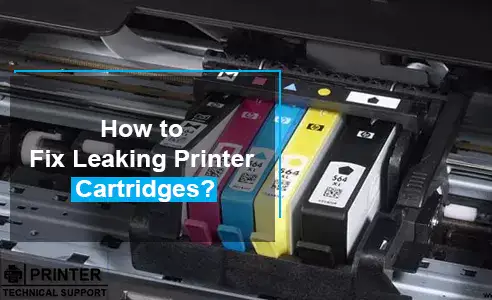
How to Fix Leaking Printer Cartridges?
Hello, Please let me know that How to Fix Leaking Printer Cartridges. I am facing some issues in printer cartridges. If you have any idea then give me.
 1 Ans
1 Ans- 4 years ago
Fix Leaking Printer Cartridges:
Want to know how to fix leaking printer cartridges? Then you are in the right place, here are some easy steps to fix leaking printer cartridges.
Steps to Fix Leaking Printer Cartridges-
Readjust your Cartridge
First of all, any printer leak is to make sure it’s installed correctly. Whereas printer cartridges have increased in technological complexity over the last decade, they’re still fundamentally a plastic box containing a bladder full of liquid. A wrong installed tap will leak, an improperly fitted printer cartridge will create a bit of mess.
Start the printer and search for the cartridge corresponding to the color of the leaked ink. Modern printers work on tight tolerances, so what may look right to you could be way off the mark for the machine.
Take out the printer cartridge and carefully reinsert it, taking care to align it correctly with the guides inside the machine. Press strongly, but not too hard – too much force could result in damage to the cartridge or to the printer itself. Close the lid and run a test page.
Clean the Contacts
Just a properly aligned cartridge can leak if the contacts between it and the machine are dirty or blocked. Like before, open up the machine, remove the offending cartridge and clean it down with an alcohol-based wipe – not water as this can cause damage. Now, do the same for the printer head. Reinstall the cartridge and run another test page.
Test for Other Leaks
Any further leaks over this point could be a symptom of a broken or defective cartridge. Take the cartridge from the printer and inspect it closely. Check for excess ink in any areas away from where it directly connects with the printer.
Printers operate on small quantities of ink – as little as 10ml per cartridge – so don’t expect to see a big dirty stain. Rather, run a white tissue over the entire printer cartridge and see for where it starts to color. If you are selecting color away from the contacts, your cartridge may be cracked or defective.
Time for a Replacement
When it’s time for a new cartridge, know you’re getting the best at a great price when you shop at Toner City. With a range of genuine and compatible cartridges to suit all makes and models of inkjet and laser printers, it’s easy to get what you need.
Quick Steps to Fix Leaking Printer Cartridges-
Step 1: Take out the cartridge from your printer and wipe both the housing and the cartridge with an alcohol-based wipe. Do not use a water-based solution for this as it may damage electrical components.
Step 2: Clean the printhead where it touches the cartridge. Once in a while dust or waste at the connection point can cause leakage that is not due to a faulty cartridge.
Step 3: Wipe a white cloth or tissue over the cartridge until you have identified the leaking area. If it is only colored at the discharge, this means the cartridge is fine.
Step 4: Inspect the cartridge once you have determined the location of the leak. You should see a crack or fault. If not, press the cartridge until you can see the damaged area.
Step 5: Rub the cartridge once more after you have identified the location and cut a piece of tape large enough to cover the affected area.
Step 6: Place the tape over the affected area and smooth as much as possible. You can then change the cartridge in the machine and test to ensure the area is firmly protected against future leakage.
In case your HP Color Ink Cartridge Won’t Work then follow the steps below:
Step 1: Remove and replace the HP color ink cartridge. Take out the cover to the HP printer and release the ink cartridge holster-locking mechanism, if applicable.
Remove the color ink cartridge upward and outward until it is released from the holster. Get back the removal process to reinstall the ink cartridge. Confirm that the cartridge clicks into place and that the locking mechanism is fully closed.
Step 2: Take a look at the ink cartridge slots carefully to see whether the color cartridge is installed in the wrong location. This can create the color cartridge to print incorrectly. Change the color ink cartridge in the right slot if this is the problem.
Step 3: Take out the color ink cartridge and make sure that the tape that covers the copper printhead contacts is not still in place. Take off any tape that is visible on the ink cartridge and replace the cartridge in the printer.
Step 4: Run an automatic cleaning cycle on the printer. Follow the instructions in your manual. Many HP printer models have the cleaning cycle available in the main operating menu on the LCD screen of the printer.
- 2 years ago
 Related Articles


Top Searches in Canon Printer
Why Won't My Canon Printer Print after Changing an Ink Cartridge?
May 23, 2026
How to Get Canon Printer Online on MAC?
Jun 4, 2026
How do I Fix a Canon Printer 1403 Error?
May 23, 2026
How do I Connect My Canon MG3050 Printer to WiFi?
May 23, 2026
How to Change Printer from Offline to Online Canon?
May 23, 2026
How to Connect Canon TS3122 Printer to WiFi?
May 23, 2026
How to Fix Canon Printer Carriage Jam Problem?
May 23, 2026
How to Fix Canon Printer Error Code 1660?
May 23, 2026
How to Resolve OKI Printer Error Code 990?
May 23, 2026
How do I Reset Canon MG2522 Printer?
May 23, 2026
Featured Articles
How to Get Canon Printer Online on MAC?
Jun 4, 2026
How to Fix Printer Printing Horizontal Black Lines?
May 23, 2026
How to Scan from HP Printer to Computer Windows 10?
Jun 13, 2026
Ricoh Printer Stuck on Processing
May 23, 2026
Brother Printer Only Printing in Black and White
Jun 21, 2026
How to Clean Kodak Printhead?
May 23, 2026
How to Install Lexmark Printer to Computer Without CD?
Jun 12, 2026
Why My Samsung Printer is Not Printing Clearly?
May 23, 2026
Top Questions
Why Won't My Canon Printer Print after Changing an Ink Cartridge?
Oct 7, 2020
How do I Fix a Canon Printer 1403 Error?
Dec 30, 2020
How do I Connect My Canon MG3050 Printer to WiFi?
Mar 30, 2021
How to Change Printer from Offline to Online Canon?
Nov 27, 2020
How to Turn My Ricoh Printer Online from Offline?
Feb 20, 2021
Brother MFC Printer Won't Print Black Despite Full Ink Cartridges
Nov 7, 2020
How to Fix Epson Printer Filter Failed or Stopped on Mac Error?
Dec 7, 2021
How do You Get a Lexmark Printer Back Online?
Sep 29, 2020