How to Setup Canon Pixma IP7240 Wireless Printer?
Hello let me know that how to setup Canon Pixma IP7240 wireless printer. I bought this Canon pixma IP7240 printer, now i am trying to setting it then fail to connect it. Please help me in setup of canon.
 1 Ans
1 Ans- 5 years ago
Setup Canon IP7240 Printer:
Before, we begin with the process to setup Canon ip7240 wireless printer, there are certain conditions that you are required to meet for using the WPS connection method.
- The access point needs to have a physical push button. Take a look at the user’s guide information of the device. In case this method is not available, then follow the directions that are given at the standard connection method tab.
- It is necessary for your method to have Wireless protected access. Generally, the access points enabled by WPS make use of this protocol.
Mentioned Below are Some of the Canon ip7240 wifi setup Steps That You Need to Follow:
 Step 1:
- Please ensure that your printer is turned on to setup Canon pixma ip7240 wireless printer.
- Please hold the button of Wi-Fi that is placed in front of your router.
Step 2:
- It is important for you to ensure that your printer starts flashing blue in colour. After that, you need to go to the access point and then press the WPS button within the next 2 minutes. In order to get the exact details on how to press the WPS button, you must take a look at the access point manual.
- The Wi-Fi lamp on the printer will continue to flash at the time of looking for or connecting to access point. Once your printer has successfully established a connection with the wireless network, then the blue light will quit flashing and remain turned on.
Confirmation of Network Settings:
To ensure that you can successfully connect your printer to the wireless network, you can take a print out of your network settings of your printer if you want.
- To setup canon ip7240 printer, please ensure that your printer is turned on.
- Place plain paper or A-4 size sheet in the printer.
- Press and hold the button of cancel or resume and keep on pressing it till the power light flashes at least 6 times. After that, the page of network details will get printed.
- As far as it is concerned about the print out, check if the connection is showing up active and the SSID name of your wireless network that you have entered is correct.
So, this is the process of WPS setup. After that, move forward by installing software. In case you do not have an installation disc that comes along with the printer, then you can download the software and manual by going to the PIXMA page by entering the range page.
In case the setup page is still not opening up after going through the guide, then you need to contact the Canon team to obtain the support.
Standard USB Connection Method:
If the above procedure to setup canon ip7240 printer couldn’t help you out, then the below mentioned USB connection method can help you with the setup.
Step 1:
1) Insert the disc that came together with the printer and continue with the setup.
Window users : In case the setup CD-ROM do not autorun. Then insert the disc once again in your computer system and then click on My Computer, then click on CD-ROM and then double click MSETUP4.EXE.
2) Click on next to complete the process of how to setup Canon ip7240 printer, when the initial screen opens up.
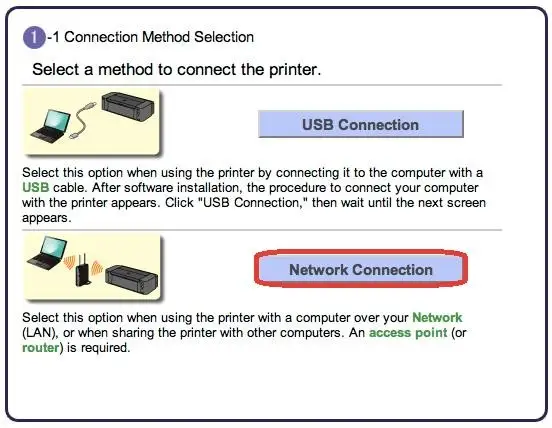
Please note: there are certain models that are occupied with the wired connection and an additional screen comes up in front of you asking you to select between a network or USB connection. If the connection method selection screen opens up in front of you, then network connection is what you need to select.
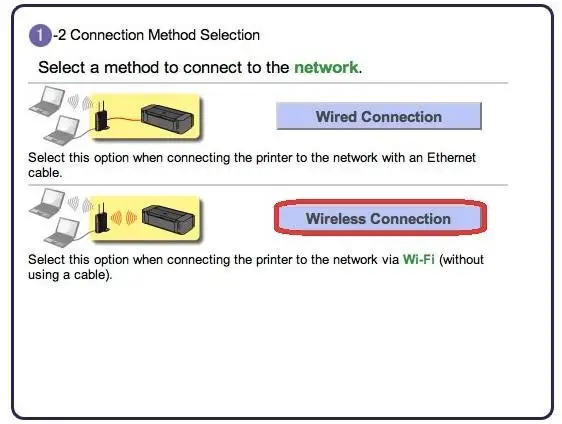
3) Under the network connection method, you will have to select a sub category which is wireless connection.
4) Please make sure that your printer is turned on and and the power light is turned on and then you need to select Next.
Step 2:
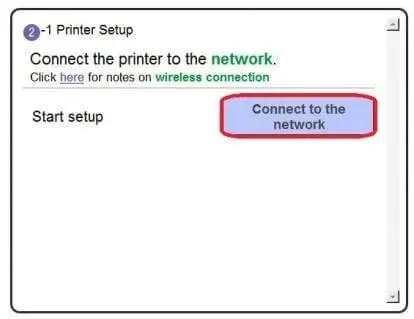 1) Select the connection to the network to complete the process to setup canon ip7240 wifi.
2) When the printer setup screen shows up, then click on the wireless setup through USB wire.
3) After that, the setup procedure selection screen comes up in front of you. Choose the region of your choice and then press next.
4) When you are asked to choose the place of residence on your screen, then select the language of your choice and then select next.
5) After that in the process to setup Canon ip7240 printer, the software installation list will open up in front of you. Choose the software that you want to install and then select Next. In case you are not sure of the software that you wish to install. Then, there is nothing to be worried about it as you can uninstall it at a later point of time.
6) Then, the License agreement screen is going to open up in front of you. Click on yes to agree with the license agreement.
7) After that in the process to setup Canon pixma ip7240 wireless printer, the setup new window will open up where you have to select Next.
Step 3:
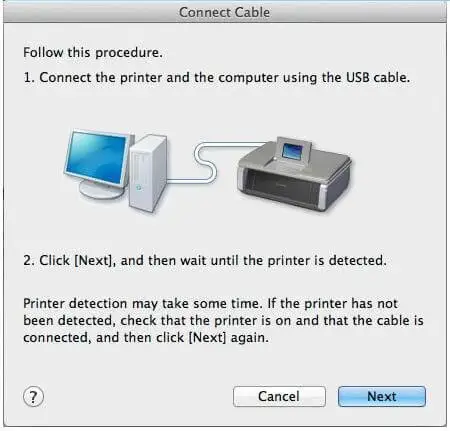
- In the final step to setup Canon Ip7240 printer, the connect cable window will open up before you. Link your printer to the computer system using a USB wire that is provided along with it. It is a wire that has a connector signal on top of it.
- Once the printer gets detected, then confirm the connection access point window will open up. The access point to which your computer is connected will be shown. If you are using a Wi-Fi network, then click on Yes.
- After that, disconnect cable screen will open up and then you will have to disconnect your computer system from the printer.
- In the next screen, the model number of your printer will show up together with the name of your wireless network.
- Click on complete and then finally click on OK.
This will open up the Windows setup.
- 2 years ago
 Related Articles


Top Searches in Canon Printer
Why Won't My Canon Printer Print after Changing an Ink Cartridge?
May 23, 2026
How to Get Canon Printer Online on MAC?
Jun 4, 2026
How do I Fix a Canon Printer 1403 Error?
May 23, 2026
How do I Connect My Canon MG3050 Printer to WiFi?
May 23, 2026
How to Change Printer from Offline to Online Canon?
May 23, 2026
How to Connect Canon TS3122 Printer to WiFi?
May 23, 2026
How to Fix Canon Printer Carriage Jam Problem?
May 23, 2026
How to Fix Canon Printer Error Code 1660?
May 23, 2026
How to Resolve OKI Printer Error Code 990?
May 23, 2026
How do I Reset Canon MG2522 Printer?
May 23, 2026
Featured Articles
How to Get Canon Printer Online on MAC?
Jun 4, 2026
How to Fix Printer Printing Horizontal Black Lines?
May 23, 2026
How to Scan from HP Printer to Computer Windows 10?
Jun 13, 2026
Ricoh Printer Stuck on Processing
May 23, 2026
Brother Printer Only Printing in Black and White
May 23, 2026
How to Clean Kodak Printhead?
May 23, 2026
How to Install Lexmark Printer to Computer Without CD?
Jun 12, 2026
Why My Samsung Printer is Not Printing Clearly?
May 23, 2026
Top Questions
Why Won't My Canon Printer Print after Changing an Ink Cartridge?
Oct 7, 2020
How do I Fix a Canon Printer 1403 Error?
Dec 30, 2020
How do I Connect My Canon MG3050 Printer to WiFi?
Mar 30, 2021
How to Change Printer from Offline to Online Canon?
Nov 27, 2020
How to Turn My Ricoh Printer Online from Offline?
Feb 20, 2021
Brother MFC Printer Won't Print Black Despite Full Ink Cartridges
Nov 7, 2020
How to Fix Epson Printer Filter Failed or Stopped on Mac Error?
Dec 7, 2021
How do You Get a Lexmark Printer Back Online?
Sep 29, 2020