How to Setup Wireless Connection on Canon Pixma MX534 Printer?
Hello, Please let me know that how to setup wireless connection on Canon PIXMA MX534 printer. I am facing some issue while setup wifi connection on printer. Help me.
 1 Ans
1 Ans- 4 years ago
Canon MX534 Wireless Setup -
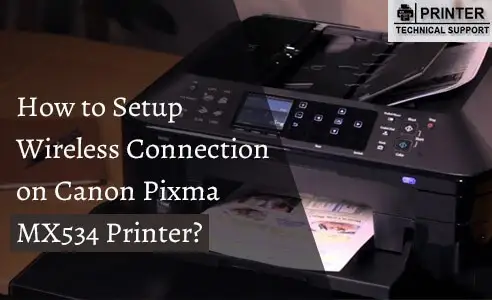
Here we are going to discuss how to setup wireless connection on a Canon MX534 printer. In this post, we will learn about the methods to setup your printer. These methods are the simplest or easiest way to connect Canon MX534 printer to wifi.
In case, your access point has a WPS button. So, choose the WPS method tab below for instructions on connecting and making use of this process. In case, the router will not support WPS we have provided option guidelines to have your Canon PIXMA MX534 connected so select the Standard Connection Method tab below.
Canon MX534 Wireless WPS Connection Method:
First we start; with some conditions that must be met in order to use the WPS push button method:
Step 1 : The access point should have a physical WPS push button access.
Step 2 : Verify with your device’s user guide for details.
Step 3 : In case, the WPS push button is not available then follows the instructions in the Standard Connection Method section.
Step 4 : Your network should be using WPA (Wi-Fi Protected Access) or WPA2 security protocol. Many WPS activate access points use this protocol.
Step 5 : Confirm that the printer is powered on. Press and hold the button about the leading with the printer until the orange alarm lamps flashes at the time after which head to your access place and push the WPS button inside two minutes. For real elements about pressing the WPS button, didn’t forget to check with the accessibility issue manual.
The blue wifi lamp around the printer will keep on. At the time of setup, the environment-friendly electric power lamp can even start to flash. Once the printer has made a relationship to the wifi network efficiently, the blue and eco-friendly bulbs will cease flashing and keep to be lit.
To confirm that the printer is properly connected to your wifi network, you can print out the community setup of one’s printer if you wish:
- Confirm that your printer is switched on.
- Put a sheet of A4 or letter-sized simple paper.
- Press and hold the cancel button till the orange alarm lamp flashes 15 minutes and then start it. The network facts sites will be printed.
When concerning the printout, find out which the ‘connection’ indicates ‘Active’ and that the SSID- Service Set Identifier shows the proper name of the wifi network.
This found the WPS setup process. Now proceed by installing the software to make the most out of your canon MX534.
In case you don’t have the installation CD that came with your product. Download the manuals and software.
In case, the wireless setup is still collapsing after following this guide then contact us for further assistance.
Canon MX534 Wireless Standard Connection Method-
Don’t forget to use the hyperlinks down below to find out the proper recommendation for the functioning method:
Canon MX534 Wireless Standard Connection Method: For Windows users only
- Inject the CD which comes with your printer and perform the setup. In case your ‘Setup CD-ROM’ does not auto perform, inject the CD- ROM and double click. In case, you do not offer the CD’s which comes with your product, make sure to get the manuals and software package.
- While the first screen displays. Tap on Next
- Choose the Wireless LAN Connection as a connection method.
- Choose access point connection as the wireless LAN connection method.
- Make sure that your printer is switched on; confirm the green power lamp is on.
- Now, software will search your network for any printer already connected. If it’s the first time you are setting up your printer, it will not be found. So make sure that it is selected.
- Now, the setup guide installation will start.
- When the following screen display holds down the wifi button (A) on the printer till the orange alarm lamp flashes two times and releases after the second flash.
- Confirm that the blue wifi lamp flashes quickly and the green power lamp is lit.
- Further messages will appear.
- When the connection to the access point is completed click Next.
- Once the further message screen appears select your region and language.
- If the following screen appears, select the program you want to install.
- When the further screen appears tap on yes to agree to the end-user license agreement.
- The software package will now put in. Depending on your community configuration, it may take a minute or so for that software package to detect the printer.
- 2 years ago
 Related Articles


Top Searches in Canon Printer
Why Won't My Canon Printer Print after Changing an Ink Cartridge?
May 23, 2026
How to Get Canon Printer Online on MAC?
Jun 4, 2026
How do I Fix a Canon Printer 1403 Error?
May 23, 2026
How do I Connect My Canon MG3050 Printer to WiFi?
May 23, 2026
How to Change Printer from Offline to Online Canon?
May 23, 2026
How to Connect Canon TS3122 Printer to WiFi?
May 23, 2026
How to Fix Canon Printer Carriage Jam Problem?
May 23, 2026
How to Fix Canon Printer Error Code 1660?
May 23, 2026
How to Resolve OKI Printer Error Code 990?
May 23, 2026
How do I Reset Canon MG2522 Printer?
May 23, 2026
Featured Articles
How to Get Canon Printer Online on MAC?
Jun 4, 2026
How to Fix Printer Printing Horizontal Black Lines?
May 23, 2026
How to Scan from HP Printer to Computer Windows 10?
Jun 13, 2026
Ricoh Printer Stuck on Processing
May 23, 2026
Brother Printer Only Printing in Black and White
May 23, 2026
How to Clean Kodak Printhead?
May 23, 2026
How to Install Lexmark Printer to Computer Without CD?
Jun 12, 2026
Why My Samsung Printer is Not Printing Clearly?
May 23, 2026
Top Questions
Why Won't My Canon Printer Print after Changing an Ink Cartridge?
Oct 7, 2020
How do I Fix a Canon Printer 1403 Error?
Dec 30, 2020
How do I Connect My Canon MG3050 Printer to WiFi?
Mar 30, 2021
How to Change Printer from Offline to Online Canon?
Nov 27, 2020
How to Turn My Ricoh Printer Online from Offline?
Feb 20, 2021
Brother MFC Printer Won't Print Black Despite Full Ink Cartridges
Nov 7, 2020
How to Fix Epson Printer Filter Failed or Stopped on Mac Error?
Dec 7, 2021
How do You Get a Lexmark Printer Back Online?
Sep 29, 2020