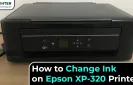
How do I Change the Ink Cartridges on Epson Printer?
Please let me know that how do i change the ink cartridges on Epson printer. I am facing some issues whle doing this. Help me.
 1 Ans
1 Ans- 4 years ago
Change the Ink Cartridges on Epson Printer:
In this article, we are going to discuss how to change the ink cartridges on the Epson printer.
Removing and Putting in Ink Cartridges
Make sure you have got your replacement cartridges handy before you start. you want to install new cartridges straightaway when removing the previous ones.
Caution:
Take off your previous cartridges within the printer till you are ready to replace them to avoid the print head nozzles from drying out. Don't open cartridge packages till you're able to install the ink. Cartridges are vacuum-packed to keep up responsibility.
Step 1: Turn on your product
- If an ink cartridge is used, you get a message on the LCD screen. Note that cartridges have to be compelled to get replaced, then choose OK and press the up arrow button.
- If you're exchanging a cartridge before you see a message on the LCD screen, press the up or down arrow button to pick Setup and press the OK button. Then choose Maintenance > Ink Cartridge(s) Replacement and press one in every of the begin buttons.
Step 2: Lift up the Scanner Unit.
Caution: Do not touch the flat white cable within the printer. Don't raise the scanner unit whereas the document cover is open.
Step 3: Squeeze the tab on the cartridge and raise the cartridge straight up to get rid of it.
Note: get rid of used cartridges fastidiously. don't take the used cartridge apart or try and refill it.
Warning: If ink gets on your skin, wash it totally with soap and water. If ink gets into your eyes, flush them straight away with water. If ink gets into your mouth, spit it out and see a doctor directly. Keep ink cartridges out of the reach of kids.
Step 4: Gently shake the new cartridge four or 5 times as shown. Then take away the cartridge from the package.
Caution:
Do not take away any labels or seals, or ink can leak. don't bite the inexperienced chip on the cartridge. Install the new cartridge straightaway when removing the previous one; if you are doing not, the print head could dry out and be unable to print.
Step 5: Remove solely the yellow tape.
Step 6: Insert the new cartridge into the holder and push it all the method down till it clicks into place.
Step 7: Press the Color button to create certain the cartridges are put in properly.
Caution: If you see a message that the Associate in Nursing cartridge is put in incorrectly, raise up the scanner unit, and press the cartridge down till it clicks into place.
Step 8: Close the scanner unit. the merchandise starts charging the ink. This takes a couple of minutes. Once you find a completion message on the LCD screen, ink replacement is finished.
Note: Don't put off the merchandise whereas charging otherwise you can waste ink.
Caution: If you take away the Associate in Nursing cartridge for later use, defend the ink provide space from dirt and dirt, and store it within the same surroundings because of the printer.
The valve within the ink provide port is intended to contain any excess ink, however, don't bit the ink provide port or encompassing space. invariably store ink cartridges with the label facing up; don't store cartridges inverted.
- 4 days ago
 Related Articles


Top Searches in Epson Printer
How to Fix Epson Printer Filter Failed or Stopped on Mac Error?
May 23, 2026
How to Fix Epson Printer Error 0XF3?
May 23, 2026
How to Fix Epson Printer Error Code 000041?
May 23, 2026
How to Fix Problem Regarding Color of Epson L380 Printer?
May 23, 2026
How do I Connect My Epson l3060 to WiFi?
May 23, 2026
Epson Printer Printing Double Letters
May 23, 2026
Fix Epson Workforce Pro WF-3720 Scanner Problem - Thin Vertical Stripes on Complete Scan
May 23, 2026
How to Find WPS Pin on Epson Printer?
May 23, 2026
How to Fix Epson Printer Error Code 0x98?
May 23, 2026
How to Reset the Epson Stylus C88?
May 23, 2026
Featured Articles
How to Get Canon Printer Online on MAC?
Jun 4, 2026
How to Fix Printer Printing Horizontal Black Lines?
May 23, 2026
How to Scan from HP Printer to Computer Windows 10?
Jun 13, 2026
Ricoh Printer Stuck on Processing
May 23, 2026
Brother Printer Only Printing in Black and White
Jun 21, 2026
How to Clean Kodak Printhead?
May 23, 2026
How to Install Lexmark Printer to Computer Without CD?
Jun 12, 2026
Why My Samsung Printer is Not Printing Clearly?
May 23, 2026
Top Questions
Why Won't My Canon Printer Print after Changing an Ink Cartridge?
Oct 7, 2020
How do I Fix a Canon Printer 1403 Error?
Dec 30, 2020
How do I Connect My Canon MG3050 Printer to WiFi?
Mar 30, 2021
How to Change Printer from Offline to Online Canon?
Nov 27, 2020
How to Turn My Ricoh Printer Online from Offline?
Feb 20, 2021
Brother MFC Printer Won't Print Black Despite Full Ink Cartridges
Nov 7, 2020
How to Fix Epson Printer Filter Failed or Stopped on Mac Error?
Dec 7, 2021
How do You Get a Lexmark Printer Back Online?
Sep 29, 2020