How to Connect Ricoh Printer to MAC?
Hello, how can i connect Ricoh printer to my MAC. Please give me any idea. I am not able to connect Ricoh printer with my Mac.
 1 Ans
1 Ans- 5 years ago
Connect Ricoh Printer to MAC
Did you recently buy a Ricoh printer and you do not know how to connect it to your Mac? To be able to connect Ricoh printer to Mac, you need to download the printer driver from the official website of the manufacturer. A number of menus will open up before you on the website.
Select your printer model and then click on the download link. After that, a set of OS will be displayed before you on the screen. Choose your version of Mac OS and select the download button. The download driver file will show up on the dock. Install the file on your system by carrying out the step-by-step procedure given below.
Steps to Install Ricoh Printer Drivers on Mac
Step 1: Connect the Ricoh printer to your Mac.
Step 2: Turn on your printer and computer system and wait for the initialization process to get completed.
Step 3: Open the admin account and log in.
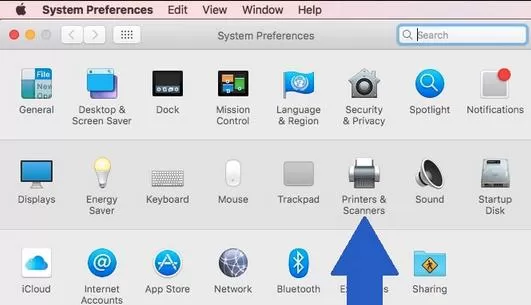
Step 4: Open System Preferences and search for the section of Print and Fax.
Step 5: Add your printer device in this section.
Step 6: Fill in the right instructions.
Step 7: Now, select the button of continue and install your printer device on your Mac system.
If you are looking for more of a detailed procedure, then take a look below.
Step 1: To connect the Ricoh printer on Mac, you will first have to go to the System Preferences and select the option of Printers and Scanners. Select the icon of Add printer, which is represented by a + sign.
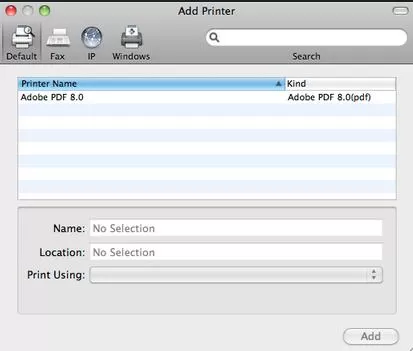
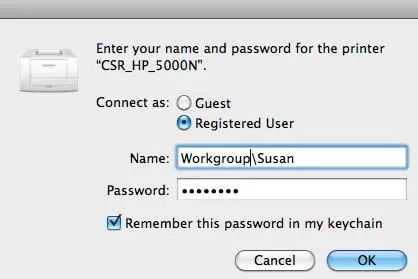
Step 2: After that, the Add Printer dialog box will open up before you. Go to the upper left corner of the box and select the IP icon. Now, you will have to enter the network address of your printer. After entering the network address, the PC will mention the Name, use field and location automatically.
Step 3: The user can also modify the default details if he or she wishes. After that, you need to select your printer's protocol.
Step 4: Then to connect the Ricoh printer to Mac, mention the printer options. You will get information about these options by looking at the user manual provided to you along with the printer. If you want, you can leave things in the default mode as well.
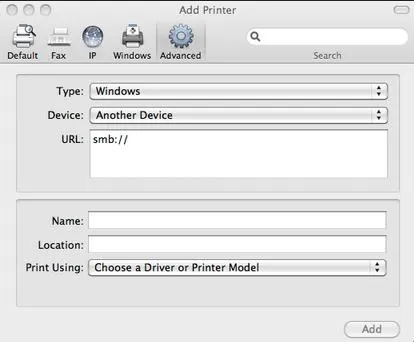
Step 5: Open the Add printer dialogue box and then go to the Advanced menu. After that, select the name of your printer driver. Select the option of Print With for choosing the driver. Now, choose the option of selecting printer software and search for your printer model. Then, click on the button of Ok to complete the installation of the Ricoh printer driver on Mac.
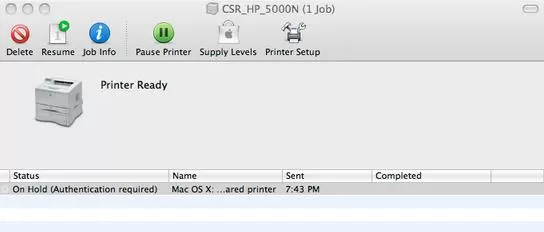
Step 6: Then, create the profile or preset configuration. Press the Ctrl+p keys to open the print dialogue box. Please make sure that you have selected the Ricoh printer. Now, open the orientation setting and click on the drop-down menu.
Step 7: Select the option of Job log from the drop-down menu. Select normal print job type. Tick the box of enable user code and then enter the password in the user code field.
Step 8: Now to connect the Ricoh printer to the Mac, move to the orientation settings and click on Printer Features. Make changes in the settings as per your need and then save the preset.
Step 9: Save the settings by clicking on the preset drop-down menu. Give the name of the profile and then select the button OK.
Step 10: After that, set profiles. Enable preset prior to printing a document.
So, these are the steps that you need to carry out to connect the Ricoh printer to the Mac.
More Important Pages for Ricoh Printers
How to Fix Error Code SC899 on Ricoh Printer?
How to Troubleshoot Ricoh Printer Stuck on Processing?
How to Clear a SC546 Error on a Ricoh?
How to Connect Ricoh Printer to WiFi Network?
- 2 years ago
 Related Articles


Top Searches in Ricoh Printer
How to Turn My Ricoh Printer Online from Offline?
May 23, 2026
How to Connect Ricoh Printer to MAC?
May 23, 2026
Ricoh Printer Stuck on Processing
May 23, 2026
How to Clear a SC546 Error on a Ricoh?
May 23, 2026
How to Install Ricoh Printer Drivers Without CD?
May 23, 2026
How do I Connect My Ricoh Printer to My Computer?
May 23, 2026
How Do I Reset a Ricoh Aficio CL3000e Printer to Factory Defaults?
May 23, 2026
How to Fix Ricoh MP C2050 Service Error Code SC542?
May 23, 2026
How to Install Ricoh Printer Driver on Windows 10?
May 23, 2026
How do You Change a Printer from Offline to Online?
May 23, 2026
Featured Articles
How to Get Canon Printer Online on MAC?
Jun 4, 2026
How to Fix Printer Printing Horizontal Black Lines?
May 23, 2026
How to Scan from HP Printer to Computer Windows 10?
Jun 13, 2026
Ricoh Printer Stuck on Processing
May 23, 2026
Brother Printer Only Printing in Black and White
Jun 21, 2026
How to Clean Kodak Printhead?
May 23, 2026
How to Install Lexmark Printer to Computer Without CD?
Jun 12, 2026
Why My Samsung Printer is Not Printing Clearly?
May 23, 2026
Top Questions
Why Won't My Canon Printer Print after Changing an Ink Cartridge?
Oct 7, 2020
How do I Fix a Canon Printer 1403 Error?
Dec 30, 2020
How do I Connect My Canon MG3050 Printer to WiFi?
Mar 30, 2021
How to Change Printer from Offline to Online Canon?
Nov 27, 2020
How to Turn My Ricoh Printer Online from Offline?
Feb 20, 2021
Brother MFC Printer Won't Print Black Despite Full Ink Cartridges
Nov 7, 2020
How to Fix Epson Printer Filter Failed or Stopped on Mac Error?
Dec 7, 2021
How do You Get a Lexmark Printer Back Online?
Sep 29, 2020