
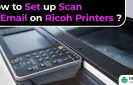
How to Set up Scan to Email on Ricoh Printers?
Please let me know how to set up scan to email on Ricoh printers. I am facing some issues while scanning email on Ricoh printer.Also Read:
- How do You Change a Printer from Offline to Online?
- How to Install Ricoh Printer Drivers Without CD?
- How to Clear a SC546 Error on a Ricoh?
Set up Scan to Email on Ricoh Printers:
Ricoh is a popular brand that produces a wide range of printers, including ones with scanning capabilities. Setting up scan to email on Ricoh printers can be a convenient way to send documents quickly and easily. We will guide you through the steps to set up scan-to-email on Ricoh printers.
Requirements
Before you start setting up scan to email on your Ricoh printer, make sure that you have the following information:
- SMTP server name and port number
- SMTP username and password
- Email address that you want to use for scan to email
You will need to have this information on hand before you start setting up scan to email on your Ricoh printer. The SMTP server name and port number can usually be obtained from your email provider, while the SMTP username and password are typically the same as the ones you use to log in to your email account. Make sure that you have the correct information before you begin the setup process.
Steps to Set up Scan to Email on Ricoh Printers
Here are the steps to set up scan to email on Ricoh printers:
Step 1: Turn on your Ricoh printer and connect it to your network.
Step 2: Open a web browser and type in the IP address of your printer to access the printer's web interface.
Step 3: Click on the "Login" button and enter the administrator username and password.
Step 4: Once you are logged in, navigate to the "Address Book" tab and click on the "New Destination" button.
Step 5: In the "New Destination" window, select "Email" as the destination type.
Step 6: Enter the email address that you want to use for scan to email in the "Email Address" field.
Step 7: In the "SMTP Server Name" field, enter the name of your SMTP server.
Step 8: In the "SMTP Port Number" field, enter the port number for your SMTP server.
Step 9: In the "SMTP Authentication" section, select "On" and enter your SMTP username and password.
Step 10: Click on the "Test" button to verify that the settings are correct. If the test is successful, click on the "OK" button to save the settings.
Once you have saved the settings, you can start scanning documents to email. Place the document on the scanner bed or in the document feeder and select "Scan to Email" as the destination. Select the email address that you set up in the previous steps and click on "Start" to start scanning.
Conclusion
Setting up scan to email on Ricoh printers can be a useful feature for any office or workplace. It allows you to easily scan and send documents to email addresses without the need for additional software or hardware.
By following the steps outlined in this guide, you can quickly and easily set up scan to email on your Ricoh printer, making it a valuable tool for your business.
Remember to have all the required information on hand before starting the setup process and to follow the instructions carefully. If you encounter any issues, don't hesitate to contact Ricoh customer support for further assistance.
- Steffan
 Brand: Ricoh Printer
- Last Update: 2 weeks ago
 Related Articles


Top Searches in Ricoh Printer
How to Turn My Ricoh Printer Online from Offline?
May 23, 2026
How to Connect Ricoh Printer to MAC?
May 23, 2026
Ricoh Printer Stuck on Processing
May 23, 2026
How to Clear a SC546 Error on a Ricoh?
May 23, 2026
How to Install Ricoh Printer Drivers Without CD?
May 23, 2026
How do I Connect My Ricoh Printer to My Computer?
May 23, 2026
How to Fix Ricoh MP C2050 Service Error Code SC542?
May 23, 2026
How to Install Ricoh Printer Driver on Windows 10?
May 23, 2026
How do You Change a Printer from Offline to Online?
May 23, 2026
Featured Articles
How to Get Canon Printer Online on MAC?
Jun 4, 2026
How to Fix Printer Printing Horizontal Black Lines?
May 23, 2026
How to Scan from HP Printer to Computer Windows 10?
Jun 13, 2026
Ricoh Printer Stuck on Processing
May 23, 2026
Brother Printer Only Printing in Black and White
Jun 21, 2026
How to Clean Kodak Printhead?
May 23, 2026
How to Install Lexmark Printer to Computer Without CD?
Jun 12, 2026
Why My Samsung Printer is Not Printing Clearly?
May 23, 2026
Top Questions
Why Won't My Canon Printer Print after Changing an Ink Cartridge?
May 23, 2026
How do I Fix a Canon Printer 1403 Error?
May 23, 2026
How do I Connect My Canon MG3050 Printer to WiFi?
May 23, 2026
How to Change Printer from Offline to Online Canon?
May 23, 2026
How to Turn My Ricoh Printer Online from Offline?
May 23, 2026
Brother MFC Printer Won't Print Black Despite Full Ink Cartridges
May 23, 2026
How to Fix Epson Printer Filter Failed or Stopped on Mac Error?
May 23, 2026
How do You Get a Lexmark Printer Back Online?
May 23, 2026