How to Scan a Paper on Canon MP480 Printer?
Hello, Please let me know that how to scan a paper on canon mp480 printer. I am facing some issue while scanning with canon mp480 printer. Help me.
 1 Ans
1 Ans- 4 years ago
Scan a Paper on Canon mp480 Printer:
This post will provide you the easiest and simplest guidelines on how to scan a Paper on Canon mp480 Printer. Here you can find the solution for both Windows and Mac computers.
Preparing to Scan Canon mp480 Printer:
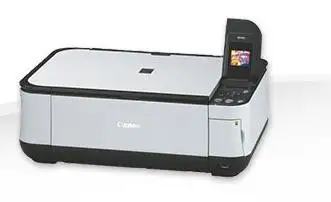
Step 1 : Make sure that your Canon printer can scan a paper on canon mp480 printer. In case your printer is an "all-in-one" model, it can scan.
Step 2 : Plug your printer to your computer. Almost Canon printers can scan will also can connect wirelessly through a touch-screen panel, but you may need to connect your printer to your computer through a USB cable.
Step 3 : Switch on your printer if needed. Press the printer's "On" button. In case, the printer won't turn on, confirm that it's connected to a working power source.
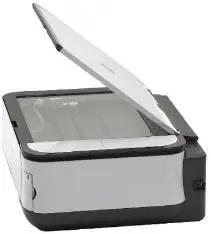
Step 4 : Start the scanner. Raise the scanner's lid so that you can see the glass bottom of the scanner.
Step 5 : In case, your Canon printer has an all-in-one paper feeder, insert your document into the tray instead. You may see the symbol on the tray to see how to put the paper.
Step 6 : Put your document face-down in the scanner. You must see markings next to the glass bottom; these generally show how the document should be oriented in the scanner.
Step 7 : Shut down the scanner lid. Confirm that it is firmly shut before you scan your document.
Scanning On Windows-
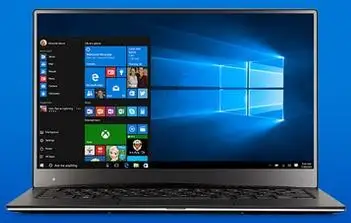
Step 1 : Start Window. Tap on Windows logo in the bottom-left corner of the screen.
Step 2 : Type windows fax and scan into Start. Now, search for Windows Fax and Scan app.
Step 3 : Click Windows Fax and Scan. It's at the top of the Start window. The Fax and Scan app will open.
Step 4 : Click New Scan. See upper-left side of the Fax and Scan window. Tap on it opens a new window.
Step 5 : Confirm that your scanner is correct. You must see the word ‘Canon’ and your printer's model number. If you see something else here, tap Change and choose your Canon printer.
Step 6 : Choose a type of document. Tap on the ‘Profile’ drop-down box, then select the type of document in the drop-down box.
Step 7 : Decide on your document's color. Tap on the ‘Color format’ drop-down box, then select either Color or Black and White.
Step 8 : Select a file type. Click the "File type" drop-down box, then click the file type that you want to use to store the scanned document on your computer.
Step 9 : Change any other options on the page. Depending on your scanner, you may have other options that you can modify prior to scanning your document.
Step 10 : Click Preview. It's at the bottom of the window. Now, you will find a preview of your document in the scanner.
Step 11 : Click Scan. It's at the bottom of window. Your document will begin scanning into your computer. After that see the scanned file later, follow the given below:
- Open Window
- Open File Explorer
- Tap on documents on the left side of the window.
- Double-click the Scanned Documents folder.
Scanning On Mac-
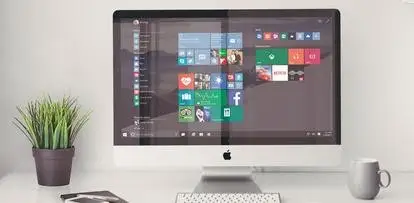
Step 1 : Start the Apple menu . Tap on the Apple logo in the top-left corner of the screen. A drop-down menu will come.
Step 2 : Tap on System Preferences. It's at the top of the drop-down menu.
Step 3 : Tap on Printers & Scanners. You will see the printer-shaped icon is on the right side of the System Preferences window.
Step 4 : Choose your Canon printer. Tap on ‘Canon’ option in the upper-left side of the window.
Step 5 : Click the Scan tab. It's at the top of the window.
Step 6 : Click Open Scanner. Following option is close to the top of the Scan tab window.
Step 7 : Tap on Show Details. It's in the lower-right side of the window.
Step 8 : Select a file type. Tap on the ‘Format’ drop-down box, then click a file type PDF or JPEG that you want to use to save your file.
Step 9 : Decide on a color. Tap on the ‘Kind’ drop-down box at the top of the page, then select a color option. Your scanner may have limited options here.
Step 10 : Select a storage location. Touch the ‘Save To’ drop-down box, then click the folder in which you want to save your scanned document.
Step 11 : Turn other options on the page. It’s based on the type of file that you're scanning, you may want to change the ‘Resolution’ value or the ‘Orientation’ value here.
Step 12 : Tap on Scan. It's in the bottom-right corner of the window. Your document will begin scanning into your computer. When it completes, you can find it in your selected save location.
I hope the following information will help you to scan a paper on Canon mp480 printer.
- 2 years ago
 Related Articles


Top Searches in Canon Printer
Why Won't My Canon Printer Print after Changing an Ink Cartridge?
May 23, 2026
How to Get Canon Printer Online on MAC?
Jun 4, 2026
How do I Fix a Canon Printer 1403 Error?
May 23, 2026
How do I Connect My Canon MG3050 Printer to WiFi?
May 23, 2026
How to Change Printer from Offline to Online Canon?
May 23, 2026
How to Connect Canon TS3122 Printer to WiFi?
May 23, 2026
How to Fix Canon Printer Carriage Jam Problem?
May 23, 2026
How to Fix Canon Printer Error Code 1660?
May 23, 2026
How to Resolve OKI Printer Error Code 990?
May 23, 2026
How do I Reset Canon MG2522 Printer?
May 23, 2026
Featured Articles
How to Get Canon Printer Online on MAC?
Jun 4, 2026
How to Fix Printer Printing Horizontal Black Lines?
May 23, 2026
How to Scan from HP Printer to Computer Windows 10?
Jun 13, 2026
Ricoh Printer Stuck on Processing
May 23, 2026
Brother Printer Only Printing in Black and White
Jun 21, 2026
How to Clean Kodak Printhead?
May 23, 2026
How to Install Lexmark Printer to Computer Without CD?
Jun 12, 2026
Why My Samsung Printer is Not Printing Clearly?
May 23, 2026
Top Questions
Why Won't My Canon Printer Print after Changing an Ink Cartridge?
Oct 7, 2020
How do I Fix a Canon Printer 1403 Error?
Dec 30, 2020
How do I Connect My Canon MG3050 Printer to WiFi?
Mar 30, 2021
How to Change Printer from Offline to Online Canon?
Nov 27, 2020
How to Turn My Ricoh Printer Online from Offline?
Feb 20, 2021
Brother MFC Printer Won't Print Black Despite Full Ink Cartridges
Nov 7, 2020
How to Fix Epson Printer Filter Failed or Stopped on Mac Error?
Dec 7, 2021
How do You Get a Lexmark Printer Back Online?
Sep 29, 2020