How to Setup Epson Expression Home XP 440 Wireless Printer?
Hello, Please let me know that how to setup Epson expression home xp 440 wireless printer. I bought this Epson expression home xp 440 printer but don't know how to setup it. Help me in this problem.
 1 Ans
1 Ans- 5 years ago
Setup Epson XP 440 Wireless Printer:
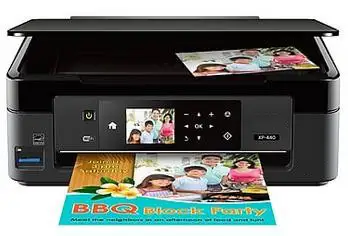
Packed with ultra-compact and convenient features, Epson XP 440 is a wireless all-in-one printer for everyday printing. It offers hi-res 2.7" color LCD to make the setup and navigation easy for the users. It has a built-in card slot to print borderless photos.
Ink cartridges are installed independently which means that the cartridge that runs out only requires replacement irrespective of other inks which are quite an affordable thing. With its compact and space-saving design, you can print virtually from anywhere with or without any network.
Setting the configuration for Epson XP 440 printers is no hard deal as the printers come with a simple to use and understand control panel that allows the user to set up or modify the existing wireless network settings for the printer machine.
To install and set up the product for wireless printing, follow down the given instructions step by step. To operate the printer from a system or monitor, you have to install the necessary software using the product CD. Further, the installer program guides you through complete network setup.
Point to Remember: In case the product breakdowns, this will cause a complete loss of data and configured settings. Epson is only responsible for backing up or recovering data and settings during or within the warranty period of product from the date of purchase. So, always keep your own backup or print out your network data and settings as a physical copy.
Quick Steps to Setup Epson Expression Home XP 440 Wireless Printer:
Step 1: At an initial point, you may require to press the home button on the printer if necessary.
Step 2: You will see a WiFi setup screen. Press the up and down arrow button to select the WiFi setup option and press the OK button to continue and proceed with further steps.
Step 3: The next screen shows a Wifi network screen that asks you to select Wifi when you have a Wifi network. Click OK to proceed.
Step 4: In the next screen, you have to connect with the Wifi network. You have choices between two options:
- Wi-fi Setup Wizard
- Wifi Protected Setup using Push Button
- Click OK to proceed.
Step 5: Use up and down arrow to select Wi-Fi Setup Wizard option. Then press the OK button.
Step 6: Use the up or down arrow button to select a desired wireless network and then press the OK button. You can manually enter the name of the wireless network if you don't see your network's name in the list.
Note: When you have to enter the wireless network name manually, select the option 'Other SSIDs' and then press the OK button. You have to enter your network name the same way as you will enter the password in the next step.
Step 7: For the selected wireless network (or network name), enter the password (or network password). While entering the password, you will see a keypad screen. Ensure the following points while typing a network password:
- Use the arrow buttons to highlight a particular character or a function button provided on the keypad. As the character is highlighted, press the OK button to select.
- For changing the case of the characters/letters, or select symbols, select AB12 (uppercase), ab12 (lowercase), or Symbol and press the OK button. Similarly, you can highlight a number and press the OK button to select it.
- For entering a space, select Space and press the OK button.
- To delete characters, numbers, or symbols, select the back arrow and press the OK button.
- As you finish typing the network password, select Done and press the OK button.
Step 8: Now you can confirm the Wifi settings for your printer by pressing the OK button.
Step 9: To check the network status, print the network report. Select Yes and then press OK button. Also, press the Start button. Else select No and then press the OK button.
Your printer will now show a WiFi icon with connection bars in it at the upper right corner of the LCD screen.
Note: If in case the Wi-Fi icon is not displayed on the LCD screen of printer, you may have connected the machine to a wrong network and you may have entered the password incorrectly. To troubleshoot the complete issue, repeat the discussed steps.
- 2 years ago
 Related Articles


Top Searches in Epson Printer
How to Fix Epson Printer Filter Failed or Stopped on Mac Error?
May 23, 2026
How to Fix Epson Printer Error 0XF3?
May 23, 2026
How to Fix Epson Printer Error Code 000041?
May 23, 2026
How to Fix Problem Regarding Color of Epson L380 Printer?
May 23, 2026
How do I Connect My Epson l3060 to WiFi?
May 23, 2026
Epson Printer Printing Double Letters
May 23, 2026
Fix Epson Workforce Pro WF-3720 Scanner Problem - Thin Vertical Stripes on Complete Scan
May 23, 2026
How to Find WPS Pin on Epson Printer?
May 23, 2026
How to Fix Epson Printer Error Code 0x98?
May 23, 2026
How to Reset the Epson Stylus C88?
May 23, 2026
Featured Articles
How to Get Canon Printer Online on MAC?
Jun 4, 2026
How to Fix Printer Printing Horizontal Black Lines?
May 23, 2026
How to Scan from HP Printer to Computer Windows 10?
Jun 13, 2026
Ricoh Printer Stuck on Processing
May 23, 2026
Brother Printer Only Printing in Black and White
Jun 21, 2026
How to Clean Kodak Printhead?
May 23, 2026
How to Install Lexmark Printer to Computer Without CD?
Jun 12, 2026
Why My Samsung Printer is Not Printing Clearly?
May 23, 2026
Top Questions
Why Won't My Canon Printer Print after Changing an Ink Cartridge?
Oct 7, 2020
How do I Fix a Canon Printer 1403 Error?
Dec 30, 2020
How do I Connect My Canon MG3050 Printer to WiFi?
Mar 30, 2021
How to Change Printer from Offline to Online Canon?
Nov 27, 2020
How to Turn My Ricoh Printer Online from Offline?
Feb 20, 2021
Brother MFC Printer Won't Print Black Despite Full Ink Cartridges
Nov 7, 2020
How to Fix Epson Printer Filter Failed or Stopped on Mac Error?
Dec 7, 2021
How do You Get a Lexmark Printer Back Online?
Sep 29, 2020