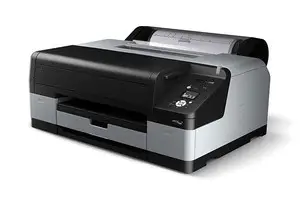
How to Setup Epson Stylus Pro 4900 Printer?
Hello, Please let me know that how to setup Epson Stylus Pro 4900 Printer.I bought this printer but don't know about it setup. Help me.
 1 Ans
1 Ans- 5 years ago
Setup Epson Stylus Pro 4900 Printer:
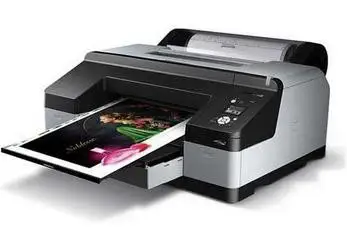
Producing exquisite professional quality prints with high speed is one desirable feature of Epson Stylus Pro 4900 Printer. Users who afford to buy this printer manage to print maximized color ranges in less time. The wider range of vibrant color delivers smooth and toned color gradations. To enjoy high-quality media and automatic printing features, users have to first setup Epson Stylus Pro 4900 Printer by following the discussed process given below. Let’s quickly begin.
1. Unpack and Connect Epson Stylus Pro 4900 Printer:
- Before you begin anything, you have to unpack the printer hardware and connect its power cord to the nearest power socket. Ensure that you have sufficient space for printer installation.
- Clean the tape from the front section of the paper tray.
- Carefully, lift the output tray to remove it.
- Now, clean all the packing and tape from the output tray. Remember, you are not damaging the lining of the tray.
- Lift the paper tray and top cover of the printer in order to remove all packing materials and tape present inside the hardware.
- Close the top cover after ensuring that no tape is left inside and outside the printer.
- Note: Keep the box and packaging for the future in case you require to ship the printer on some location.
- Place the paper tray and output tray on their actual position.
- Clean the tape present at the printer back and connect it to the source using power cable.
- Finally, press the power button on the printer machine. This will turn on your printer.
2. Setup Ink Cartridges:
- The next important thing is to install ink cartridges for the printer to function. When you are initially setting up the printer, always use the cartridges that came along with the printer.
- Open the left and right ink compartments by pressing them.
- Take out the ink cartridges from their packages shake them gently for about 15 seconds.
- Understand the slot location corresponding to each ink cartridge in the compartment.
Left Compartment-
- Green (GR)
- Light Light Black (LLK)
- Yellow (Y)
- Light Cyan (LC)
- Vivid Light Magenta (VLM)
- Orange (OR)
Right Compartment-
- Matte Black (MK)
- Vivid Magenta (VM)
- Light Black (LK)
- Cyan (C)
- Photo Black (PK)
- Hold the cartridge with the arrow pointing toward the printer and then push it into its respective slot until it clicks into place. Ensure that each of the cartridges is inserted at their right slot position.
- Close the ink cover after installing the 11 cartridges inside the machine slots. Once the cartridge setup is done, the printer starts charging the ink and the power light flashes.
- Note: Ink charging takes about 15 minutes to complete. So never power off the printer as it may critically damage the machine.
3. Install Printer Software
There are two ways to install printer software:
- Connect and print using your computer system via USB interface
- Connect to a network and print using a network printer.
Connecting to Your Computer System
Use a Hi-Speed USB 2.0 port and a shielded USB “AB” cable to connect Series A (computer) to Series B (printer).
Windows:
- Turn ON your computer and Epson Stylus Pro 4900 printer.
- Insert the software CD for printer installation.
- If the AutoPlay window appears, simply click on Run Setup.exe. In case you see the User Account Control screen, click Yes or Continue option.
- Click on Install button.
- Follow the on-screen instructions to complete the Epson software installation.
- A prompt window will appear asking you to connect the USB cable of printer to any USB port of your computer.
- Once the process is finished, click exit option and eject out the software CD.
Mac:
- Ensure that your computer and Epson printer are turned ON and Epson Stylus Pro 4900 is connected to the system.
- Insert Epson Stylus Pro 4900 software CD into its DVD drive.
- Double-click the Epson Stylus Pro 4900 icon.
- Follow the on-screen instructions to install the printer software on your Mac. Refer user guide for more help.
- While connecting to a network, click the Ethernet Utility icon and install the
- EpsonNet Configuration utility in Applications inside EpsonNet folder.
- Once done click on Exit button and eject out the CD. Restart the Mac to execute the installation changes.
Connecting to a Network Printer-
- Use an appropriate cable to connect your printer to a network. Use a standard RJ-45 “straight-through” network cable to connect to a network hub or switch. Or you can directly connect to your computer’s network interface using an RJ-45 crossover cable.
- Switch off the printer.
- Connect one end of the cable to your printer’s Ethernet port and the other end to the network switch/hub or your computer’s Ethernet port.
- Now, turn on the printer.
- Configure the printer settings once it is connected to your desired network.
- 2 years ago
 Related Articles


Top Searches in Epson Printer
How to Fix Epson Printer Filter Failed or Stopped on Mac Error?
May 23, 2026
How to Fix Epson Printer Error 0XF3?
May 23, 2026
How to Fix Epson Printer Error Code 000041?
May 23, 2026
How to Fix Problem Regarding Color of Epson L380 Printer?
May 23, 2026
How do I Connect My Epson l3060 to WiFi?
May 23, 2026
Epson Printer Printing Double Letters
May 23, 2026
Fix Epson Workforce Pro WF-3720 Scanner Problem - Thin Vertical Stripes on Complete Scan
May 23, 2026
How to Find WPS Pin on Epson Printer?
May 23, 2026
How to Fix Epson Printer Error Code 0x98?
May 23, 2026
How to Reset the Epson Stylus C88?
May 23, 2026
Featured Articles
How to Get Canon Printer Online on MAC?
Jun 4, 2026
How to Fix Printer Printing Horizontal Black Lines?
May 23, 2026
How to Scan from HP Printer to Computer Windows 10?
Jun 13, 2026
Ricoh Printer Stuck on Processing
May 23, 2026
Brother Printer Only Printing in Black and White
Jun 21, 2026
How to Clean Kodak Printhead?
May 23, 2026
How to Install Lexmark Printer to Computer Without CD?
Jun 12, 2026
Why My Samsung Printer is Not Printing Clearly?
May 23, 2026
Top Questions
Why Won't My Canon Printer Print after Changing an Ink Cartridge?
Oct 7, 2020
How do I Fix a Canon Printer 1403 Error?
Dec 30, 2020
How do I Connect My Canon MG3050 Printer to WiFi?
Mar 30, 2021
How to Change Printer from Offline to Online Canon?
Nov 27, 2020
How to Turn My Ricoh Printer Online from Offline?
Feb 20, 2021
Brother MFC Printer Won't Print Black Despite Full Ink Cartridges
Nov 7, 2020
How to Fix Epson Printer Filter Failed or Stopped on Mac Error?
Dec 7, 2021
How do You Get a Lexmark Printer Back Online?
Sep 29, 2020