
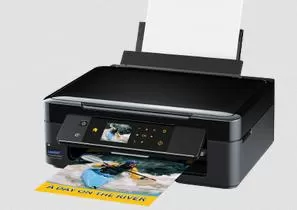
How to Setup Epson XP-410 Printer?
Setup Epson xp-410 Printer:
Epson XP 410 printer is special in several ways. One of the things that makes it different from other printers is that you have to replace the cartridge when the ink dries up.
Moreover, it is great at saving space with its incredible features. Here in this article, we are going to learn how to set up an Epson XP-410 printer.
Steps to setup Epson XP 410
Mentioned below are the steps that you need to carry out in order to setup the Epson XP 410 printer.
Step 1: Remove the packaging and take out your printer device by lifting it with handles.
Step 2: Remove the blue tapes that are on and within the machine. Remove them all to perform the setup process.
Step 3: Connect the power wire to the side of your printer device.
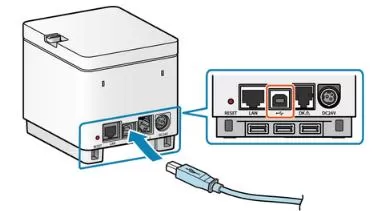
Step 4: Now, connect the power cord to the power source. Turn on your Epson printer by pressing the power button.
Step 5: Squeeze the release bar given below the control panel and then lower it to perform the setup.
Step 6: Extend the paper cassette and paper tray.
Step 7: Extend the width guide to extremes and load the sheets in the cassette.
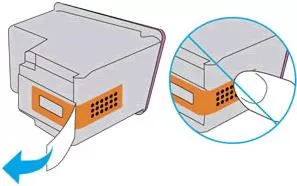
Step 8: Unwrap the cartridges prior to installing them in the slots.
Step 9: Remove the tape on the cartridges and install them in their designated slots.
Step 10: Press start to begin with the ink supply system and wait for around 4 minutes.
Step 11: Download your printer driver and then install it. Now, connect it to your computer system.
- SAM
 Brand: Epson Printer
- Last Update: 1 month ago
 Related Articles


Top Searches in Epson Printer
How to Fix Epson Printer Error 0XF3?
May 23, 2026
How to Fix Epson Printer Error Code 000041?
May 23, 2026
How do I Connect My Epson l3060 to WiFi?
May 23, 2026
Epson Printer Printing Double Letters
May 23, 2026
Fix Epson Workforce Pro WF-3720 Scanner Problem - Thin Vertical Stripes on Complete Scan
May 23, 2026
How to Find WPS Pin on Epson Printer?
May 23, 2026
How to Fix Epson Printer Error Code 0x98?
May 23, 2026
How to Reset the Epson Stylus C88?
May 23, 2026
Featured Articles
How to Get Canon Printer Online on MAC?
Jun 4, 2026
How to Fix Printer Printing Horizontal Black Lines?
May 23, 2026
How to Scan from HP Printer to Computer Windows 10?
Jun 13, 2026
Ricoh Printer Stuck on Processing
May 23, 2026
Brother Printer Only Printing in Black and White
Jun 21, 2026
How to Clean Kodak Printhead?
May 23, 2026
How to Install Lexmark Printer to Computer Without CD?
Jun 12, 2026
Why My Samsung Printer is Not Printing Clearly?
May 23, 2026
Top Questions
Why Won't My Canon Printer Print after Changing an Ink Cartridge?
May 23, 2026
How do I Fix a Canon Printer 1403 Error?
May 23, 2026
How do I Connect My Canon MG3050 Printer to WiFi?
May 23, 2026
How to Change Printer from Offline to Online Canon?
May 23, 2026
How to Turn My Ricoh Printer Online from Offline?
May 23, 2026
Brother MFC Printer Won't Print Black Despite Full Ink Cartridges
May 23, 2026
How to Fix Epson Printer Filter Failed or Stopped on Mac Error?
May 23, 2026
How do You Get a Lexmark Printer Back Online?
May 23, 2026