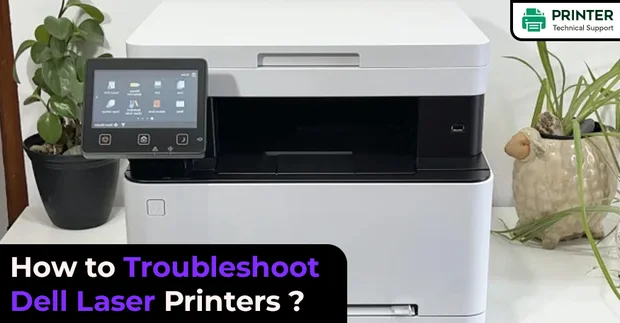
How to Troubleshoot Dell Laser Printers?
Dell 1720 Printer Driver:
Hey Christ, there is no need to get worried if your Dell laser printer installation is getting fail again-n-again. Just check out this one of the easiest method to install Dell Laser printer on Windows 7.
Install Dell 1720 Printer in a Simple Way -
- First of all, remove all protective materials that are placed near your printer. After this, you have to remove the orange color tape from the exterior of your printer.
- After removing the tape, open the outlet tray of your printer to lift the scanning unit cover.
- Next, take a power cable for connecting your printer to the power supply. Then press the “ ON” button. You can also select your language from the operation panel. To switch off your printer, just press the same “ON” button. Now, you have to open the scanning unit cover and then put ink cartridge holder into their appropriate location. Then close the scanning unit.
- Switch on Dell printer by pressing ON button. After switching on, wait for a couple of moments so that your Dell printer can properly adjust cartridge.
- Next, for setting up Wireless LAN, first, you have to press Setup button and then move to printer’s operational panel.
- From the operational panel, you have to select the option “Easy setup” and then hit OK. After this, you have to choose “Access point”.
- On the operational panel, you have to insert WEP key and then hit OK.
- Insert the Dell printer installation disc into your system and the automatically AutoPlay screen will display on our computer’s screen. Hit Run. If due to any reason, the AutoPlay screen does not open on your system then move to CD-ROM folder and then tap on “openMSetup4.exe” application.
- On the pop-up window, select your location and then hit Next. Choose the option “Easy Install” and then tap on Install button. Now you are redirected to next window where you have to select “Use printer on Network” option. Then hit Next.
- Now, you have to wait for some time because Dell printer installation process will take some time. Once the installation complete, Printer Detection screen will display on your system’s screen.
- From the list of displayed printers, just choose your Dell printer and proceed to next step.
- After some time, printer setup completion window will appear on the screen, just click on the Complete button. Once the setup gets complete, you will see Printer Application menu.
Try this process and feel free to share your dell 1720 printer driver problems or queries, if you have any.
- SAM
 Brand: Dell Printer
- Last Update: 3 weeks ago
 Related Articles

Top Searches in Dell Printer
Dell E515dw Can Print But Can't Scan
May 23, 2026
What Programming Language do 3D Printers Use?
May 23, 2026
How to Fix Dell Printer Error Code 009-654?
May 23, 2026
How to Fix Dell Printer Paper Jam?
Jun 4, 2026
How to Connect Dell E310dw Printer to WiFi?
May 23, 2026
How do I Connect My Dell B1165NFW Printer to WiFi?
May 23, 2026
Dell C1765 Black Cartridge Printing Light Gray
Jun 13, 2026
Featured Articles
How to Get Canon Printer Online on MAC?
Jun 4, 2026
How to Fix Printer Printing Horizontal Black Lines?
May 23, 2026
How to Scan from HP Printer to Computer Windows 10?
Jun 13, 2026
Ricoh Printer Stuck on Processing
May 23, 2026
Brother Printer Only Printing in Black and White
Jun 21, 2026
How to Clean Kodak Printhead?
May 23, 2026
How to Install Lexmark Printer to Computer Without CD?
Jun 12, 2026
Why My Samsung Printer is Not Printing Clearly?
May 23, 2026
Top Questions
Why Won't My Canon Printer Print after Changing an Ink Cartridge?
May 23, 2026
How do I Fix a Canon Printer 1403 Error?
May 23, 2026
How do I Connect My Canon MG3050 Printer to WiFi?
May 23, 2026
How to Change Printer from Offline to Online Canon?
May 23, 2026
How to Turn My Ricoh Printer Online from Offline?
May 23, 2026
Brother MFC Printer Won't Print Black Despite Full Ink Cartridges
May 23, 2026
How to Fix Epson Printer Filter Failed or Stopped on Mac Error?
May 23, 2026
How do You Get a Lexmark Printer Back Online?
May 23, 2026
Dell E515dw Can Print But Can't Scan
May 23, 2026
What Programming Language do 3D Printers Use?
May 23, 2026
How to Fix Dell Printer Error Code 009-654?
May 23, 2026
How to Fix Dell Printer Paper Jam?
June 4, 2026
How to Connect Dell E310dw Printer to WiFi?
May 23, 2026
How do I Connect My Dell B1165NFW Printer to WiFi?
May 23, 2026
Dell C1765 Black Cartridge Printing Light Gray
June 13, 2026
How to Get Canon Printer Online on MAC?
June 4, 2026
How to Fix Printer Printing Horizontal Black Lines?
May 23, 2026
How to Scan from HP Printer to Computer Windows 10?
June 13, 2026
Ricoh Printer Stuck on Processing
May 23, 2026
Brother Printer Only Printing in Black and White
June 21, 2026
How to Clean Kodak Printhead?
May 23, 2026
How to Install Lexmark Printer to Computer Without CD?
June 12, 2026
Why My Samsung Printer is Not Printing Clearly?
May 23, 2026
How do I Fix a Canon Printer 1403 Error?
May 23, 2026
How do I Connect My Canon MG3050 Printer to WiFi?
May 23, 2026
How to Change Printer from Offline to Online Canon?
May 23, 2026
How to Turn My Ricoh Printer Online from Offline?
May 23, 2026
How do You Get a Lexmark Printer Back Online?
May 23, 2026
Categories
48 Article
79 Article
13 Article
67 Article
182 Article
11 Article
30 Article
41 Article
11 Article
27 Article