How to Connect Brother Printer to Computer?
Hello, Please let me know how to connect Brother printer to computer. I am facing some issues with this while connecting to the printer to the computer. Help me.
 1 Ans
1 Ans- 4 years ago
Connect Brother Printer to Computer:
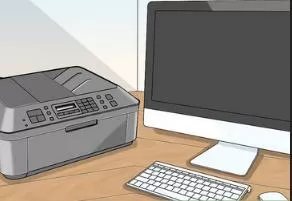
Brother printer is as simple to operate as it sounds to be. It is one of the top-notch names in the printers. It allows you to connect it to your computer or laptop both ways; i.e wired and wireless. In this article, we have shown you the steps to Connect Brother Printer to Computer in both ways.
Steps to Connect Brother Printer to Computer -
Here is your step by step guide to Connect Brother Printer to Computer if you have recently bought a new brother printer and want to make connections.
Step 1: Primarily, on your computer, download the printer driver and open the official Brother Printer website.
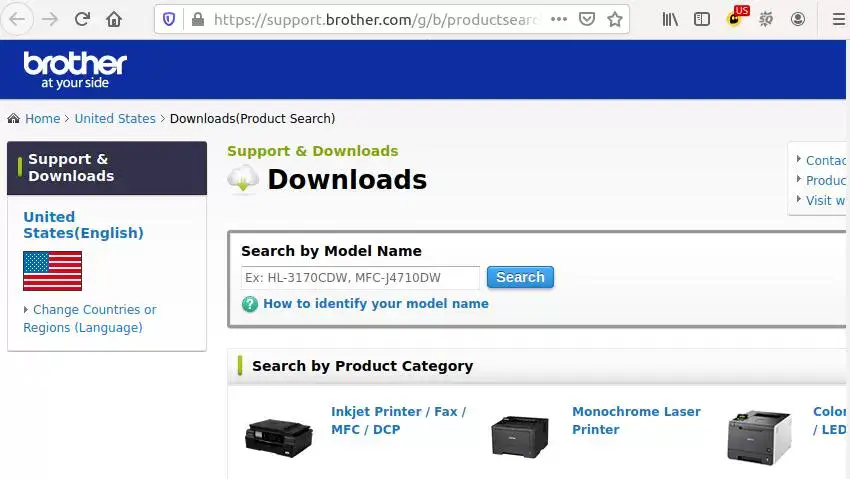
Step 2: Next, click on the downloads link.
Step 3: In the next screen, click on the Printer under the Select Product Group category option.
Step 4: To continue the process, click on the View option.
Step 5: Next, select your operating system and then select your language from the drop-down menu.
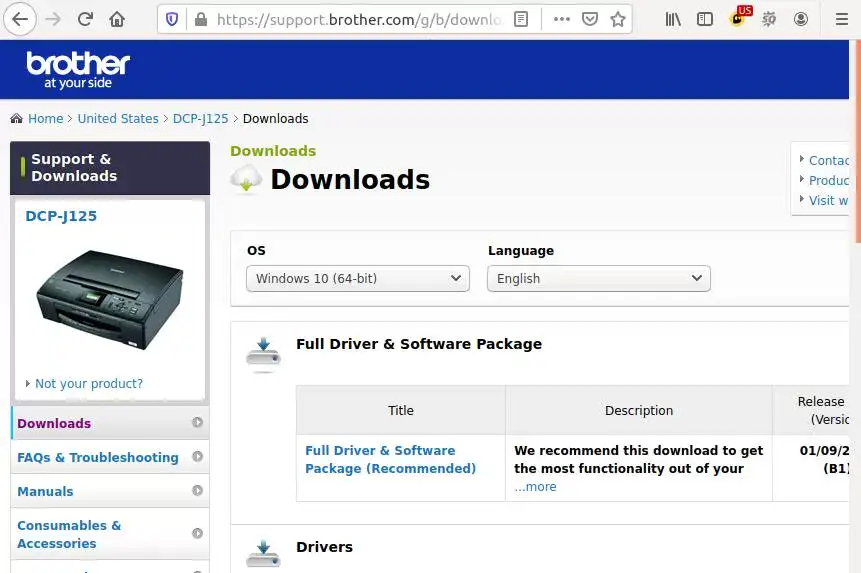
Step 6: Now wait for a few seconds until the driver download process is completed.
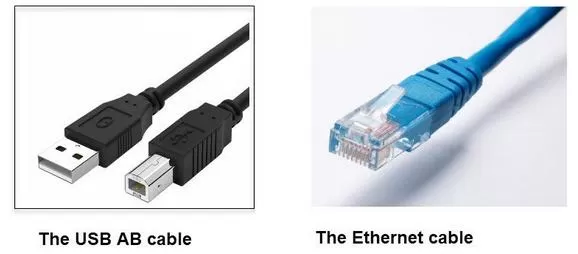
Step 7: Restart your computer and then plug your printer into your computer with the help of a USB cable.
Step 8: Lastly, turn your Brother printer on and then wait until your computer identifies the printer and creates a connection.
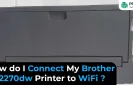
Steps to Connect Brother Wireless Printer to Laptop and Computer -
Brother printer is also equipped with wireless printing feature using which you can simply print any document without a wired connection just by connecting your printer to the wireless connection on the laptop or computer system.
Here is your step by step guide to Connect Brother Wireless Printer to Laptop and Computer.
Step 1: First of all, turn your laptop and router on.
Step 2: Next, turn your Brother Printer on and by using the control panel of the touch screen, navigate to the menu.
Step 3: Now, expand the Network section and then click on WLAN.
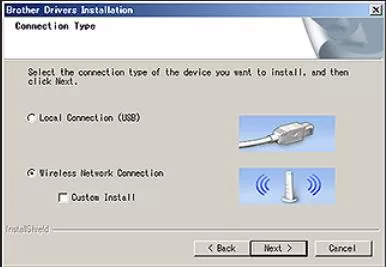
Step 4: Following that, click on the Setup Wizard.
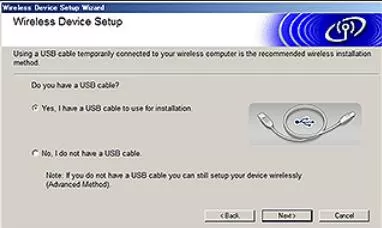
Step 5: Now press Enter when you see Network I/F switched to Wireless on the screen.
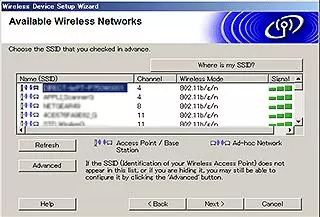
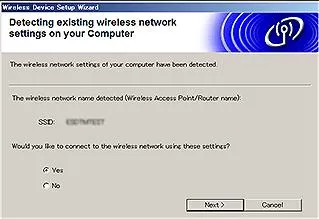
Step 6: In the next step, look for your network in the available list and then again click on Enter.
Step 7: Now you will be prompted to enter the password for your wireless network and then enter the Wi-Fi password into the username and password fields.
Step 8: Finally, your printer will be connected to the wireless network successfully. Check it by taking a printing test to check the connection status.
We hope the above article helped you to Connect Brother Printer to Laptop and continue with your print jobs.
- 2 years ago
 Top Related Question
Related Articles

Top Searches in Brother Printer
Brother MFC Printer Won't Print Black Despite Full Ink Cartridges
May 23, 2026
How to Connect Brother Wireless Printer to MAC?
May 23, 2026
Brother Printer Only Printing in Black and White
Jun 21, 2026
How to Fix Brother Printer Error 50?
May 23, 2026
How do I Get My Brother Printer to Print Double Sided?
May 23, 2026
How to Fix Brother Printer Printing Blank Pages?
May 23, 2026
Not Able to Print any PDF Files from Brother Printer
May 23, 2026
Brother Printer Connected But Not Printing
May 23, 2026
How Can I Make Homemade Printer Ink?
May 23, 2026
How to Fix Brother Printer Head Alignment Not Working?
May 23, 2026
Featured Articles
How to Get Canon Printer Online on MAC?
Jun 4, 2026
How to Fix Printer Printing Horizontal Black Lines?
May 23, 2026
How to Scan from HP Printer to Computer Windows 10?
Jun 13, 2026
Ricoh Printer Stuck on Processing
May 23, 2026
Brother Printer Only Printing in Black and White
Jun 21, 2026
How to Clean Kodak Printhead?
May 23, 2026
How to Install Lexmark Printer to Computer Without CD?
Jun 12, 2026
Why My Samsung Printer is Not Printing Clearly?
May 23, 2026
Top Questions
Why Won't My Canon Printer Print after Changing an Ink Cartridge?
Oct 7, 2020
How do I Fix a Canon Printer 1403 Error?
Dec 30, 2020
How do I Connect My Canon MG3050 Printer to WiFi?
Mar 30, 2021
How to Change Printer from Offline to Online Canon?
Nov 27, 2020
How to Turn My Ricoh Printer Online from Offline?
Feb 20, 2021
Brother MFC Printer Won't Print Black Despite Full Ink Cartridges
Nov 7, 2020
How to Fix Epson Printer Filter Failed or Stopped on Mac Error?
Dec 7, 2021
How do You Get a Lexmark Printer Back Online?
Sep 29, 2020