How do I Connect My Brother MFC J435w to WiFi?
Hello, Please let me know that how do I connect my Brother MFC j435w to wifi. I am not able to connect it. Help me.
 1 Ans
1 Ans- 5 years ago
Connect Brother MFC J435w to WiFi:
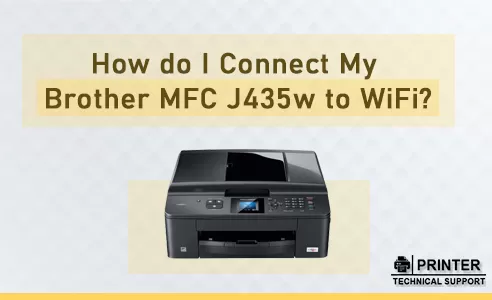
Brother’s multifunction all-in-one printer series are very suitable and cost-effective solutions for home-based users as well as for employees of small companies. Brother’s MFC-J425W, MFC-J430W, and MFC-J435W have identical characteristics. Take, for example, each of the printers mentioned above has wireless printing attributes.
What this denotes is that you can link up these printers to your current Wi-Fi network. However, prior to printing, you must set up the printer in alignment with the Wi-Fi connection. To connect your Brother MFC j435w to WiFi or your gadget via Wi-Fi network, make use of the following guidelines.
Be aware that if you had arranged your printer as per the Wi-Fi network in the past, you must launch it differently now before joining a new Wi-Fi network. To execute this, abide by the following steps.
In What Manner to Reorganize Brother mfc-j435w Wireless Setup?
- First, press Menu on the printer.
- Next, press the up or down arrows before selecting a network. After that, press OK.
- Initially, press the up or down arrows and select Network Reset. Subsequently, press OK.
- Afterward, press 1twice for approving the changes.
- Before you attach your Brother printer, ensure you obey the following prerequisites.
- You must have access to a wireless network.
- You must have knowledge of the name (SSID) of your Wi-Fi network.
- Now, you possess the password (network key) of your Wi-Fi network.
Also, keep in mind that in case your Wi-Fi router backs WPS or AOSS, then you can link the printer minus the password.
By What Method do We Launch Brother MFC J425W, J430w, J435W Printers Wireless Features Using their Control Panel (One-Push Configuration via WPS or AOSS)?
In case your Wi-Fi router promotes One-Push configuration via WPS or AOSS, then connect Brother MFC j435w to WiFi according to the steps mentioned below.
- To begin with, push the Menu button on your Brother printer.
- Next, force down the up and down arrows to select a network.
- Soon after, press OK to continue.
- Afterward, press the up or down arrow keys to pick out WPS / AOSS.
- After that, press OK.
- As soon as Enable WLAN appears on a computer screen, press OK to continue.
- The moment the LCD reveals Start WPS or AOSS, push WPS or AOSS button on your wireless router.
- The moment you push OK on the printer, it will join the network without human intervention.
- In case the connection does well, you will catch sight of a four-level signal indicator in the topmost right spot of the printer’s LCD screen.
- At that point, a wireless LAN report will get printed mechanically.
- At this moment, you have succeeded in completing the wireless arrangement of your Brother printer.
- Very soon, you get a view of the signal strength of the Wi-Fi network on a four-level indicator at the top-right spot of your printer’s LCD.13-At this point, go ahead and set up MFL-Pro Suite.
What Method to Follow to Establish Brother mfc-j435w Wireless Setup?
In case your Wi-Fi router does not back One-Push configuration via WPS or AOSS, then Brother printer mfc-j430w wifi setup via manual configuration.
- To begin with, press Menu on your Brother printer.
- Next, push the up and down arrows to select a network.
- After that, press OK to keep going.
- Later on, push up or down arrow keys to point out Setup Wizard and press OK.
- The moment, Enable WLAN comes into view, press OK to get going.
- This action will kick off the wireless setup wizard, and the printer will try to find existing wireless networks.
- As soon as the PC shows a catalog of obtainable networks, pick out your preferred network before pushing OK button.
- Write down the password (network key).
- Push Use right and left arrow keys to record lowercase, uppercase, and numbers.
- The printer will robotically set out to join the network.
- If the connection proves effective, you will notice a four-level signal indicator on the top right-hand corner of the printer’s LCD screen.
Simultaneously, a wireless LAN report will get printed. - At this time, put the MFL-Pro Suite in place.
Setting up MFL-Pro Suite-
- At this instant, place your printer’s installation disk into the CD-ROM drive. Now, the setup will commence without human intervention.
- In case the arrangement does not begin mechanically, open the CD-ROM drive in your PC, and double-click the installation application.
- As soon as the printer model and language screens come into sight, single out your printer model and desired language.
- The moment you reach the installation screen, click Install MFL-Pro Suite.
- Click Yes if you agree with the points in the license agreement.
- When User Account Control screen comes into view, click Yes.
- The moment On Connection Type screen shows up, opt for Wireless Network Connection before clicking Next.
- After the Firewall/Antivirus screen emerges, select Change the Firewall port settings. Carrying out this step will facilitate network connection ahead of the installation (Recommended).
- Later on, click Next. Be aware that in case you want to employ a third-party firewall, you must visit the firewall settings and permit this connection.
- If you would like to join the ports to your firewall physically, then you should utilize UDP port 54925 for network scanning and UDP port 54926 for network PC-Fax receiving.
- If even now, the user’s network connection failure persists, then it is advisable to include UDP port 137 and UDP port 161.
- In the beginning, select your printer from the catalog before clicking Next.
- Click Next to bring about the complete installation of MFL-Pro Suite.
A Useful Piece of Practical Advice-
If not a single technique works out, then it is best to employ the Reimage Repair tool, which scans the repositories to substitute corrupt and missing files. This tactic proves successful in almost all instances where the breakdown has its origin in system corruption. The Reimage Repair tool boosts your system for elevated performance levels.
- 2 years ago
 Top Related Question
Related Articles


Top Searches in Brother Printer
Brother MFC Printer Won't Print Black Despite Full Ink Cartridges
May 23, 2026
How to Connect Brother Wireless Printer to MAC?
May 23, 2026
Brother Printer Only Printing in Black and White
Jun 21, 2026
How to Fix Brother Printer Error 50?
May 23, 2026
How do I Get My Brother Printer to Print Double Sided?
May 23, 2026
How to Fix Brother Printer Printing Blank Pages?
May 23, 2026
Not Able to Print any PDF Files from Brother Printer
May 23, 2026
Brother Printer Connected But Not Printing
May 23, 2026
How Can I Make Homemade Printer Ink?
May 23, 2026
How to Fix Brother Printer Head Alignment Not Working?
May 23, 2026
Featured Articles
How to Get Canon Printer Online on MAC?
Jun 4, 2026
How to Fix Printer Printing Horizontal Black Lines?
May 23, 2026
How to Scan from HP Printer to Computer Windows 10?
Jun 13, 2026
Ricoh Printer Stuck on Processing
May 23, 2026
Brother Printer Only Printing in Black and White
Jun 21, 2026
How to Clean Kodak Printhead?
May 23, 2026
How to Install Lexmark Printer to Computer Without CD?
Jun 12, 2026
Why My Samsung Printer is Not Printing Clearly?
May 23, 2026
Top Questions
Why Won't My Canon Printer Print after Changing an Ink Cartridge?
Oct 7, 2020
How do I Fix a Canon Printer 1403 Error?
Dec 30, 2020
How do I Connect My Canon MG3050 Printer to WiFi?
Mar 30, 2021
How to Change Printer from Offline to Online Canon?
Nov 27, 2020
How to Turn My Ricoh Printer Online from Offline?
Feb 20, 2021
Brother MFC Printer Won't Print Black Despite Full Ink Cartridges
Nov 7, 2020
How to Fix Epson Printer Filter Failed or Stopped on Mac Error?
Dec 7, 2021
How do You Get a Lexmark Printer Back Online?
Sep 29, 2020