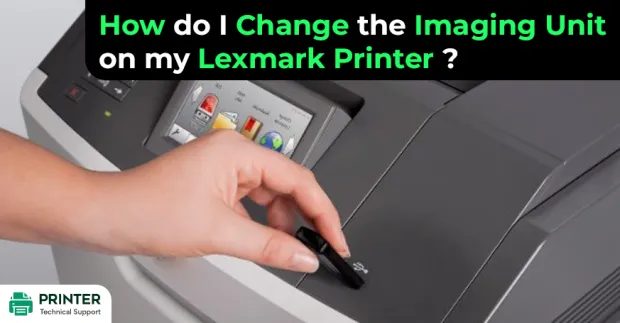
How do I Change the Imaging Unit on my Lexmark Printer?
Is there anyone who knows about how do i change the imaging unit on my Lexmark printer. I am facing some issues while printing. Help me.Also Read:
- What does the 32.01 Error Mean in My Lexmark Printer?
- How to Print a Device Statistics Report on Your Lexmark MX421?
- How to Fix a Cartridge Missing Error on a Lexmark Printer?
Change the Imaging Unit on My Lexmark Printer:
Do you wish to know how to change the imaging unit of your Lexmark printer? If yes, then you have come to the right place as here you will get to know all that you need to do to change the imaging unit of your printer. So, let's get started.

How to Replace the Imaging Unit on your Lexmark Printer?
Below are the steps that you need to follow to replace the imaging unit of your Lexmark printer.
Step 1: Lift the cover in the front and then pull the multipurpose feeder door down.
Step 2: Take out the toner cartridge from your printer using the handle.
Step 3: Lift the green handle and then take out the imaging unit from your printer.
Step 4: Take out the new imaging unit and shake it.
How to Reset the Imaging Unit of Lexmark Printer?
Steps to reset the PC counter.
Step 1: Please make sure that your printer is turned on and then open the front door.
Step 2: Press the cancel button and hold it. After a while, the printer is going to flash indicator lights to inform you that it is resetting the counter.
Step 3: Close your front door.
Step 4: After that, your printer will restart automatically.
How to Get Your Lexmark Printer to Recognize Refilled Ink Cartridges?

Below are the steps that you need to follow to make your Lexmark printer recognize refilled ink cartridges.
Step 1: Place the original working cartridge in your printer.
Step 2: After that, turn off your printer.
Step 3: Once you turn off your printer, open the lid and remove the toner cartridge.
Step 4: Then, you need to replace your old cartridge with your new Lexmark toner cartridge.
Step 5: Now, power your printer back on.
- Brend
 Brand: Lexmark Printer
- Last Update: 1 month ago
 Related Articles


Top Searches in Lexmark Printer
How do You Get a Lexmark Printer Back Online?
May 23, 2026
My Lexmark Printer is Printing Symbols
May 23, 2026
How do I Connect My Computer to My Lexmark Printer?
May 23, 2026
How to Fix Lexmark E260dn Error Lights?
May 23, 2026
Lexmark Printer not Feeding Paper
May 23, 2026
Lexmark Printer Not Communicating with MAC
May 23, 2026
How to Fix Lexmark Printer Printing Blank Pages?
May 23, 2026
Lexmark X364 Scan to PC Profile Blank
May 23, 2026
Lexmark X4650 Printer Wireless Problem
May 23, 2026
Featured Articles
How to Get Canon Printer Online on MAC?
Jun 4, 2026
How to Fix Printer Printing Horizontal Black Lines?
May 23, 2026
How to Scan from HP Printer to Computer Windows 10?
Jun 13, 2026
Ricoh Printer Stuck on Processing
May 23, 2026
Brother Printer Only Printing in Black and White
Jun 21, 2026
How to Clean Kodak Printhead?
May 23, 2026
How to Install Lexmark Printer to Computer Without CD?
Jun 12, 2026
Why My Samsung Printer is Not Printing Clearly?
May 23, 2026
Top Questions
Why Won't My Canon Printer Print after Changing an Ink Cartridge?
May 23, 2026
How do I Fix a Canon Printer 1403 Error?
May 23, 2026
How do I Connect My Canon MG3050 Printer to WiFi?
May 23, 2026
How to Change Printer from Offline to Online Canon?
May 23, 2026
How to Turn My Ricoh Printer Online from Offline?
May 23, 2026
Brother MFC Printer Won't Print Black Despite Full Ink Cartridges
May 23, 2026
How to Fix Epson Printer Filter Failed or Stopped on Mac Error?
May 23, 2026
How do You Get a Lexmark Printer Back Online?
May 23, 2026