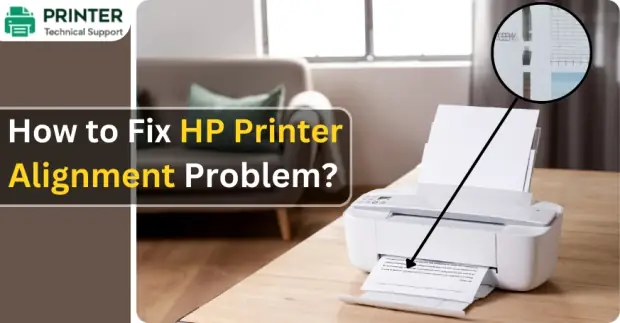
How to Fix HP Printer Alignment Problem?
In this article, we are providing you with all the crucial information regarding this issue. We will first see what are the possible reasons for this issue. Then we will give you multiple solutions that you can use on your HP printers.
Common Causes For HP Printer Alignment Problem
Your HP Printer is showing issues with printer alignment. There can be multiple reasons for this. Some of the most common reasons could be:
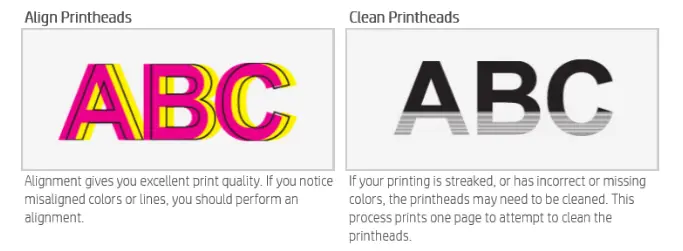
- Printhead Misalignment
- Paper Feed Issues
- Clogged or Dirty Printhead
- Driver or Software Problems
- Calibration Errors
- Mechanical components alignment issues
- Environmental Factors
- Incorrect Printer Settings
- Improper Installation or Movement
- Unfit ink cartridge placement
How to fix HP Printer Alignment?
Both software and hardware can cause the HP Printer Alignment issue, so you may require more than one method to find the perfect solution. Don’t hurry the process and cross-verify every method we give you here. The following is the order in which you should proceed.
Method 1: Automatic printer alignment
Method 2: Printer driver update
Method 3: Printer calibration
Method 4: Aligning through HP utility software
Method 5: Printhead cleaning
Method 6: Check the Ink cartridges on your printer
Below we have explained each of the above methods:
Method 1: Automatic Printer Alignment
Step 1: Go to your printer control panel screen and click on “Setup” or “Settings” option.
Step 2: Click on the “Tools” or “Maintainance” button.
Step 3: Select the “Align Ink Cartridges” or “Align Printer” option.
After following each step here, you can see if the issue is resolved. These options may or may not appear the same as in your printer. You can roughly follow these steps and keep choosing somewhat similar options.
Method 2: Printer Driver Update
Step 1: Go to your computer’s Start menu.
Step 2: Search for “device manager”.
Step 3: Click on the “printer” section.
Step 4: Search for your HP Printer in there.
Step 5: Right-click on the HP Printer and then select the “update driver”.
Step 6: Then click on the “Search automatically for updated driver software“ option.
By doing this a new driver version will be installed in your system which is most likely to resolve the printer alignment issue.
Method 3: Printer Calibration Method
Printer Calibration means adjusting your printer’s settings and color output to solve different technical and consistent output-related issues. Let’s see how you can do that on your HP Printer.
Step 1: Open “Printer Settings” either by the printer’s control panel or on your system.
Step 2: Navigate to the option “Maintain Your Printer” or any other similar option.
Step 3: Click on “Align Printhead” or “Align Cartridges”. This will print an alignment page.
Step 4: Place the printed page on the scanner glass and
Step 5: Scan it to complete the alignment process.
Method 4: Aligning through HP Utility Software
Follow the following steps to solve the alignment issue in your printer using utility software.
Step 1: Click on the start menu and search “HP Smart/ HP Printer Assitant/ HP Utility”.
Step 2: Select your printer from the options.
Step 3:. Now go to the “printer settings/ tools” tab.
Step 4: Choose the “Align Printheads/ Align Printer”.
Step 5: Select the on-screen instructions to complete the alignment process.
Method 5: Printhead Cleaning (By Using HP Smart App)
Step 1: First, load a white A4 paper into the tray.
Step 2: Open the HP Smart App on your system.
Step 3: Open the settings and then the "management option".
Step 4: Now click on “Print Quality Tools”.
Step 5: Select the “Clean Printhead/ Clean” option. Then a test page will be printed.
Step 6: Examine the print quality and look for any misalignment. If there is none then all good. If it shows some issues then choose to perform a second-level and third-level cleaning process.
NOTE: Have a gap of 30 minutes between two cleaning processes initiation.
Method 6: Check the Ink cartridges on your printer
The HP Printer Alignment issue can also be caused by incorrect installation of ink cartridges or low ink fillings. To solve that you can do these measures - check ink levels, clean ink cartridges, check fittings & proper installation, look for damage, etc.
NOTE: Do not touch the ink nozzles. It can increase the chances of clogs, ink system failure, or failed connection.
Common HP Printer Alignment Error Codes
| Error Codes | Solutions |
|---|---|
| Error Code 0x61011bed | Let's Fix this error |
| Error Code 0xC4EB827F | Let's Fix this error |
| Error Code 0xC19A0020 | Let's Fix this error |
| Alignment Failed Message | Let's Fix this error |
| Error Code 0x80004005 | Let's Fix this error |
| Error Code 0xC19A0013 | Let's Fix this error |
| Error Code 0xC18A0206 | Let's Fix this error |
| "Cartridge Alignment Failed" Message | Let's Fix this error |
| Error Code 0x6100004a | Let's Fix this error |
| Error Code 0x610000f6 | Let's Fix this error |
| Error code 0xC19A0023 | Let's Fix this error |
Also Read:
- How to Fix HP Printer E0, E1, E2, E3, E4, E5, E6 and E9 Error Codes
- How to Fix HP Printer Error Code 0xC4EB827F?
- Alignment Failed Message in HP Printer: Causes and Solutions
FAQ's
- Jhon
 Brand: Hp Printer
- Last Update: 1 month ago
 Related Articles


Top Searches in Hp Printer
How to Fix Printer Printing Horizontal Black Lines?
May 23, 2026
How to Scan from HP Printer to Computer Windows 10?
Jun 13, 2026
How do I Get My HP Printer to Print PDF Files?
May 23, 2026
How do I Connect HP Laserjet Pro M118dW to WiFi?
May 23, 2026
How to Fix PCL XL Error on HP Printer?
May 23, 2026
Why is My HP OfficeJet Pro 8610 Printer Offline?
May 23, 2026
How do I Get My HP Printer Back Online?
May 23, 2026
Featured Articles
How to Get Canon Printer Online on MAC?
Jun 4, 2026
How to Fix Printer Printing Horizontal Black Lines?
May 23, 2026
How to Scan from HP Printer to Computer Windows 10?
Jun 13, 2026
Ricoh Printer Stuck on Processing
May 23, 2026
Brother Printer Only Printing in Black and White
Jun 21, 2026
How to Clean Kodak Printhead?
May 23, 2026
How to Install Lexmark Printer to Computer Without CD?
Jun 12, 2026
Why My Samsung Printer is Not Printing Clearly?
May 23, 2026
Top Questions
Why Won't My Canon Printer Print after Changing an Ink Cartridge?
May 23, 2026
How do I Fix a Canon Printer 1403 Error?
May 23, 2026
How do I Connect My Canon MG3050 Printer to WiFi?
May 23, 2026
How to Change Printer from Offline to Online Canon?
May 23, 2026
How to Turn My Ricoh Printer Online from Offline?
May 23, 2026
Brother MFC Printer Won't Print Black Despite Full Ink Cartridges
May 23, 2026
How to Fix Epson Printer Filter Failed or Stopped on Mac Error?
May 23, 2026
How do You Get a Lexmark Printer Back Online?
May 23, 2026