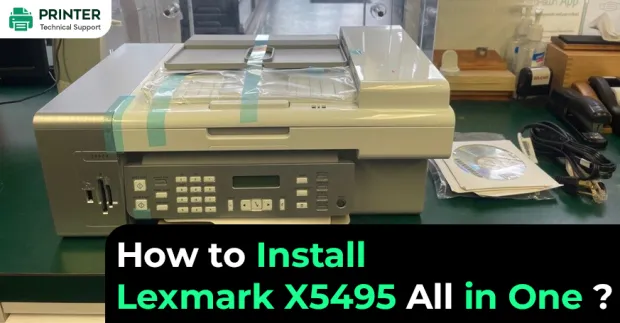
How to Install Lexmark X5495 All in One?
Recently I purchased Lexmark printer but I am facing some issues while installing Lexmark printer on the Windows 7 operating system. When I insert installation CD into my PC, my system doesn’t recognize it. I have also tried many ways to install Lexmark printer on my system but without success. Is there anyone who can suggest me how to install Lexmark x5495 all-in-one printer on the computer. One of my friend told me that Lexmark printer is not compatible with Windows 7, so please guide me.Also Read:
- How do I Connect My Lexmark X7170 Printer to My NETGEAR Wireless Router?
- Why Lexmark Printer is Not Communicating with Windows?
- Lexmark X4650 Printer Wireless Problem
Follow these steps to install Lexmark x5495 all in one printer -
- First of all, visit Lexmark official website and then move to “Drivers and Downloads” section. After this, locate Driver Finder option in “Drivers and Downloads” section and then type your Lexmark printer model in the search box.
- Choose your Lexmark printer from the displaying list and then click on “Download Driver”.
- From the drop-down menu, choose your operating system. Now your internet browser will redirect you to the downloads page. Tap on “Download Now” option and then choose to save the file at the desktop. Wait for some time so that downloading can finish. Once the downloading completes, move to next step.
- Now click on downloaded file and walk through the steps that are in the installer. Now the setup will start copying the file to your system’s hard drive, so you have to wait for a couple of minutes. Once this process gets finished, you will get a confirmation message.
- Lexmark printer has successfully installed on your system. Now, test your printer by clicking on File> Print in the word processor or web browser. Choose your Lexmark printer from the drop-down list and press OK to print.
- Erick
 Brand: Lexmark Printer
- Last Update: 2 weeks ago
 Related Articles


Top Searches in Lexmark Printer
How do You Get a Lexmark Printer Back Online?
May 23, 2026
My Lexmark Printer is Printing Symbols
May 23, 2026
How do I Connect My Computer to My Lexmark Printer?
May 23, 2026
How to Fix Lexmark E260dn Error Lights?
May 23, 2026
Lexmark Printer not Feeding Paper
May 23, 2026
Lexmark Printer Not Communicating with MAC
May 23, 2026
How to Fix Lexmark Printer Printing Blank Pages?
May 23, 2026
Lexmark X364 Scan to PC Profile Blank
May 23, 2026
Lexmark X4650 Printer Wireless Problem
May 23, 2026
Featured Articles
How to Get Canon Printer Online on MAC?
Jun 4, 2026
How to Fix Printer Printing Horizontal Black Lines?
May 23, 2026
How to Scan from HP Printer to Computer Windows 10?
Jun 13, 2026
Ricoh Printer Stuck on Processing
May 23, 2026
Brother Printer Only Printing in Black and White
Jun 21, 2026
How to Clean Kodak Printhead?
May 23, 2026
How to Install Lexmark Printer to Computer Without CD?
Jun 12, 2026
Why My Samsung Printer is Not Printing Clearly?
May 23, 2026
Top Questions
Why Won't My Canon Printer Print after Changing an Ink Cartridge?
May 23, 2026
How do I Fix a Canon Printer 1403 Error?
May 23, 2026
How do I Connect My Canon MG3050 Printer to WiFi?
May 23, 2026
How to Change Printer from Offline to Online Canon?
May 23, 2026
How to Turn My Ricoh Printer Online from Offline?
May 23, 2026
Brother MFC Printer Won't Print Black Despite Full Ink Cartridges
May 23, 2026
How to Fix Epson Printer Filter Failed or Stopped on Mac Error?
May 23, 2026
How do You Get a Lexmark Printer Back Online?
May 23, 2026
How do You Get a Lexmark Printer Back Online?
May 23, 2026
My Lexmark Printer is Printing Symbols
May 23, 2026
How do I Connect My Computer to My Lexmark Printer?
May 23, 2026
How to Install Lexmark Printer to Computer Without CD?
June 12, 2026
How to Fix Lexmark E260dn Error Lights?
May 23, 2026
Lexmark Printer not Feeding Paper
May 23, 2026
Lexmark Printer Not Communicating with MAC
May 23, 2026
How to Fix Lexmark Printer Printing Blank Pages?
May 23, 2026
Lexmark X364 Scan to PC Profile Blank
May 23, 2026
Lexmark X4650 Printer Wireless Problem
May 23, 2026
How to Get Canon Printer Online on MAC?
June 4, 2026
How to Fix Printer Printing Horizontal Black Lines?
May 23, 2026
How to Scan from HP Printer to Computer Windows 10?
June 13, 2026
Ricoh Printer Stuck on Processing
May 23, 2026
Brother Printer Only Printing in Black and White
June 21, 2026
How to Clean Kodak Printhead?
May 23, 2026
How to Install Lexmark Printer to Computer Without CD?
June 12, 2026
Why My Samsung Printer is Not Printing Clearly?
May 23, 2026
How do I Fix a Canon Printer 1403 Error?
May 23, 2026
How do I Connect My Canon MG3050 Printer to WiFi?
May 23, 2026
How to Change Printer from Offline to Online Canon?
May 23, 2026
How to Turn My Ricoh Printer Online from Offline?
May 23, 2026
How do You Get a Lexmark Printer Back Online?
May 23, 2026
Categories
48 Article
79 Article
13 Article
67 Article
182 Article
11 Article
30 Article
41 Article
11 Article
27 Article