How do I Connect HP Deskjet 2540 to WIFI?
Connect HP Deskjet 2540 to WIFI
The connection between your HP deskjet 25 and Wi-Fi takes place in four different parts the first one is preparing the printer device for the wireless network, the second one is turning on the wireless mode on your HP printer, the third one is installing the wireless software and the last one is connecting your HP Deskjet printer to your computer device.
In the first step, you have to set up the hardware, connect the printer to your PC, and then set up the software. In the second step, you have to run the installed wireless software and then enable the wireless mode. The third step is to install software, choose the USB option, and finish the process of wireless setup. Lastly, you have to manage the settings to connect the HP printer to your computer device.
How Do I Connect HP Deskjet 2540 to WIFI?
Part 1: Preparing Your Printer Device for a Wireless Setup
a) Set up Your Hardware: Remove your HP printer device from the box. Now, connect it to an electrical outlet and then install the ink tanks.
b) Connect Your PC: Take a print out of the alignment page. Connect your printer machine to Wi-Fi.
c) Set up the Software: Use the installation disc that came in the package for installing the HP Deskjet 2450 software on your system.
Part 2: Turn on the Wireless Mode on Your Printer Device
a) Run the Wireless Software that you just Installed: Start the software and carry out the instructions. The wizard will prepare your HP printer device and will forward you to the connect screen. After that, enable the wireless mode on your printer.
b) Enable the Wireless Mode: After turning on your printer, the first thing that you need to do is to check the Wi-Fi light. Check if the light is blinking or not. If the light is not blinking, then you will not be able to perform the software installation process.
- In case the Wi-Fi light is not blinking, then turn it on. Press the power button and keep on holding it. Simultaneously, press the Start Copy Black button two times in a row.
- After that, press the Cancel button three times in a row and don't leave the power button. Now, leave the power button and you will see that the light is blinking.
- After you see that the Wi-Fi light is blinking, go ahead with the software installation.
Part 3: Installing the Wireless Software
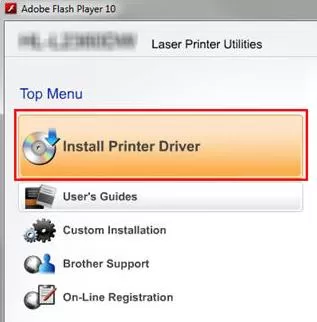
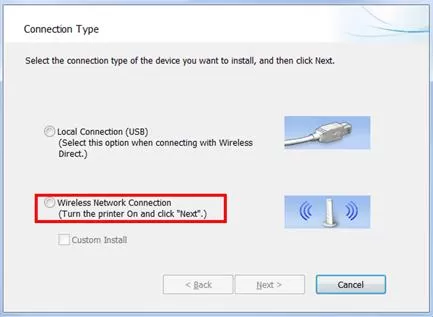
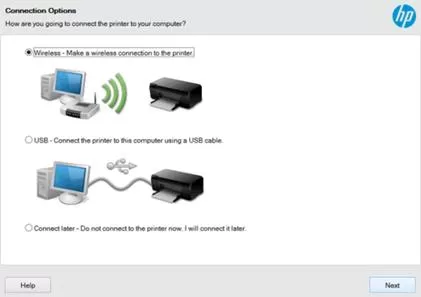
a) The Software Installation Process: Go to the Window of connect on your software installation wizard and then select the button of Continue. Now, the connection options will appear before you. You have to choose from USB or wireless.
b) Choose the USB Option: A new screen will open up before you. There, select the option of HP Auto Wireless Connect.
c) Complete the Wireless Setup Process: Carry out the instructions appearing on the screen and complete the wireless setup process using the home network.
Part 4: Connect your HP Deskjet Printer to Your Computer
Step 1: Connect printer and computer to the home network: If you are a Windows user, then connect your printer to a home network. Plus, connect your PC to the same home network.
Step 2: Go to the Control Panel of your PC and then select Devices and Printers. Search for the name of your printer in the list appearing before you and then select it.
Step 3: If you are using Mac, then connect Mac to the same wireless network. Select the Apple icon on your Mac and then navigate to System & Preferences. Select Devices to view devices around you that are ready for a wireless connection. Select your printer name to connect it to Mac wirelessly.
This is how you connect HP Deskjet printer to Wi-Fi.
Also Read:
- How to Connect HP Laserjet Printer to WiFi?
- How to Connect an HP Printer to a BT Hub?
- How to Troubleshooting HP Photosmart 7520 Printer Problems?
FAQ for Connect HP Deskjet 2540 to WIFI
- Mick
 Brand: Hp Printer
- Last Update: 1 month ago
 Related Articles


Top Searches in Hp Printer
How to Fix Printer Printing Horizontal Black Lines?
May 23, 2026
How to Scan from HP Printer to Computer Windows 10?
Jun 13, 2026
How do I Get My HP Printer to Print PDF Files?
May 23, 2026
How do I Connect HP Laserjet Pro M118dW to WiFi?
May 23, 2026
How to Fix PCL XL Error on HP Printer?
May 23, 2026
Why is My HP OfficeJet Pro 8610 Printer Offline?
May 23, 2026
How do I Get My HP Printer Back Online?
May 23, 2026
Featured Articles
How to Get Canon Printer Online on MAC?
Jun 4, 2026
How to Fix Printer Printing Horizontal Black Lines?
May 23, 2026
How to Scan from HP Printer to Computer Windows 10?
Jun 13, 2026
Ricoh Printer Stuck on Processing
May 23, 2026
Brother Printer Only Printing in Black and White
Jun 21, 2026
How to Clean Kodak Printhead?
May 23, 2026
How to Install Lexmark Printer to Computer Without CD?
Jun 12, 2026
Why My Samsung Printer is Not Printing Clearly?
May 23, 2026
Top Questions
Why Won't My Canon Printer Print after Changing an Ink Cartridge?
May 23, 2026
How do I Fix a Canon Printer 1403 Error?
May 23, 2026
How do I Connect My Canon MG3050 Printer to WiFi?
May 23, 2026
How to Change Printer from Offline to Online Canon?
May 23, 2026
How to Turn My Ricoh Printer Online from Offline?
May 23, 2026
Brother MFC Printer Won't Print Black Despite Full Ink Cartridges
May 23, 2026
How to Fix Epson Printer Filter Failed or Stopped on Mac Error?
May 23, 2026
How do You Get a Lexmark Printer Back Online?
May 23, 2026