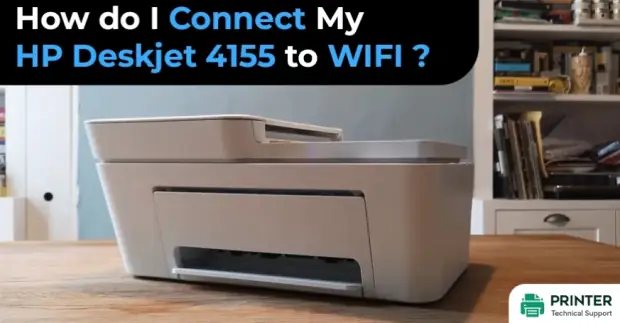
How do I Connect My HP Deskjet 4155 to WIFI?
Connect HP Deskjet 4155 to WIFI
Let's see how to connect the HP Deskjet 4155 to Wi-Fi with a touchscreen control panel. Firstly locate the WPS button on your router, you need to put the printer within the range of the wireless router, after launching the setup go to the wireless settings menu, choose the Wi-Fi protected setup option, press the push button, and start.
Press and hold the WPS button till the connection process starts, go to the printer, and check the status with the help of light blinking on the printer. Different coloured light blinkings represent different things. Make sure that your printer and computer are on the same Wi-Fi network.
How Do I Connect HP Deskjet 4155 to WiFi?
Complete the connectivity process by entering your router and printer in the WPS setup mode. When connected, install the software to connect your printer to the computer wirelessly.
Step 1: Please ensure that your router has a WPS button or a button with the WPS icon.
In case your router has a WPS button, then don't press it yet and move ahead with the next step.
In case your router does not have a WPS button, then contact the experts.
Step 2: Place the printer within the signal of the wireless router.
Step 3: Keep your printer in the WPS connection mode.
- If your printer has a touchscreen control panel: Launch the setup and then open the wireless settings menu. Choose the option of Wi-Fi protected setup and then click on the push button. After that, select Start.
- If your printer does not have a touchscreen control panel: Press the wireless button for at least 5 seconds and wait for the wireless light to flash. In case you are using a Tango printer, then press and hold the power button and wireless button simultaneously. Keep on pressing the buttons for 5 seconds and wait for the blue light to flash.
Step 4: After two minutes, press and hold the WPS button of your router for a few seconds or till the connection process starts.
Step 5: Come back to your printer and then see the status of the wireless light.
In case the blue bar or light quits blinking, then the printer will successfully get connected to the network. After that, move forward with the next step.
In case the light is turned off or still blinking, then that means there is no connection or the connection has failed. If such a thing happens, then move your printer close to the router and perform all the above steps again. In case the connection fails once again, then contact the experts.
Step 6: Please ensure that your computer system is on the same wireless network as your printer.
Step 7: Go to the main website of HP and follow the steps to install the program and set up a wireless connection.
Also Read:
- How to Fix HP Printer Not Printing Color Issue?
- How to Connect HP Envy 6055 to WiFi?
- How to Reset the HP OfficeJet Pro 8600 and 8610 Printers?
FAQ for Connect My HP Deskjet 4155 to WIFI
- Mick
 Brand: Hp Printer
- Last Update: 1 month ago
 Top Related Question
Related Articles


Top Searches in Hp Printer
How to Fix Printer Printing Horizontal Black Lines?
May 23, 2026
How to Scan from HP Printer to Computer Windows 10?
Jun 13, 2026
How do I Get My HP Printer to Print PDF Files?
May 23, 2026
How do I Connect HP Laserjet Pro M118dW to WiFi?
May 23, 2026
How to Fix PCL XL Error on HP Printer?
May 23, 2026
Why is My HP OfficeJet Pro 8610 Printer Offline?
May 23, 2026
How do I Get My HP Printer Back Online?
May 23, 2026
Featured Articles
How to Get Canon Printer Online on MAC?
Jun 4, 2026
How to Fix Printer Printing Horizontal Black Lines?
May 23, 2026
How to Scan from HP Printer to Computer Windows 10?
Jun 13, 2026
Ricoh Printer Stuck on Processing
May 23, 2026
Brother Printer Only Printing in Black and White
Jun 21, 2026
How to Clean Kodak Printhead?
May 23, 2026
How to Install Lexmark Printer to Computer Without CD?
Jun 12, 2026
Why My Samsung Printer is Not Printing Clearly?
May 23, 2026
Top Questions
Why Won't My Canon Printer Print after Changing an Ink Cartridge?
May 23, 2026
How do I Fix a Canon Printer 1403 Error?
May 23, 2026
How do I Connect My Canon MG3050 Printer to WiFi?
May 23, 2026
How to Change Printer from Offline to Online Canon?
May 23, 2026
How to Turn My Ricoh Printer Online from Offline?
May 23, 2026
Brother MFC Printer Won't Print Black Despite Full Ink Cartridges
May 23, 2026
How to Fix Epson Printer Filter Failed or Stopped on Mac Error?
May 23, 2026
How do You Get a Lexmark Printer Back Online?
May 23, 2026