How do I Connect My Kodak Verite Printer to My WiFi?
Hello, Please let me know that how do i connect my Kodak verite printer to my wifi. I bought this new Kodak verite printer but now i am trying to connect it with my home wifi then it's not working on that. Help me.
 1 Ans
1 Ans- 5 years ago
Connect Kodak Verite Printer to WiFi:
Now a days it’s a common thing because many printers do print wirelessly. Kodak, although makes different further priced models of all-in-one printers that perform by Bluetooth.
This makes it easier for multiple computers in a home or office to connect to and print from a printer than it was with the old mass of wires. But sometimes it’s hard to connect my kodak verite printer to my WiFi.
To Networking Your Kodak Printer Connect with a Wireless Network-
To connect your printer to an 802.11 wireless (Wi-Fi) network use the following procedures to connect kodak printer to wifi.
Before You Connect- You Need:
- A wireless router.
- To find out if your wireless router supports Wi-Fi Protected Setup (WPS).
Connect with a Wireless Network the Wi-Fi Setup Wizard:
You may use the Wi-Fi setup wizard on the printer to attach your wireless network. Follow the process that is suitable for your network setup.
Connecting to a WPS Wireless Router-
If your router supports Wi-Fi Protected Setup (WPS), use WPS Connect. WPS allow you set up your printer for a wireless network by pressing buttons or entering a PIN.
To connect to a network using WPS:
Step 1 : Press Home button.
Step 2 : Then touch Network Settings.
Step 3 : Touch Wi-Fi Setup Wizard.

Step 4 : Touch WPS Connect.
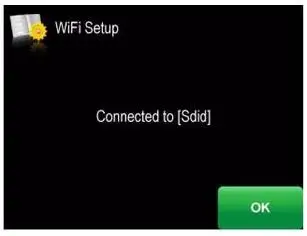
Step 5 : When the confirmation message appears, touch OK.

Step 6 : When the printer is successfully connected, the Wi-Fi connectivity LED stops blinking and remains lit.
Step 7 : The printer through a wireless connection is mentioned as the name of the printer plus a number.
If you have not yet installed the KODAK All-in-One Printer Software:
- Visit www.kodak.com/go/aiodownloads.
- Through results list, tap on link for KODAK All-in-One Printer Software for your computer's operating system.
- Follow the on-screen instructions.
Setting up an IP Address-
To configure your IP Address on the printer:
- Press the home button.
- Then touch Network Settings.
- Touch Advanced IP Address Setup.
- Touch Yes to continue.
Touch one of the following:
- Dynamic (DHCP)
- Manual (Static)
In case you choose Manual (Static), you are suggested to type an IP Address, a Subnet Mask, a Gateway Address, and a DNS Server address. Click OK after each entry. Take the help of LCD keyboard to enter each digit of the numbers. Contact with your Internet Service Provider or network administrator for more information.
Follow the Steps to Connect Kodak Verite Printer to WiFi:
Step 1 : Find out to make particular your computer has a wireless card set up. If your computer does not have an installed wireless device, you can use a "dongle" in a USB port, but these do not always work properly.
Sometimes, shutting down the computer will make it difficult to re-establish the wireless connection upon startup. In case, you have a desktop computer within PCI card slots, you can setup a Wi-Fi PCI card to create your computer access for wireless connections.
Step 2 : Link a USB cable from the Kodak printer to your computer. It is necessary for setting up wireless connections with Kodak printers. You may eliminate the USB cable when you have made the connection between the printer and your computer.
Step 3 : Overload the Kodak software disc into your computer and continue with the direction of installation of the software and drivers. This software will provide you to connect my Kodak verite printer to my wifi for wireless connections when your computer has wireless competencies . The software disc also contains applications for scanning images from your all-in-one printer.
Step 4 : Push the "Home" button on the printer. This will introduce options on the LCD screen of the printer. Use the arrow keys to scroll down to "Wi-Fi Setup Wizard. Select the "OK" button, then select "Wireless" from the menu options and click "OK" again. The printer will take you to a list of potential networks, where you can select the correct one.
Step 5 : Unplug the USB cable once your installation is complete. Turn off the printer, wait a few minutes, then turn it back on. Give it time to start up and then you should see the Wi-Fi light appear on the printer. If it flashes, it means there may be a problem with the connection. If it is a constant light, you have connected your printer properly.
- 2 years ago
 Related Articles


Top Searches in Kodak Printer
Featured Articles
How to Get Canon Printer Online on MAC?
Jul 30, 2026
How to Fix Printer Printing Horizontal Black Lines?
Jul 30, 2026
How to Scan from HP Printer to Computer Windows 10?
Jul 30, 2026
Ricoh Printer Stuck on Processing
Jul 30, 2026
Brother Printer Only Printing in Black and White
Jul 30, 2026
How to Clean Kodak Printhead?
Jul 30, 2026
How to Install Lexmark Printer to Computer Without CD?
Jul 30, 2026
Why My Samsung Printer is Not Printing Clearly?
Jul 30, 2026
Top Questions
Why Won't My Canon Printer Print after Changing an Ink Cartridge?
Oct 7, 2020
How do I Fix a Canon Printer 1403 Error?
Dec 30, 2020
How do I Connect My Canon MG3050 Printer to WiFi?
Mar 30, 2021
How to Change Printer from Offline to Online Canon?
Nov 27, 2020
How to Turn My Ricoh Printer Online from Offline?
Feb 20, 2021
Brother MFC Printer Won't Print Black Despite Full Ink Cartridges
Nov 7, 2020
How to Fix Epson Printer Filter Failed or Stopped on Mac Error?
Dec 7, 2021
How do You Get a Lexmark Printer Back Online?
Sep 29, 2020