How to Add a Printer to Windows 11?
Is there anyone who knows about how to add a printer to Windows 11. I have updated my windows 10 to windows 11, but now facing some issues while using printer. Help me
 1 Ans
1 Ans- 4 years ago
Add a Printer to Windows 11:
Buying a printer and setting it up is easy and doesn’t take more than 10-15 minutes. If you follow the user manual step by step or have done it before, it isn’t going to be a difficult task for you.
The steps are easy to proceed with but can become hard when it comes to Windows 11. You can add a printer both manually or automatically. To Add a Printer to Windows 11 either of the methods is valid and can be done on your own.
If you are one of the users who is struggling to Add a Printer to Windows 11, keep reading further to find out methods with which you can add it.
1. Add the Printer Automatically:
Windows takes a few minutes to find the printer in its network range and then the next couple of steps just involve adding it and making sure your system connects to it automatically.
- Connect your printer to the power source and switch it on.
- Click on the wifi button to allow it to get connected to the network.
- Make sure your system and printer have access to the same wifi network.
- From the Start menu search for Settings.
- Go to Bluetooth and Devices.
- Under it head to Printers and Scanners.
- Select the option of Add Device and let it take a few seconds to locate the Printer.
- Click on Add Device against the device you want to add.
- Wait for it to install.
- Now try taking out a print and the Printer will show up in the devices lined and available on the network.
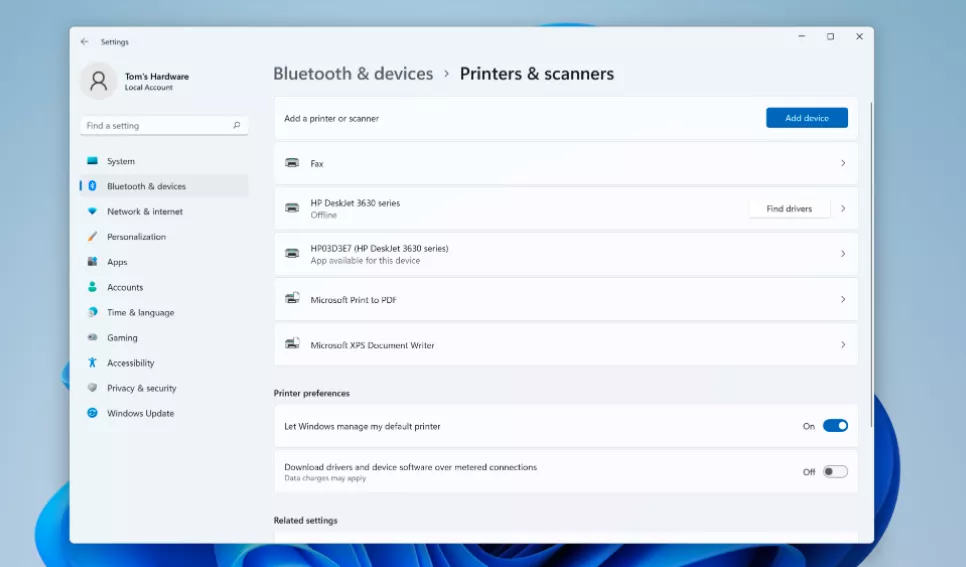
2. Add the Printer Manually:
.webp)
If the automatic option doesn’t work to Add a Printer to Windows 11 you can go ahead with the manual option as well.
- Go to Settings from the Start menu and then head to Bluetooth and Devices.
- Navigate to Printers and Scanners and then click on Add Device.
- After a few minutes, click on the option of Add Manually.
- Select the most appropriate option for yourself.
- Further an option to choose the Port will arise. Select the port attached to your Printer.
- Click on Next and move to the installation process. If your printer came with a CD to help you install the printer driver, use that. Otherwise, you can select Windows Update and allow it to install the Printer Driver.
- Now choose the Printer’s manufacturer from the list of options and proceed further.
- Click on Next.
- Type in the model of your printer and click on Next.
- It will take a few minutes for the Printer driver to get installed.
- If you want to keep the Printer and its network private click on the option of ‘Do not share this printer.
- A success page will be displayed and you can print out a test page.
With these two methods, you can easily Add a Printer to Windows 11.
- 2 years ago
 Related Articles


Top Searches in Hp Printer
How to Fix Printer Printing Horizontal Black Lines?
May 23, 2026
How to Scan from HP Printer to Computer Windows 10?
Jun 13, 2026
How Do You Open the Ink Cartridge Access Door of HP Printer?
May 23, 2026
How to Fix HP Envy 5000 Printer Saying Offline Issue?
May 23, 2026
How do I Get My HP Printer to Print PDF Files?
May 23, 2026
How to Fix HP Printer Cannot Connect to Web Services?
May 23, 2026
How do I Connect HP Laserjet Pro M118dW to WiFi?
May 23, 2026
How to Fix PCL XL Error on HP Printer?
May 23, 2026
Why is My HP OfficeJet Pro 8610 Printer Offline?
May 23, 2026
How do I Get My HP Printer Back Online?
May 23, 2026
Featured Articles
How to Get Canon Printer Online on MAC?
Jun 4, 2026
How to Fix Printer Printing Horizontal Black Lines?
May 23, 2026
How to Scan from HP Printer to Computer Windows 10?
Jun 13, 2026
Ricoh Printer Stuck on Processing
May 23, 2026
Brother Printer Only Printing in Black and White
Jun 21, 2026
How to Clean Kodak Printhead?
May 23, 2026
How to Install Lexmark Printer to Computer Without CD?
Jun 12, 2026
Why My Samsung Printer is Not Printing Clearly?
May 23, 2026
Top Questions
Why Won't My Canon Printer Print after Changing an Ink Cartridge?
Oct 7, 2020
How do I Fix a Canon Printer 1403 Error?
Dec 30, 2020
How do I Connect My Canon MG3050 Printer to WiFi?
Mar 30, 2021
How to Change Printer from Offline to Online Canon?
Nov 27, 2020
How to Turn My Ricoh Printer Online from Offline?
Feb 20, 2021
Brother MFC Printer Won't Print Black Despite Full Ink Cartridges
Nov 7, 2020
How to Fix Epson Printer Filter Failed or Stopped on Mac Error?
Dec 7, 2021
How do You Get a Lexmark Printer Back Online?
Sep 29, 2020