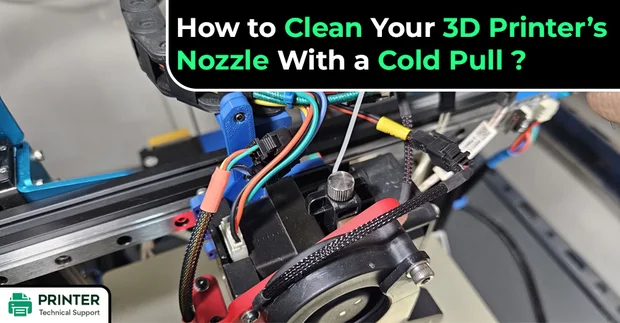
How to Clean Your 3D Printer’s Nozzle With a Cold Pull?
Clean Your 3D Printer’s Nozzle With a Cold Pull:
The massive temperature difference between two filaments can lead to deposition of PLA residue inside the 3D printer’s nozzle which calls for comprehending the complete mechanism to clean your 3D printer’s nozzle with a Cold Pull. With this quick guide, you can definitely find it a lot easier to run a Cold Pull.
Step 1 - Preparing the Cleaning Filament
The process to clean your 3D printer’s nozzle with a Cold Pull begins by taking a narrow nylon pipe and cutting it so as to make a 30-cm-long filament. Now snip it’s one end and make sure that the ends remain sharp to pass into the nozzle easily.

Step 2 - Making Filament Pathway
If your 3D printers come with Bowden Extruders then make way for filament inside the print head by eliminating the Bowden Tube present at the nozzle’s end.
Step 3 - Ensuring Reasonable Space Between the Bed and the Nozzle
Lift the nozzle away from the bed distant enough to let the filament extrude without any hurdles.
Step 4 - Eliminating the Old Filament
Remove the filament at the hot end by heating the nozzle to the appropriate extrusion temperature of the already loaded filament. Please remember this step is relevant for 3D printers with Bowden Extruders only.
Note: In case your printer comes with a direct drive extruder unloading the filament is a tad easy as you can extract the filament with the help of printer firmware.
Step 5 - Synchronizing the Nozzle Temperature
When the nozzle remains hot just continue increasing the extrusion temperature to a set standard declared by the filament manufacturer. Make sure this temperature is in the range of 250 to 280 degrees Celsius depending on the nozzle size and type of filament material.
Now insert the nylon’s pointed section into the hot end followed by pushing the Nylon filament through the nozzle.
Step 6 - Shaping up the Filament within the Nozzle
Allow the nozzle to cool down a bit by turning off the nozzle heater and applying a constant downward pressure on the nozzle until it stops oozing out. Ensure that the pressure is applied for another 20 seconds.
When precisely done this will lead to making the nylon compact and would simply facilitate filling the entire nozzle cavity with the molten material.
Step 7 - Allow the Filament to Solidify
Continue to wait a little to let the filament cool down to a temperature of 50 degrees Celsius as a consequence of which direct drive extruders will have a strong grip over the filament and the filament will not be in a situation to pull itself out.
Step 8 - Heating up the Nozzle Again
Start heating the nozzle until it reaches a temperature of 120 degrees Celsius and keep applying a constant upward pressure as if to pull itself out. So, this heating will enable the removal of debris stuck inside the nozzle till the time the nozzle happens to be in the Goldilocks Zone.
Note: When this process is accomplished successfully it will be marked by a popping sound which will also be corroborated by the visibility of the impeccable imprint of the nozzle cavity.
Step 9 - Repeating this Cold Pull to Eliminate the Residue Completely
You must repeat this process to clean your 3D printer’s nozzle with a Cold Pull until the filament residue is completely removed.
- SAM
 Brand: Hp Printer
- Last Update: 1 month ago
 Related Articles


Top Searches in Hp Printer
How to Fix Printer Printing Horizontal Black Lines?
May 23, 2026
How to Scan from HP Printer to Computer Windows 10?
Jun 13, 2026
How do I Get My HP Printer to Print PDF Files?
May 23, 2026
How do I Connect HP Laserjet Pro M118dW to WiFi?
May 23, 2026
How to Fix PCL XL Error on HP Printer?
May 23, 2026
Why is My HP OfficeJet Pro 8610 Printer Offline?
May 23, 2026
How do I Get My HP Printer Back Online?
May 23, 2026
Featured Articles
How to Get Canon Printer Online on MAC?
Jun 4, 2026
How to Fix Printer Printing Horizontal Black Lines?
May 23, 2026
How to Scan from HP Printer to Computer Windows 10?
Jun 13, 2026
Ricoh Printer Stuck on Processing
May 23, 2026
Brother Printer Only Printing in Black and White
Jun 21, 2026
How to Clean Kodak Printhead?
May 23, 2026
How to Install Lexmark Printer to Computer Without CD?
Jun 12, 2026
Why My Samsung Printer is Not Printing Clearly?
May 23, 2026
Top Questions
Why Won't My Canon Printer Print after Changing an Ink Cartridge?
May 23, 2026
How do I Fix a Canon Printer 1403 Error?
May 23, 2026
How do I Connect My Canon MG3050 Printer to WiFi?
May 23, 2026
How to Change Printer from Offline to Online Canon?
May 23, 2026
How to Turn My Ricoh Printer Online from Offline?
May 23, 2026
Brother MFC Printer Won't Print Black Despite Full Ink Cartridges
May 23, 2026
How to Fix Epson Printer Filter Failed or Stopped on Mac Error?
May 23, 2026
How do You Get a Lexmark Printer Back Online?
May 23, 2026