How to Fix HP Envy 4520 Printer Offline in Windows 10?
How to Fix HP Envy 4520 Printer Offline in Windows 10?
 1 Ans
1 Ans- 5 years ago
Fix HP Envy 4520 Printer Offline in Windows 10:
The HP Envy 4520 is an all-in-one inkjet printer which can both scan and copy. It operates with the help of Windows and Mac OS. When a particular colour in the multi-colour ink cartridge finishes, you must refill it.
When you work with a multi-function device like the HP Envy 4520, you get to be creative in your presentations and develop photographs that stand out. Also, you get to generate realistic hues and arrangements that can be linked up directly with your mobile gadget.
At this point, be aware that the HP Envy 4520 can operate with cartridges that have HP's initial electrical structure.
What to Do When the HP ENVY 4520 Printer doesn't Print?
Sometimes, to print with the HP ENVY 4520 Printer, you modify the network protocol or download the new HP Print and Scan Doctor but to no avail. If you can print only after switching the wireless on and off and have experimented with disabling the IPv6 and assigning a public DNS and are exasperated, then a Hard Reset is recommended.
If Your HP Envy 4520 Printer Offline in Windows 10, then:
- Switch the printer ON, if by this time, it is not turned on.
- Hang on till your printer starts.
- When the printer is switched on, remove the power cord from the back end of the printer.
- Disconnect the power cord from the power supply.
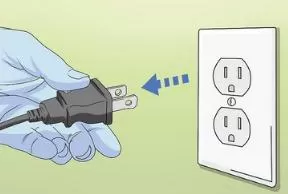
- Hang around for at least 60 seconds.
- Now, attach the power cord into the power supply. At this juncture, HP suggests that you link up the printer power cable straight to the main electricity supply.
- Re-join the power cable to the hindmost part of the printer.
- Switch on the printer, if it does not get automatically turned on.
- It is likely that the printer will undergo a warm-up phase.
- At this stage, the printer lights can flicker, and the carriage could move.
- Hold your fire till the warm-up period ends, and your printer lies inactive and quiet.
If You would Like to Assign Manual IP:
To assign Manual IP, go along with the steps given below:
- Print a Network configuration page using the printer's control panel.
- Try to find the IP address from the Network configuration page.
- Launch a web browser like Chrome or IE.
- Write down the IP address (revealed in the Network configuration page) inside the browser's address bar or URL bar before pushing the Enter button.
- Visit the Network tab.
- Click Networking (located in the left pane.)
- After that, click Network Address (IP).
- Soon after, click Manual IP Address and visit Suggest a Manual IP.
- Scroll down the screen and choose Manual DNS server.
- Type in the primary and secondary DNS server from the Network Configuration page in the Manual Preferred DNS server field.
- Afterward, click Apply.
- You can also look up the video link for step by step guidelines at - http://hp.care/2cqpl6p. At this point, be aware that the video is for Windows 8, but its instructions can be applied to different operating systems.
- You must type in the IP address in the browser's URL or the address bar to get hold of the printer page.
If the Recommendation Mentioned Above was not Helpful:
You may find the above advice of no use and discover choices like Network Summary, Network Identification, Network Protocols, Proxy Settings, the moment you click the Network tab.
Additionally, you can first visit the Network Address (IPv4) link and choose Manual IP. After clicking "Suggest a Manual IP Address," and altering the Manual DNS Server (as directed), if you still find the printer to be offline, then perform the steps given below:
- Download and proceed with HP Print and Scan Doctor.
- Set up HP Print and Scan Doctor on the computer joined to your printer.
- Ensure that your printer is switched on and linked to the computer.
- To start with, download HP Print and Scan Doctor, and later, go along with the on-screen prompts to set up and start the tool.
- On the Welcome screen, click start to inspect the inventory of existing printers.
- Choose your printer from the catalog before clicking Next.
- If you discover that your printer is not registered or there is a faulty connection, click My product is not listed. Alternatively, choose your connection type and stick to the on-screen instructions before clicking Retry.
- After that, click either Fix Printing or Fix Scanning.
- When you receive a prompt to install the printer software, obey the on-screen instructions.
- The software can put an end to several printer complications.
- To begin with, re-examine the listing of test results; later on, get to the bottom of the printer malfunctions.
- If you notice a checkmark, then that indicates the printer did well at the test.
- If you see a wrench, then that shows HP Print and Scan Doctor detected a fault and got it working again.
- If you notice an exclamation point, then that indicates that the printer flunked the test and needs user action, but the step was given a miss.
- If you see an X, then that shows that the user must carry out the on-screen instructions to eliminate the problem.
- 2 years ago
 Related Articles


Top Searches in Hp Printer
How to Fix Printer Printing Horizontal Black Lines?
May 23, 2026
How to Scan from HP Printer to Computer Windows 10?
Jun 13, 2026
How Do You Open the Ink Cartridge Access Door of HP Printer?
May 23, 2026
How to Fix HP Envy 5000 Printer Saying Offline Issue?
May 23, 2026
How do I Get My HP Printer to Print PDF Files?
May 23, 2026
How to Fix HP Printer Cannot Connect to Web Services?
May 23, 2026
How do I Connect HP Laserjet Pro M118dW to WiFi?
May 23, 2026
How to Fix PCL XL Error on HP Printer?
May 23, 2026
Why is My HP OfficeJet Pro 8610 Printer Offline?
May 23, 2026
How do I Get My HP Printer Back Online?
May 23, 2026
Featured Articles
How to Get Canon Printer Online on MAC?
Jun 4, 2026
How to Fix Printer Printing Horizontal Black Lines?
May 23, 2026
How to Scan from HP Printer to Computer Windows 10?
Jun 13, 2026
Ricoh Printer Stuck on Processing
May 23, 2026
Brother Printer Only Printing in Black and White
Jun 21, 2026
How to Clean Kodak Printhead?
May 23, 2026
How to Install Lexmark Printer to Computer Without CD?
Jun 12, 2026
Why My Samsung Printer is Not Printing Clearly?
May 23, 2026
Top Questions
Why Won't My Canon Printer Print after Changing an Ink Cartridge?
Oct 7, 2020
How do I Fix a Canon Printer 1403 Error?
Dec 30, 2020
How do I Connect My Canon MG3050 Printer to WiFi?
Mar 30, 2021
How to Change Printer from Offline to Online Canon?
Nov 27, 2020
How to Turn My Ricoh Printer Online from Offline?
Feb 20, 2021
Brother MFC Printer Won't Print Black Despite Full Ink Cartridges
Nov 7, 2020
How to Fix Epson Printer Filter Failed or Stopped on Mac Error?
Dec 7, 2021
How do You Get a Lexmark Printer Back Online?
Sep 29, 2020