How to Fix HP Printer Ink Error?
Please let me know that how to fix HP printer ink error. I am facing some issues while printing with HP printer. Help me.
 1 Ans
1 Ans- 4 years ago
Fix HP Printer Ink Error:
Is the HP printer ink error troubling you? If yes, then you have come to the right place as here you will get to know how to HP printer ink error.
Steps to Fix HP Printer Ink Error-
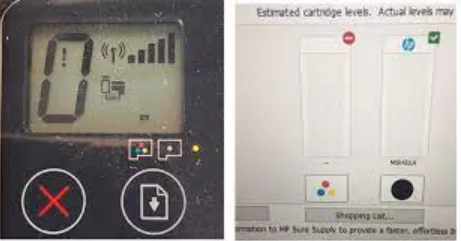
Below mentioned are the simple steps that you need to follow in order to fix the HP printer ink error.
Step 1: First of all, you need to acquire some important materials. These include soft material, lint-free cloth, and rubber swabs. Make sure that the materials you are using don't leave fibers. Also, you are going to need bottled, filtered, or distilled water.
Step 2: Now, power on your printer in case it is not turned on.
Step 3: Hold the handles of your printer and then take out the ink cartridge access door. Don't leave it till it clicks in the right place. Now, bring the carriage to the center of that device.
Step 4: Wait for your printer device to become silent and idle prior to continuing with the process.
Step 5: Remove the power wire from the side of your printer.
Step 6: If the USB cable is connected, then you must disconnect that as well.
Step 7: Move the lid upwards on the ink cartridge slot and then take out the ink cartridges.
Step 8: Remove the ink cartridge from the slot.
Step 9: Now, hold the ink cartridges. Make sure you hold it from the sides.
Step 10: Check if the cartridge is covered with dust or debris.
Step 11: Take a lint-free material or dry swab to clean the debris on the cartridge.
Step 12: Now, take a foam-rubber swab in filtered water. Squeeze out the excess water content.
Step 13: Make sure that you clean the copper-colored contacts. Now, wait for the ink cartridge to dry for 10 minutes.
Step 14: Now, take another cotton swab and moisten it with filtered water. Squeeze out the extra water.
Step 15: After that, clean the electrical contacts by using the cotton swabs kept inside the printer.
Step 16: Then, clean the contacts of your printer's carriage.
Step 17: Keep the carriage still for 10 minutes and then allow the clean section to dry up.
Step 18: Take an ink cartridge and hold it from the sides. Make sure that the nozzle side is towards the printer and then place it into the slot.
Step 19: Close the lid on your ink tank and then secure it in the right place.
Step 20: Insert the cartridge. Place the black and white ink cartridge on the right and the colored ink cartridge on the left.
Step 21: Repeat the same steps for the other ink cartridges.
Step 22: Close the ink cartridge access door.
Step 23: Now, connect the power cord to the side of your printer.
Step 24: Connect the USB wire once again in case you disconnected it.
Step 25: Power off your printer in case it does not get turned on automatically.
- 2 years ago
 Related Articles


Top Searches in Hp Printer
How to Fix Printer Printing Horizontal Black Lines?
May 23, 2026
How to Scan from HP Printer to Computer Windows 10?
Jun 13, 2026
How Do You Open the Ink Cartridge Access Door of HP Printer?
May 23, 2026
How to Fix HP Envy 5000 Printer Saying Offline Issue?
May 23, 2026
How do I Get My HP Printer to Print PDF Files?
May 23, 2026
How to Fix HP Printer Cannot Connect to Web Services?
May 23, 2026
How do I Connect HP Laserjet Pro M118dW to WiFi?
May 23, 2026
How to Fix PCL XL Error on HP Printer?
May 23, 2026
Why is My HP OfficeJet Pro 8610 Printer Offline?
May 23, 2026
How do I Get My HP Printer Back Online?
May 23, 2026
Featured Articles
How to Get Canon Printer Online on MAC?
Jun 4, 2026
How to Fix Printer Printing Horizontal Black Lines?
May 23, 2026
How to Scan from HP Printer to Computer Windows 10?
Jun 13, 2026
Ricoh Printer Stuck on Processing
May 23, 2026
Brother Printer Only Printing in Black and White
Jun 21, 2026
How to Clean Kodak Printhead?
May 23, 2026
How to Install Lexmark Printer to Computer Without CD?
Jun 12, 2026
Why My Samsung Printer is Not Printing Clearly?
May 23, 2026
Top Questions
Why Won't My Canon Printer Print after Changing an Ink Cartridge?
Oct 7, 2020
How do I Fix a Canon Printer 1403 Error?
Dec 30, 2020
How do I Connect My Canon MG3050 Printer to WiFi?
Mar 30, 2021
How to Change Printer from Offline to Online Canon?
Nov 27, 2020
How to Turn My Ricoh Printer Online from Offline?
Feb 20, 2021
Brother MFC Printer Won't Print Black Despite Full Ink Cartridges
Nov 7, 2020
How to Fix Epson Printer Filter Failed or Stopped on Mac Error?
Dec 7, 2021
How do You Get a Lexmark Printer Back Online?
Sep 29, 2020