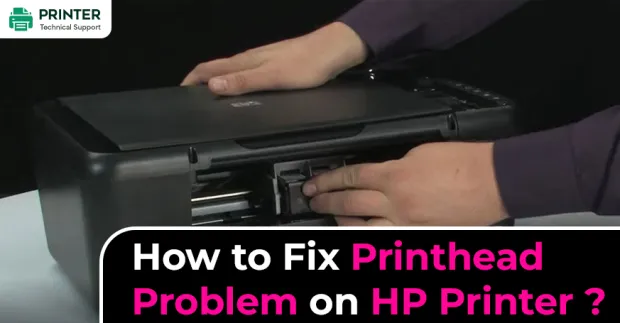
How to Fix Printhead Problem on HP Printer?
Hello, Please let me know that how to fix printhead problem on HP printer. I am facing this printhead problem on HP printer. So give me any idea to fix it.Also Read:
- How to Install the HP Designjet Printer Driver Windows 10?
- How Do I Fix an HP Printer Carriage Jam Problem?
- How to Install HP Deskjet 9800 Printer Driver?
Fix HP Printer Printhead Problem:
If you are looking forward to knowing how you can solve the printhead problem on HP printer, then these are some of the methods that you need to follow. These methods will help you in getting rid of the HP printhead problem.
Method 1: Clean, Remove, and Reinstall the HP Printhead
Step 1: Switch ON your HP printer by pressing the power button. In case, it is not turned on.
Step 2: Open your printer’s cartridge access door.
Step 3: Take out all the cartridges by keeping them on a piece of paper. Make sure that the ink opening area is pointed in the upwards direction. Don’t keep the cartridge outside the printer for more than 30 minutes. This can cause damage to both the printer as well as the cartridges.

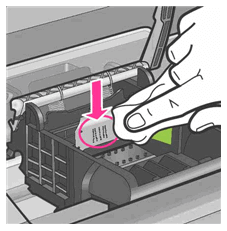
Step 4: Open the print carriage latch by lifting the handle.

Step 5: Lift it up for removing the printhead.

Step 6: Now, to solve the printhead problem on HP printer clean the printhead. There are three areas that you particularly need to clean and that are plastic ramps on each side of the ink nozzles, the electric contacts, and the corner of the ink nozzles.

These are some of the steps that you need to follow for cleaning the HP printhead.
- Assemble all the cleaning materials.
- Use a lint-free paper or cloth for cleaning. Eyeglass cleaning cloth or coffee filters will work well.
- Take a distilled water bottle.
- Clean up the electrical contact area by using a lint-free and a slightly wet cloth from top to bottom. Don’t clean the area beyond the electrical contacts and edges between the nozzles. Keep on cleaning until the new ink stops showing up on the cloth.
- Now to solve the Printhead problem on HP printer, wipe the debris and accumulated ink that is between the corners and contacts.
- Clean each side of the nozzles by using a lint-free, dampened, and fresh cloth. Clean the nozzles.
- Wipe all the areas again that you cleaned earlier by using a lint-free cloth prior to moving ahead with the next step.
Step 7: Clean the electrical contacts.
- Use lint-free and a slightly wet cloth. Dip the cloth in the distilled water.
- For cleaning the electrical contacts of the printer, wipe all the areas using the cloth.
Step 8: Please ensure that your latch handle is up. After that, install HP printhead.

Step 9: Shut the latch handle. Please ensure that you lower the latch handle prior to installing the ink cartridges. In case the latch handle is raised, then it can lead to printing problems.

Step 10: Look at the colored shaped icons on the guide and then move the cartridges in the vacant slot. Make sure, it snaps into place.

Step 11: Now, close the access door of the cartridge. This solves the printhead problem on HP printer
Method 2: Reset your HP Printer
Step 1: Turn ON your printer, in case it is not turned on.
Step 2: Wait for your printer to get silent and idle before you proceed.
Step 3: Now that the printer is on, remove the power wire from the side of the printer.
Step 4: Disconnect the power wire from the wall outlet.
Step 5: Wait for at least 60 seconds.
Step 6: Connect the power wire back to the power source. It is recommended that you should connect the HP printer to the power source directly.
Step 7: Now connect the power wire back to the side of the printer.
Step 8: Turn ON your printer if it does not get turned on automatically.
Step 9: Wait for it to get idle before you move forward with the next step. This will definitely solve the Printhead problem on hp printer.
Method 3: Replace the HP Printhead
In case the HP company replaces your printhead within the warranty period, then in that case you will get a new printhead assembly, set of ink cartridges, and cleaning materials. In case the printhead assembly is not covered under the warranty period, then you will have to purchase another one online.
Step 1: Go to the main site of HP parts store.
Step 2: Go to the option of find your parts by going to the text box of search by part number.
Step 3: Carefully follow the instructions that are given on the screen.
Finally, when you get the replacement printhead, go forward with replacing the printhead. In order to get detailed information on how to take out an old printhead and replace by installing a new one, go to replacing the printhead section on the site. This will solve your Printhead problem on HP printer.
Method 4: Servicing the HP Printer
Replace your HP product or service even if the issue remains after fulfilling all the steps that are given above, then you must get in touch with the HP customer team. By contacting the support team, you will definitely be able to solve the problem of Printhead problem on HP printer.
- Steven
 Brand: Hp Printer
- Last Update: 2 weeks ago
 Related Articles


Top Searches in Hp Printer
How to Fix Printer Printing Horizontal Black Lines?
May 23, 2026
How to Scan from HP Printer to Computer Windows 10?
Jun 13, 2026
How do I Get My HP Printer to Print PDF Files?
May 23, 2026
How do I Connect HP Laserjet Pro M118dW to WiFi?
May 23, 2026
How to Fix PCL XL Error on HP Printer?
May 23, 2026
Why is My HP OfficeJet Pro 8610 Printer Offline?
May 23, 2026
How do I Get My HP Printer Back Online?
May 23, 2026
Featured Articles
How to Get Canon Printer Online on MAC?
Jun 4, 2026
How to Fix Printer Printing Horizontal Black Lines?
May 23, 2026
How to Scan from HP Printer to Computer Windows 10?
Jun 13, 2026
Ricoh Printer Stuck on Processing
May 23, 2026
Brother Printer Only Printing in Black and White
Jun 21, 2026
How to Clean Kodak Printhead?
May 23, 2026
How to Install Lexmark Printer to Computer Without CD?
Jun 12, 2026
Why My Samsung Printer is Not Printing Clearly?
May 23, 2026
Top Questions
Why Won't My Canon Printer Print after Changing an Ink Cartridge?
May 23, 2026
How do I Fix a Canon Printer 1403 Error?
May 23, 2026
How do I Connect My Canon MG3050 Printer to WiFi?
May 23, 2026
How to Change Printer from Offline to Online Canon?
May 23, 2026
How to Turn My Ricoh Printer Online from Offline?
May 23, 2026
Brother MFC Printer Won't Print Black Despite Full Ink Cartridges
May 23, 2026
How to Fix Epson Printer Filter Failed or Stopped on Mac Error?
May 23, 2026
How do You Get a Lexmark Printer Back Online?
May 23, 2026