How to Fix Spool 32 Printer Error?
Is there anyone who knows how to fix spool 32 printer error? I am facing some spool 32 error on my printer. If anyone knows then help me.
 1 Ans
1 Ans- 3 years ago
Fix Spool 32 Printer Error:
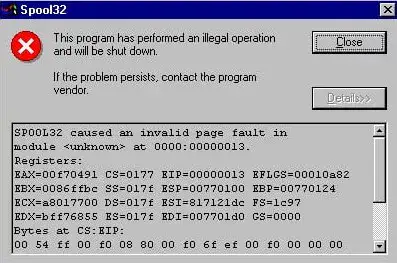
Spool 32 printer error may obstruct you from extracting printouts of some important documents in any urgent situation which may be a little annoying as you will have to fix this “spool 32 printer error” first and then continue printing your desired files.
It is observed that Spool 32 printer error happens because of the fact that your printer might be running with the support of the outdated driver which could be fixed by facilitating the printout using another printer driver along with some additional procedures.
Friends, I also had to do away with the “spool32 printer error” to secure some urgent printouts which I actually did primarily by extracting the printout using a different printer driver along with deleting all the temporary files on my system. So, here is presented a quick user guide that aims at fixing the “spool 32 printer error” instantly.
Stage 1 - Trying to Take the Print after Closing All the Files and Programs before Switching to the Subsequent Process
Step 1- Just begin by closing all the files and programs running on your computer.
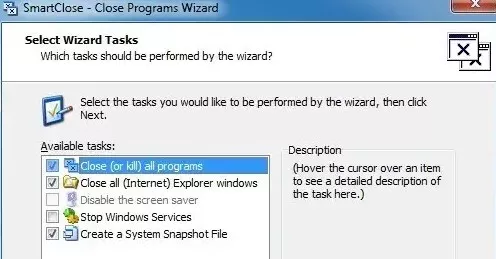
Step 2 - Now attempt to restart the computer.
Step 3 - After your computer reopens, just open the relevant document and try printing it again.
If you are successful then the “spool32 printer error” stands resolved else just endeavor to follow the subsequent stages.
Stage 2 - Resorting to Extract Printout Using Another Printer Driver
Step 1 - Just open the document that you wish to print followed by clicking on the “File” and then on the “Print” option.
Step 2 - Now you have to verify the printer driver name by clicking on the drop-down list. For this, just check if the “PCL6” is selected then you should click on the “PCL5” or on the “HP Postscript level 3 emulation” printer driver.
Step 3 - Now after executing the preceding steps just try extracting the print again. If you are able to get the print out then nothing to worry about the problem “spool32 printer error” is resolved, else follow the next stage enshrined here below.
Stage 3 - Just Make an Attempt to Delete the Temporary Files on Your PC
Step 1 - Just initiate by clicking on the “Start” button followed by clicking on the “Run” option.
Step 2 - In the dialogue box that consequently opens just type “%temp” and press the “OK” button.
Step 3 - Consequently, a new window with all the temporary files gets opened just continue selecting all the files followed by deleting all the said files.
Step 4 - Now, again make an attempt to extract the printout of the desired file. Here, you should be able to secure the printout else check the Microsoft Documentation for further resolution.
- 2 years ago
 Related Articles


Top Searches in Hp Printer
How to Fix Printer Printing Horizontal Black Lines?
May 23, 2026
How to Scan from HP Printer to Computer Windows 10?
Jun 13, 2026
How Do You Open the Ink Cartridge Access Door of HP Printer?
May 23, 2026
How to Fix HP Envy 5000 Printer Saying Offline Issue?
May 23, 2026
How do I Get My HP Printer to Print PDF Files?
May 23, 2026
How to Fix HP Printer Cannot Connect to Web Services?
May 23, 2026
How do I Connect HP Laserjet Pro M118dW to WiFi?
May 23, 2026
How to Fix PCL XL Error on HP Printer?
May 23, 2026
Why is My HP OfficeJet Pro 8610 Printer Offline?
May 23, 2026
How do I Get My HP Printer Back Online?
May 23, 2026
Featured Articles
How to Get Canon Printer Online on MAC?
Jun 4, 2026
How to Fix Printer Printing Horizontal Black Lines?
May 23, 2026
How to Scan from HP Printer to Computer Windows 10?
Jun 13, 2026
Ricoh Printer Stuck on Processing
May 23, 2026
Brother Printer Only Printing in Black and White
Jun 21, 2026
How to Clean Kodak Printhead?
May 23, 2026
How to Install Lexmark Printer to Computer Without CD?
Jun 12, 2026
Why My Samsung Printer is Not Printing Clearly?
May 23, 2026
Top Questions
Why Won't My Canon Printer Print after Changing an Ink Cartridge?
Oct 7, 2020
How do I Fix a Canon Printer 1403 Error?
Dec 30, 2020
How do I Connect My Canon MG3050 Printer to WiFi?
Mar 30, 2021
How to Change Printer from Offline to Online Canon?
Nov 27, 2020
How to Turn My Ricoh Printer Online from Offline?
Feb 20, 2021
Brother MFC Printer Won't Print Black Despite Full Ink Cartridges
Nov 7, 2020
How to Fix Epson Printer Filter Failed or Stopped on Mac Error?
Dec 7, 2021
How do You Get a Lexmark Printer Back Online?
Sep 29, 2020