How to Install Xerox Printer Driver on Windows 10?
Hello, Please let me know that how to install Xerox printer driver on Windows 10. I am facing some issue in this. Help me.
 1 Ans
1 Ans- 4 years ago
Install Xerox Printer Driver on Windows 10:
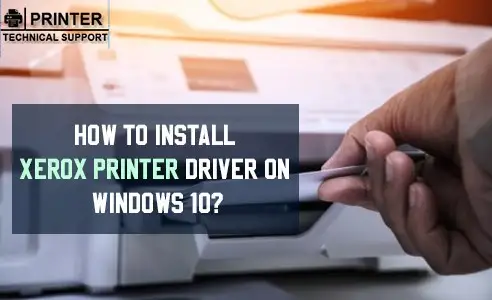
Have you bought a new Xerox printer for yourself and troubled with its installation process? Well, most of the users are not sure about their knowledge to install the printers correctly on their Windows system. If you are among those who is finding difficulty to install Xerox printer driver on Windows 10 then read this guide carefully.
This step by step guide covers all the instructions to install the hardware on Windows 10. These quick and accurate steps will help you rightly to install the drivers on your system. You just need to check the below discussed guidelines properly.
Generally, Xerox printer drivers are installed on the computer in order to simplify the printer application with a computer. Configuring, managing and using your printer through your PC is quite easy if you download and install the Xerox printer drivers by yourself. So, for this you must properly know how to install Xerox printer driver on Windows 10 system.
You can download the printer drivers from any of the trusted official websites. You just have to wait until the entire installation process gets over and then managing your printer will become easiest. Only action that is required is to connect your printer to the computer during installation phase. Moreover, you get the option to install any one of the drivers based upon your requirements.
View or read this blog: Printer driver is Unavailable
Quick Steps to Install Xerox Printer Driver on Windows 10-
- Firstly, check whether you have logged in as an administrator so as to give the required permissions before starting the installation process.
- Now, save the downloaded driver files into an easily accessible location.
- Check and verify to see if you have downloaded the correct driver.
- Add your specific printer to the list at the start of the installation procedure.
- Ensure to use the TCP/IP address or the hostname to add your printer.
- Search for the particular location where the Xerox printer files are saved.
- Select your printer model and give a suitable name for the printer.
- Optionally, you can choose to share your printer or not in the next window.
Detailed Steps to Install Xerox Printer Driver on Windows 10-
Step 1: Before setting up with the process to install Xerox printer driver on windows 10, check whether you are logged on to your computer as the administrator or guest user. This step is required to allow the necessary permissions as when required.
Step 2: Go to the location where you have downloaded the Xerox printer driver file. Usually, it is placed or saved in a location that is easily accessible.
Step 3: You have to choose among three different types of printers namely Xerox Class, Xerox V4, and the Xerox V3 Drivers. Each of these driver comes with its own advantages. You can select one as per your needs.
Step 4: Now, turn on your system and then click on the Windows button at the Desktop. Launch the Control Panel and click on the Devices and Printers option. If the option is not found then go to the search bar and type Printers. On the next screen, select the Add a Printer option.
Step 5: Further, you can choose the Add a Printer using a TCP/IP Address or Hostname option. Under the Device Type, tap over the TCP/IP Device option and continue to install Xerox printer driver on windows 10.
Step 6: Give a Hostname or the IP Address in the respective Type a Printer Hostname or IP Address window. The Port Name depicts the IP address or the Hostname. You can even modify the Port Name if required.
Step 7: If you are installing a class driver, then choose the Class Driver option. Thereafter, wait until the installation gets over. V3 drivers come with full functionality when printing from a computer, but they provide limited functionality while printing via modem. Whereas the Class Drivers offer limited functions only. It is recommended to go for V4 drivers.
Step 8: Go to the location where you have saved the driver file. Select that particular driver file and then click OK.
Step 9: Select any of the Printer Model from the Install the Printer Driver window. Now, in the Type a Printer a Printer Name screen, you have to enter the name for the printer. You can either make use of the existing name.
Step 10: Next, in the Printer Sharing window, you have to choose whether you want to share the printer or not. Click on the Next and then Finish button. So, this is how you can install Xerox printer driver on Windows 10 system.
- 2 years ago
 Related Articles


Top Searches in Kodak Printer
How to Fix Kodak Printer Paper Jam?
May 23, 2026
How to Clean Kodak Printhead?
May 23, 2026
How do I Get My Kodak Printer Back Online?
May 23, 2026
How to Fix Kodak Printer Printing Blank Pages?
May 23, 2026
How to Connect Kodak Printer to Computer?
May 23, 2026
Printer Printing Slow Over Network
May 23, 2026
How do I Connect My Kodak Verite Printer to My WiFi?
May 23, 2026
Kodak Printer not Printing Color
May 23, 2026
Why My Kodak Printer is Not Connecting to Dell Laptop Wirelessly?
Jun 4, 2026
How to Set up Kodak ESP 5250 Printer?
May 23, 2026
Featured Articles
How to Get Canon Printer Online on MAC?
Jun 4, 2026
How to Fix Printer Printing Horizontal Black Lines?
May 23, 2026
How to Scan from HP Printer to Computer Windows 10?
Jun 13, 2026
Ricoh Printer Stuck on Processing
May 23, 2026
Brother Printer Only Printing in Black and White
Jun 21, 2026
How to Clean Kodak Printhead?
May 23, 2026
How to Install Lexmark Printer to Computer Without CD?
Jun 12, 2026
Why My Samsung Printer is Not Printing Clearly?
May 23, 2026
Top Questions
Why Won't My Canon Printer Print after Changing an Ink Cartridge?
Oct 7, 2020
How do I Fix a Canon Printer 1403 Error?
Dec 30, 2020
How do I Connect My Canon MG3050 Printer to WiFi?
Mar 30, 2021
How to Change Printer from Offline to Online Canon?
Nov 27, 2020
How to Turn My Ricoh Printer Online from Offline?
Feb 20, 2021
Brother MFC Printer Won't Print Black Despite Full Ink Cartridges
Nov 7, 2020
How to Fix Epson Printer Filter Failed or Stopped on Mac Error?
Dec 7, 2021
How do You Get a Lexmark Printer Back Online?
Sep 29, 2020