How to Print in Black and White on a Mac?
Is there anyone who knows how to print in black and white on a Mac. I am facing some issues while printing. Help me.
 1 Ans
1 Ans- 3 years ago
Print in Black and White on a Mac:
The process for printing in black and white is the same as for printing in colour, although your Mac must be simply told to inform the printer to print in just black ink. The majority of programmes print in a similar manner.
Use These Fundamental Steps to Print in Black and White on a Mac
Step 1: Open the image and document you want to print.
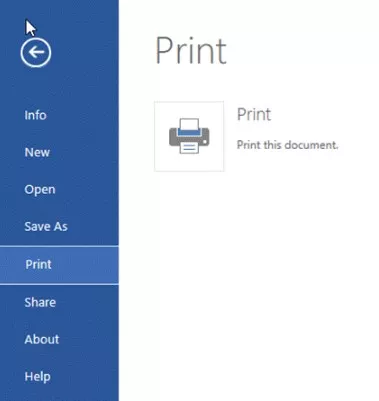
Step 2: Select File in the application's menu bar to begin.
Step 3: Discover Print in the drop-down menu, then chooses it.
Step 4: If you notice a Black & White box, check it, or go to the Presets menu and choose Black & White. You might occasionally need to switch between colour and black and white.
Step 5: Click Print after making any necessary adjustments to the quantity and page count.
How to Make a Preset for Black and White Printing
You can save yourself the trouble of tinkering with selections every time you launch the Print function if you plan to Print in Black and White on a Mac frequently. Save a preset, which keeps track of the specific settings you select. Whenever you print again in the future, you can easily access the preset.
Step 1: This is how a preset for black and white printing is saved.
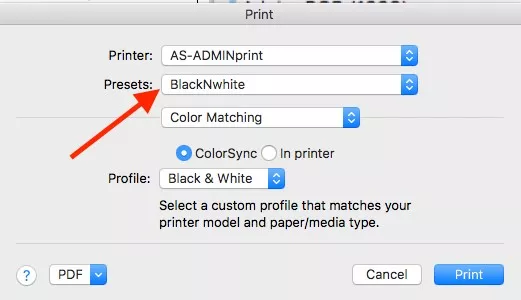
Step 2: Using the menu bar, select Black & White printing under File > Print.
Step 3: Choose the Presets drop-down option after choosing the settings you wish to use for black-and-white printing.
Step 4: Save Current Settings as Preset by clicking.
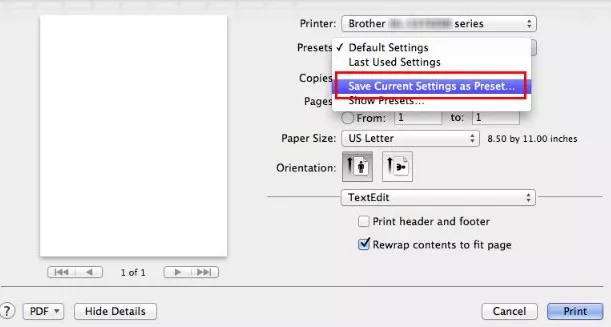
Step 5: Give your preset a name, like B&W, for instance. Choose between preserving the preset for All Printers or Only This Printer if the option is presented.
Step 6: Tap Ok
How to Fix Black and White Mac Printing Issues
You could not see the possibility of printing in black and white even if you have a printer that you're aware of as being able to print without colour. In that instance, deleting the printer using System Preferences and afterwards setting it up again on your Mac are two things you may do to rectify the issue (along with many others).
Step 1: If the printer is a wireless printer, unplug it from your Mac or turn it off.
Step 2: Choose System Preferences from the drop-down menu that appears when you click the Apple menu at the top of the Mac screen.
Step 3: Simply select Printers & Scanners.
Step 4: In the left pane, choose the printer you want to remove.
Step 5: At the bottom of the printer pane, click the Minus (-) sign. Then, click Delete Printer to finish the process.
Step 6: If the printer is a wireless one, restart it as usual or reconnect it to your Mac using its USB cable.
Step 7: In most circumstances, simply reconnecting your printer will be enough to enable it on your Mac. However, you might need to take additional action if issues arise.
The following additional troubleshooting actions are:
Step 1: Visit the website of the printer's manufacturer to download an update.
Step 2: Utilize a USB cord to link your wireless printer to the Mac.
Step 3: To manually add your printer, go back to the Printers & Scanners settings box and select the Add (+) button.
Step 4: Reset your printer.
- 2 years ago
 Related Articles


Top Searches in Hp Printer
How to Fix Printer Printing Horizontal Black Lines?
May 23, 2026
How to Scan from HP Printer to Computer Windows 10?
Jun 13, 2026
How Do You Open the Ink Cartridge Access Door of HP Printer?
May 23, 2026
How to Fix HP Envy 5000 Printer Saying Offline Issue?
May 23, 2026
How do I Get My HP Printer to Print PDF Files?
May 23, 2026
How to Fix HP Printer Cannot Connect to Web Services?
May 23, 2026
How do I Connect HP Laserjet Pro M118dW to WiFi?
May 23, 2026
How to Fix PCL XL Error on HP Printer?
May 23, 2026
Why is My HP OfficeJet Pro 8610 Printer Offline?
May 23, 2026
How do I Get My HP Printer Back Online?
May 23, 2026
Featured Articles
How to Get Canon Printer Online on MAC?
Jun 4, 2026
How to Fix Printer Printing Horizontal Black Lines?
May 23, 2026
How to Scan from HP Printer to Computer Windows 10?
Jun 13, 2026
Ricoh Printer Stuck on Processing
May 23, 2026
Brother Printer Only Printing in Black and White
May 23, 2026
How to Clean Kodak Printhead?
May 23, 2026
How to Install Lexmark Printer to Computer Without CD?
Jun 12, 2026
Why My Samsung Printer is Not Printing Clearly?
May 23, 2026
Top Questions
Why Won't My Canon Printer Print after Changing an Ink Cartridge?
Oct 7, 2020
How do I Fix a Canon Printer 1403 Error?
Dec 30, 2020
How do I Connect My Canon MG3050 Printer to WiFi?
Mar 30, 2021
How to Change Printer from Offline to Online Canon?
Nov 27, 2020
How to Turn My Ricoh Printer Online from Offline?
Feb 20, 2021
Brother MFC Printer Won't Print Black Despite Full Ink Cartridges
Nov 7, 2020
How to Fix Epson Printer Filter Failed or Stopped on Mac Error?
Dec 7, 2021
How do You Get a Lexmark Printer Back Online?
Sep 29, 2020