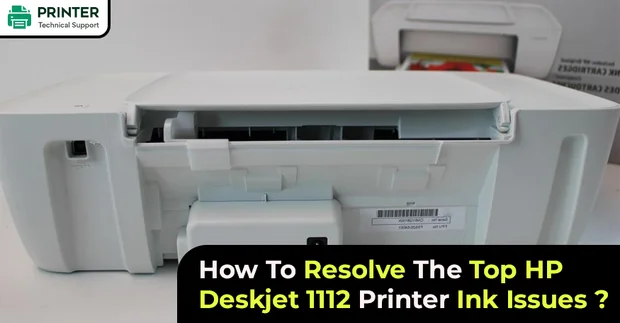
How To Resolve The Top HP Deskjet 1112 Printer Ink Issues?
Resolve The Top HP Deskjet 1112 Printer Ink Issues:
Find below the instructions to Resolve The Top HP Deskjet 1112 Printer Ink Issues:

Method 1: Set up Your Printer’s Drivers
Doing a tough reset to your printer resets its internal memory to the free area in order that it'll be able to acknowledge new changes to your printer. to try and do a tough reset on your printer, follow these steps:
- Switch on your printer.
- Wait for the printer to achieve its idle state.
- Disconnect your printer’s cord from its rear section while it's still steam-powered on.
- Remove the facility wire from your outlet.
- Reconnect the wire to your outlet also on your printer when sixty seconds.
- Turn your printer back on.
Method 2. Take a Look If the Ink Cartridges Have Enough Ink
If you're encountering ink quality problems on your printouts, check if the remaining inks on your cartridges don't seem to be critically low. In case the cartridges are empty, change them with new ones.
Step 1. Check Estimated Ink Levels
- Load plain A4 or U.S. letter paper into your printer.
- Launch the HP Printer Assistant window by sorting out your printer on your pc and gap it.
- Go to the Maintain Your Printer section.
- Click on Device Services.
- Click on calculable Ink Levels.
Step 2. Replace Empty or Low Ink Cartridges

If it's your initial time putting in new cartridges, below is the correct thanks to doing it:
- Lower your printer’s output receptacle.
- Hold the handle within your printer then open the cartridge exit door.
- Wait till the printer carriage is within the middle of your printer.
- Push down the empty cartridge when the carriage becomes silent and idle. this can unleash the cartridge.
- Pull the empty cartridge to get rid of it from its slot.
- Get the new cartridge from the packaging
- Remove the protecting strip of the new cartridge. don't bit the cartridge’s metal contacts to avoid ink failure and poor electrical connections.
- Hold the edges of the cartridge and certify that its nozzles face the printer.
- Insert the cartridge into the acceptable slot. (Black ink cartridges ought to attend the proper and tri-color ink cartridges to the left).
- Slide the cartridge into its slot at an associate upward angle.
- Push the cartridge up gently till it clicks into place.
- Close the exit door and check out printing a document.
Method 3. Clean the Ink Cartridges
Dirty ink cartridges can manufacture streaks on your printouts. Below is however you'll be able to clean your ink cartridges automatically:
- Load clean paper into your printer.
- Again, attend the Device Services tab on the HP Printer Assistant window.
- Click on Clean Ink Cartridges.
- After the cleansing methodology is finished, click Print to print take a look at the page.
- Now, examine the written take a look at the page.
- To acceptable print quality, tap on done and stop troubleshooting.
- For unacceptable print quality, click on the Second-level Clean choice after you are asked to. This can perform another cleansing method.
Method 4. Set up the Printer Driver
For this methodology, associate HP Deskjet 1112 computer code transfer is critical. Also, you would like to uninstall your HP printer driver, set up it, then transfer a computer code update.
Step 1. Reinstall Your Printer Driver
- Disconnect your printer from your pc.
- Go to your computer’s list of programs.
- Find your printer and click on Uninstall. Follow the on-screen directions.
- After the uninstallation method, restart your pc.
Step 2. Set up the Printer Driver and Transfer Updated Computer Code
- Go to HP’s official website.
- Search for your printer’s model and transfer the mandatory driver and obtainable computer code.
- Install the programs when the transfer method.
Step 3. Re-Add Your Printer to Your PC
- Connect your printer to your pc and switch your printer on.
- Open your computer’s instrument panel.
- Click on read devices and printers below Hardware and Sound.
- Click on Add a printer.
- Wait for your pc to observe connected devices.
- Once your printer’s name seems, click thereon.
- Follow the on-screen directions.
- SAM
 Brand: Hp Printer
- Last Update: 1 month ago
 Related Articles


Top Searches in Hp Printer
How to Fix Printer Printing Horizontal Black Lines?
May 23, 2026
How to Scan from HP Printer to Computer Windows 10?
Jun 13, 2026
How do I Get My HP Printer to Print PDF Files?
May 23, 2026
How do I Connect HP Laserjet Pro M118dW to WiFi?
May 23, 2026
How to Fix PCL XL Error on HP Printer?
May 23, 2026
Why is My HP OfficeJet Pro 8610 Printer Offline?
May 23, 2026
How do I Get My HP Printer Back Online?
May 23, 2026
Featured Articles
How to Get Canon Printer Online on MAC?
Jun 4, 2026
How to Fix Printer Printing Horizontal Black Lines?
May 23, 2026
How to Scan from HP Printer to Computer Windows 10?
Jun 13, 2026
Ricoh Printer Stuck on Processing
May 23, 2026
Brother Printer Only Printing in Black and White
Jun 21, 2026
How to Clean Kodak Printhead?
May 23, 2026
How to Install Lexmark Printer to Computer Without CD?
Jun 12, 2026
Why My Samsung Printer is Not Printing Clearly?
May 23, 2026
Top Questions
Why Won't My Canon Printer Print after Changing an Ink Cartridge?
May 23, 2026
How do I Fix a Canon Printer 1403 Error?
May 23, 2026
How do I Connect My Canon MG3050 Printer to WiFi?
May 23, 2026
How to Change Printer from Offline to Online Canon?
May 23, 2026
How to Turn My Ricoh Printer Online from Offline?
May 23, 2026
Brother MFC Printer Won't Print Black Despite Full Ink Cartridges
May 23, 2026
How to Fix Epson Printer Filter Failed or Stopped on Mac Error?
May 23, 2026
How do You Get a Lexmark Printer Back Online?
May 23, 2026