How to Setup HP Laserjet Pro M402n Laser Printer?
Hello, Please let me know that how to setup HP LaserJet Pro M402n Laser Printer. I bought this HP laserjet pro printer, but don't know about it's setup. Help me in this problem.
 1 Ans
1 Ans- 5 years ago
Setup HP LaserJet Pro M402n Laser Printer:
In this article, you are going to learn the step by step procedure of how to setup HP LaserJet Pro M402n laser printer. Down below are some of the steps that you need to perform prior to installing the software on your system.
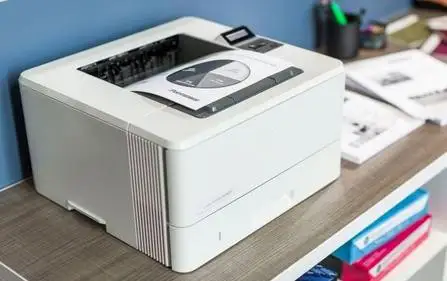
Step 1: Unpack Your Printer
1) Keep your printer in a place that meets the given requirements:
- An area that is free of dust, ventilated, and sturdy. Keep it in a place that is far away from the sunlight.
- The temperature range should lie somewhere between 17.5 degrees to 25 degrees.
- The humidity level of that place should range between 30 to 70 percent.
- There should be enough space near the printer for opening all the trays and doors.
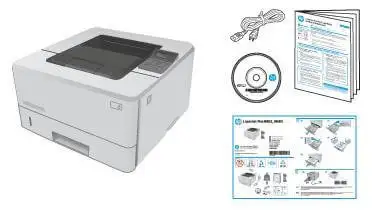
2) Remove your HP printer from the box. Also, take out all the packaging material. Please check that you have all the contents.
Step 2: Load Second Tray
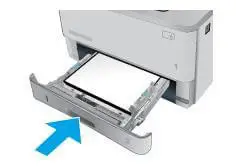
- Take out the tray and lift it up a bit to dismantle it from the machine.
- Now, squeeze the latch for adjusting the length of the paper.
- Put some sheets in the tray.
- Now, push the tray back into the machine.
Step 3: Connect the Network Wire
If you wish to connect your printer to the internet, then you need to connect the network wire.
Step 4: Connect the Printer to the Power Source and Switch it On
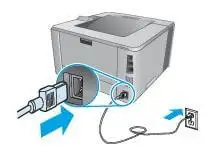
- Connect the power wire of the printer to the power source. If you want to avoid damages, then you must use the power wire that came along with your printer.
- Turn on your printer.
- Wait for 1 minute before you continue with the next step. If at this point, you will connect your printer to the network, then your printer will be recognized by the network. Then, your network will send a hostname or IP address to the printer.
- Go to the Control Panel. After that, select time zone, date & time format and language.
Step 5: Check the Functions of Your Printer
In the next step to setup HP LaserJet Pro M402n Laser Printer you need to check if your printer is functioning properly or not, these are some of the steps that you need to follow.
- Go to the control panel of your printer and then click on OK.
- Launch the menu of reports.
- Click on the configuration report.
- Go to the Jetdirect page and locate the IP address of the printer. Do this only after your printing device gets connected to the internet.
Go to control panel and then select ok. After that, open the menu of system setup.
Step 6: Firmware Upgrade
HP consistently introduces new updates, which are available on the firmware of your printer. So, perform a firmware upgrade to be able to use all the recently-updated features.
So, these are the 6 steps that one has to carry out to setup HP LaserJet Pro M402n Laser Printer.
- 2 years ago
 Related Articles


Top Searches in Hp Printer
How to Fix Printer Printing Horizontal Black Lines?
May 23, 2026
How to Scan from HP Printer to Computer Windows 10?
Jun 13, 2026
How Do You Open the Ink Cartridge Access Door of HP Printer?
May 23, 2026
How to Fix HP Envy 5000 Printer Saying Offline Issue?
May 23, 2026
How do I Get My HP Printer to Print PDF Files?
May 23, 2026
How to Fix HP Printer Cannot Connect to Web Services?
May 23, 2026
How do I Connect HP Laserjet Pro M118dW to WiFi?
May 23, 2026
How to Fix PCL XL Error on HP Printer?
May 23, 2026
Why is My HP OfficeJet Pro 8610 Printer Offline?
May 23, 2026
How do I Get My HP Printer Back Online?
May 23, 2026
Featured Articles
How to Get Canon Printer Online on MAC?
Jun 4, 2026
How to Fix Printer Printing Horizontal Black Lines?
May 23, 2026
How to Scan from HP Printer to Computer Windows 10?
Jun 13, 2026
Ricoh Printer Stuck on Processing
May 23, 2026
Brother Printer Only Printing in Black and White
Jun 21, 2026
How to Clean Kodak Printhead?
May 23, 2026
How to Install Lexmark Printer to Computer Without CD?
Jun 12, 2026
Why My Samsung Printer is Not Printing Clearly?
May 23, 2026
Top Questions
Why Won't My Canon Printer Print after Changing an Ink Cartridge?
Oct 7, 2020
How do I Fix a Canon Printer 1403 Error?
Dec 30, 2020
How do I Connect My Canon MG3050 Printer to WiFi?
Mar 30, 2021
How to Change Printer from Offline to Online Canon?
Nov 27, 2020
How to Turn My Ricoh Printer Online from Offline?
Feb 20, 2021
Brother MFC Printer Won't Print Black Despite Full Ink Cartridges
Nov 7, 2020
How to Fix Epson Printer Filter Failed or Stopped on Mac Error?
Dec 7, 2021
How do You Get a Lexmark Printer Back Online?
Sep 29, 2020