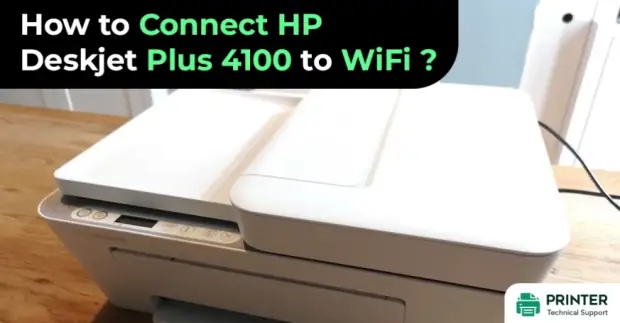
How to Connect HP Deskjet Plus 4100 to WiFi?
Connect HP Deskjet Plus 4100 to WiFi With Simple Steps
A printer is a great addition to your work life. HP offers a wide range of printers with different models equipped with different advanced features. HP printers are used by millions of people, which shows their worldwide popularity.
The HP Deskjet Plus 4100 is a top-notch quality printer. It comes with a printing speed of 8.5 pages per minute for black and white pages and 5.5 pages per minute for colour pages. The Printer comes with a compact design feature, which makes it suitable for various spaces.
The setup process of the Printer is easy and simple. You can download the necessary software and drivers from the official HP website. The HP Deskjet Plus 4100 is a solid choice to fulfil all of your printing needs.
How To Connect HP Deskjet Plus 4100 to WiFi on Windows 10?
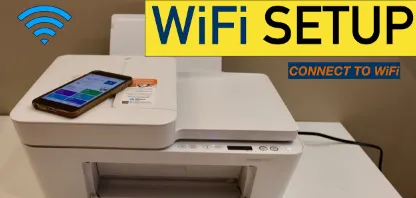
Step 1 - Just begin by turning on your HP Deskjet Plus 4100 printer followed by going to the printer’s “Display” panel in a bid to initiate the proceedings to connect HP Deskjet Plus 4100 to Wi-Fi.
Step 2 - Now you need to enter the “Setup Mode” and to get this done you just have to press the “Cancel” button together with the “Wireless” button for three seconds.
Step 3 - As soon as you release the buttons you must witness the “Power” button flashing. You must also note that after the “Power” button remains on, the blue light of the “Wireless” button will also begin flashing which will be a sort of confirmation that your HP Deskjet Plus 4100 Printer has entered into the “Setup Mode”.
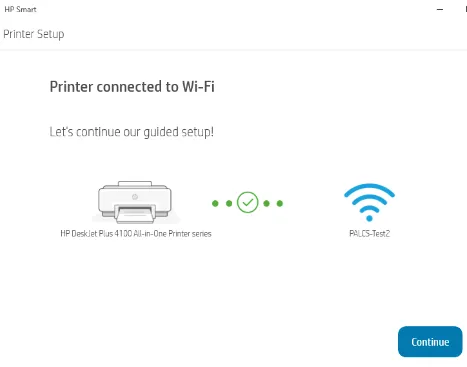
Step 4 - At this point in time you have to go to the HP Smart app on your PC followed by opening the same.
Step 5 - Now when you are in the HP Smart app you must find the “Add Printer” option and click thereon to see the available printers.
Step 6 - After finding the HP Deskjet Plus 4100 Printer icon you should click on the “Setup” option followed by clicking on “Continue”.
Step 7 - Consequently, your HP Deskjet Plus 4100 printer will try to access the password of your Wi-Fi automatically. Remember, that you may again be prompted to click on “Continue” to finally connect HP Deskjet Plus 4100 to Wi-Fi after which your printer will eventually get added to your Wi-Fi network.
Step 8 - Now you shall enter the “Postcode” for accessing your HP Deskjet Plus 4100 printer followed further by clicking on “Continue”.
Integrating the HP Deskjet Plus 4100 on Android or iOS over WiFi
Step 1 - To connect HP Deskjet Plus 4100 to Wi-Fi you must first switch on your HP Deskjet Plus 4100 printer.
Step 2 - Now after your printer is turned on it will be marked by the glowing of the “Wireless” light which you have to turn off by gentle pressing of the “Wireless Button”. As a result of this, your Wi-Fi Direct is on which is also visible on the screen. It also becomes noteworthy at this stage that the Wi-Fi Direct is positioned just above the ink cartridge.
Step 3 - Now the next step is to retrieve the password which can be accomplished by pressing the “i” button which will facilitate printing the details of your HP Deskjet Plus 4100 printer.
Sep 4 - Here on the printed page just look for the “Wi-Fi” icon, underneath which you will find the printer name and the password.
Step 5 - Now open the HP Smart app after downloading the same on your Android or iOS device.
Step 6 - Open the Wi-Fi panel of your Android or iOS device followed by finding the HP Deskjet Plus 4100 printer icon and further going on to punch in the password and tap the “Connect” button going forward.
Step 7 - In this step, you should connect HP Deskjet Plus 4100 to Wi-Fi using the ”Plus” button on the HP Smart app followed by confirming the connection by utilizing the “Printer Scan Option”.
CONCLUSION
When you are looking to buy printers, you need to consider some things. The model of the Printer you are buying is important. Understanding the features of the Printer is important. Doing a little research before buying the Printer is always a good idea to avoid confusion about the product in the future.
More Important Pages About HP Printers
How To Reset HP Printer Password?
How to Connect iPhone to HP Printer?
How to Fix E2 Error on HP printer?
How to Find the IP Address for an HP Printer?
How to Fix HP Printer Cannot Connect to Web Services?
Also Read:
- How to Fix HP Printer Error E3?
- How to Connect HP Deskjet 2752 Printer to WiFi?
- Why cant I Print From My iPad with My HP Wireless Printer?
FAQ for Connect HP Deskjet Plus 4100 to WiFi
- Mick
 Brand: Hp Printer
- Last Update: 1 month ago
 Top Related Question
Related Articles


Top Searches in Hp Printer
How to Fix Printer Printing Horizontal Black Lines?
May 23, 2026
How to Scan from HP Printer to Computer Windows 10?
Jun 13, 2026
How do I Get My HP Printer to Print PDF Files?
May 23, 2026
How do I Connect HP Laserjet Pro M118dW to WiFi?
May 23, 2026
How to Fix PCL XL Error on HP Printer?
May 23, 2026
Why is My HP OfficeJet Pro 8610 Printer Offline?
May 23, 2026
How do I Get My HP Printer Back Online?
May 23, 2026
Featured Articles
How to Get Canon Printer Online on MAC?
Jun 4, 2026
How to Fix Printer Printing Horizontal Black Lines?
May 23, 2026
How to Scan from HP Printer to Computer Windows 10?
Jun 13, 2026
Ricoh Printer Stuck on Processing
May 23, 2026
Brother Printer Only Printing in Black and White
Jun 21, 2026
How to Clean Kodak Printhead?
May 23, 2026
How to Install Lexmark Printer to Computer Without CD?
Jun 12, 2026
Why My Samsung Printer is Not Printing Clearly?
May 23, 2026
Top Questions
Why Won't My Canon Printer Print after Changing an Ink Cartridge?
May 23, 2026
How do I Fix a Canon Printer 1403 Error?
May 23, 2026
How do I Connect My Canon MG3050 Printer to WiFi?
May 23, 2026
How to Change Printer from Offline to Online Canon?
May 23, 2026
How to Turn My Ricoh Printer Online from Offline?
May 23, 2026
Brother MFC Printer Won't Print Black Despite Full Ink Cartridges
May 23, 2026
How to Fix Epson Printer Filter Failed or Stopped on Mac Error?
May 23, 2026
How do You Get a Lexmark Printer Back Online?
May 23, 2026